
With simple settings, triggering dialogue modules is more flexible
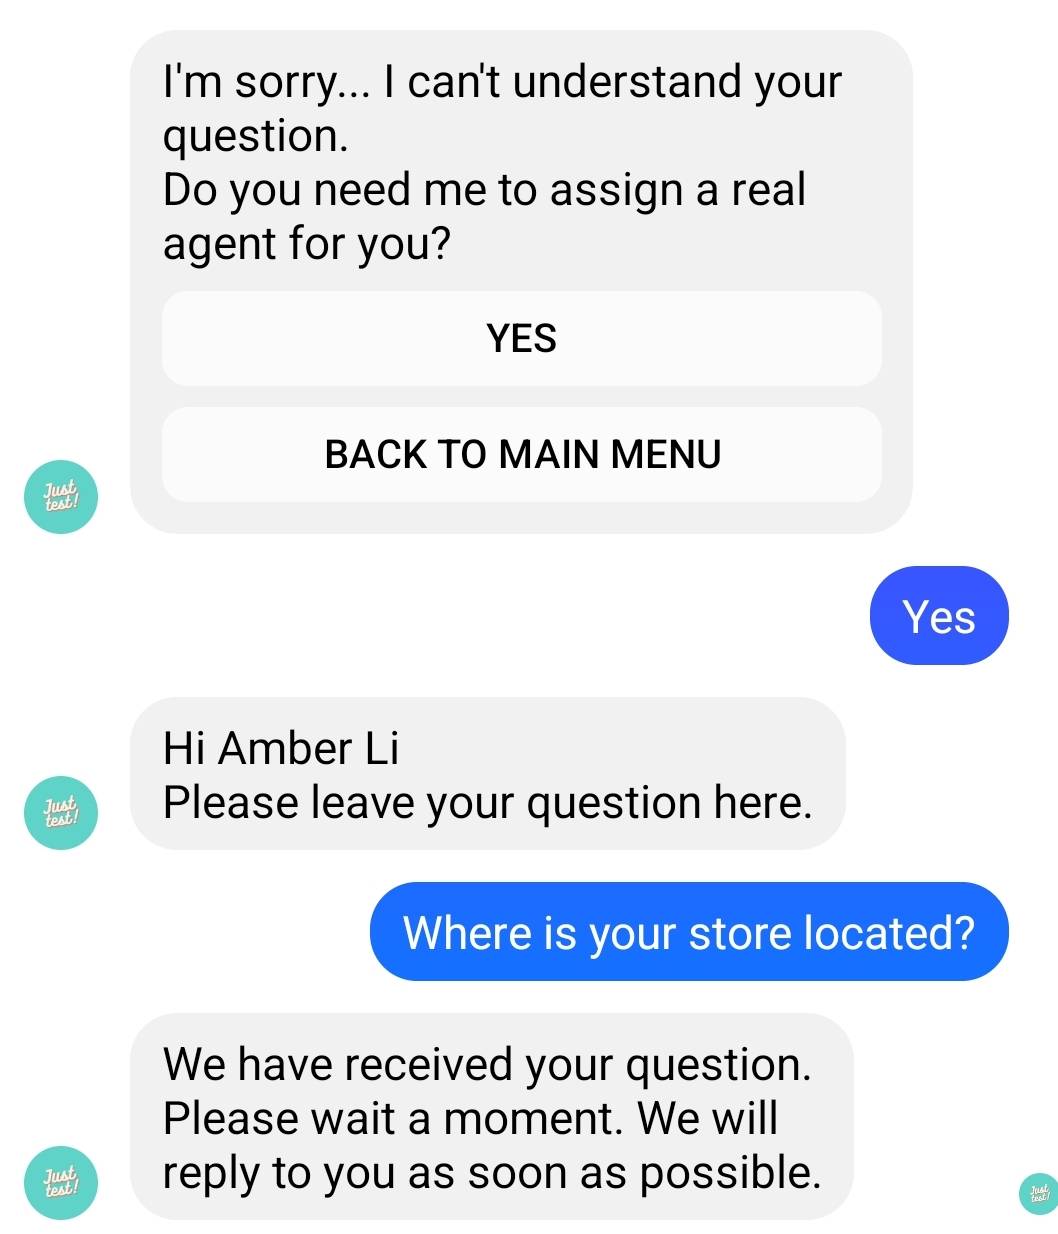
No matter how complete the bot Flow is, it may still be unable to answer the user’s response. Lack of reply to the user’s question will result in a bad Chatbot experience.
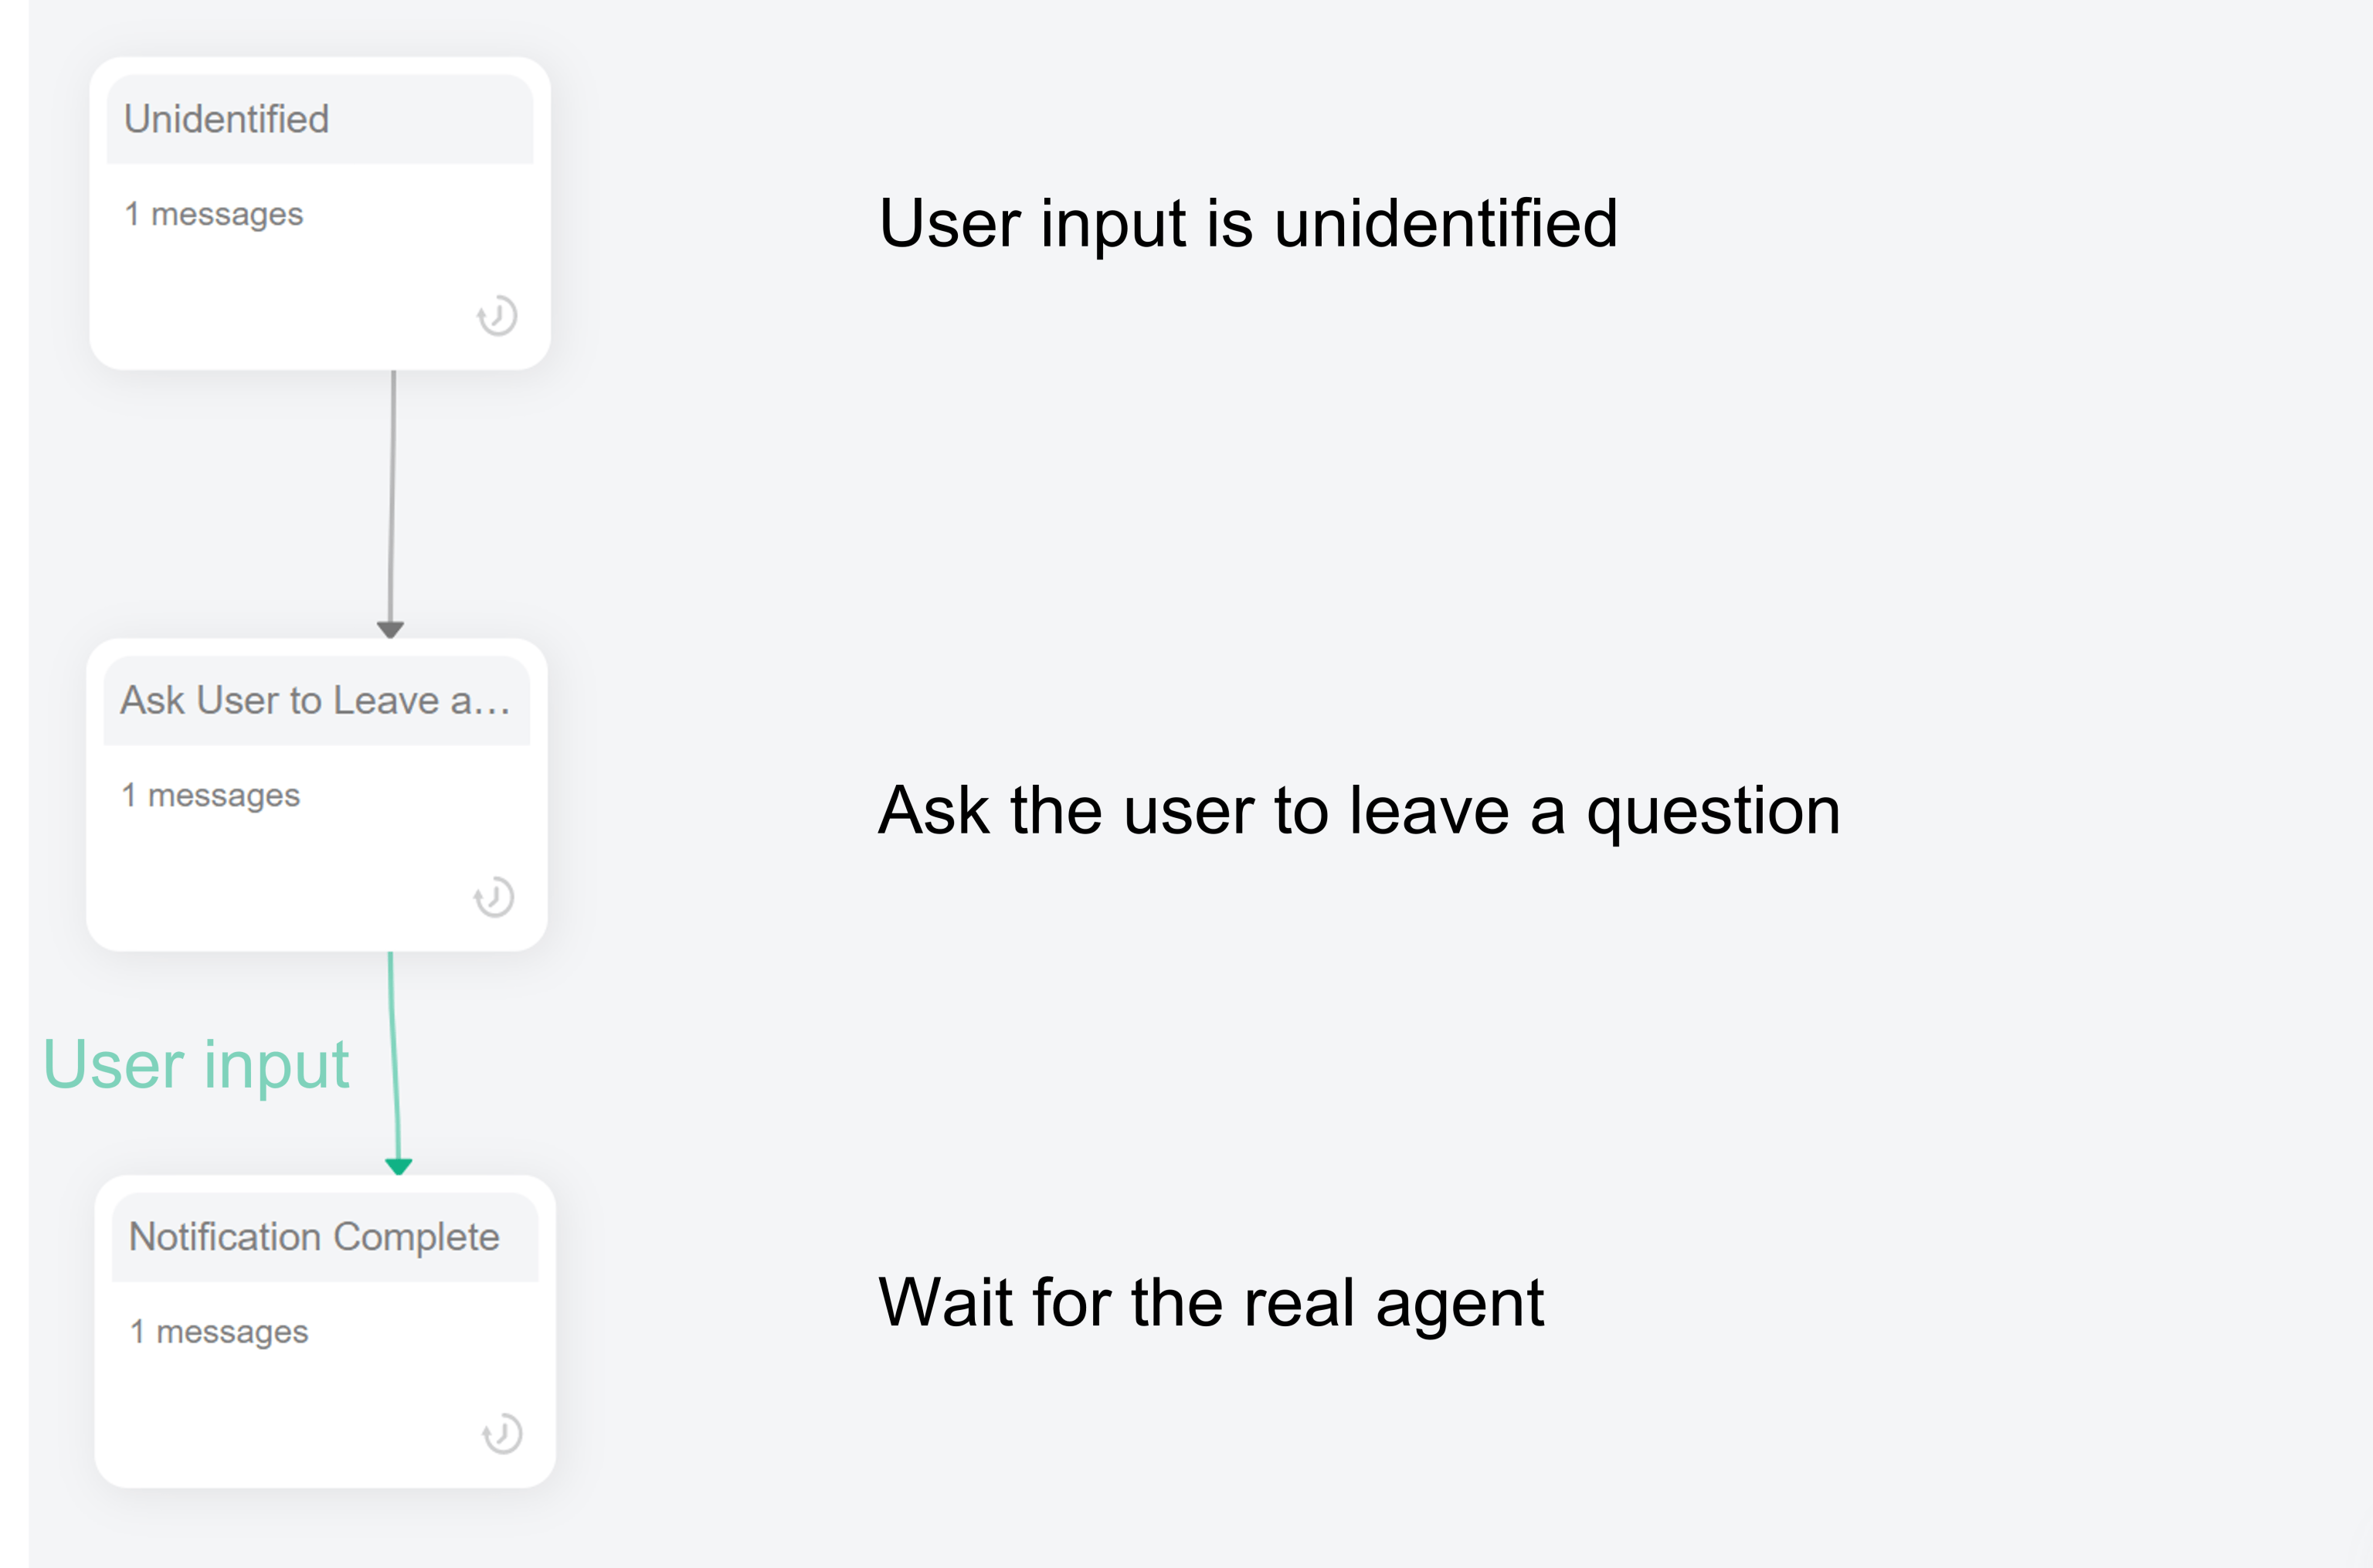
Trainers can use the “User Input” function to create a set of customer service processes, as shown in the figure below, to direct users to leave questions and use LINE Notify to stay up-to-date on any questions you’ve received from users!
Complete the setup with the three easy steps below:
- Group settings for LINE Notify
- Set up a customer service process module group
- Set up Auto Reply
【BotBonnie’s Note】To reply to user questions, you can go to “Live Chat” in the BotBonnie operating platform to reply!
1. Group settings for LINE Notify

1.Scan the QR Code above to add LINE Notify to your friends
2. Create a group, then add LINE Notify and customer service/editors to the group
3. Return to the BotBonnie platform. Click on “Bot Settings” in the menu on the left, enter the “Notify Customer Care Channel,” click on “+LINE Notify” on the upper right corner, log in, and select the group you’ve just created

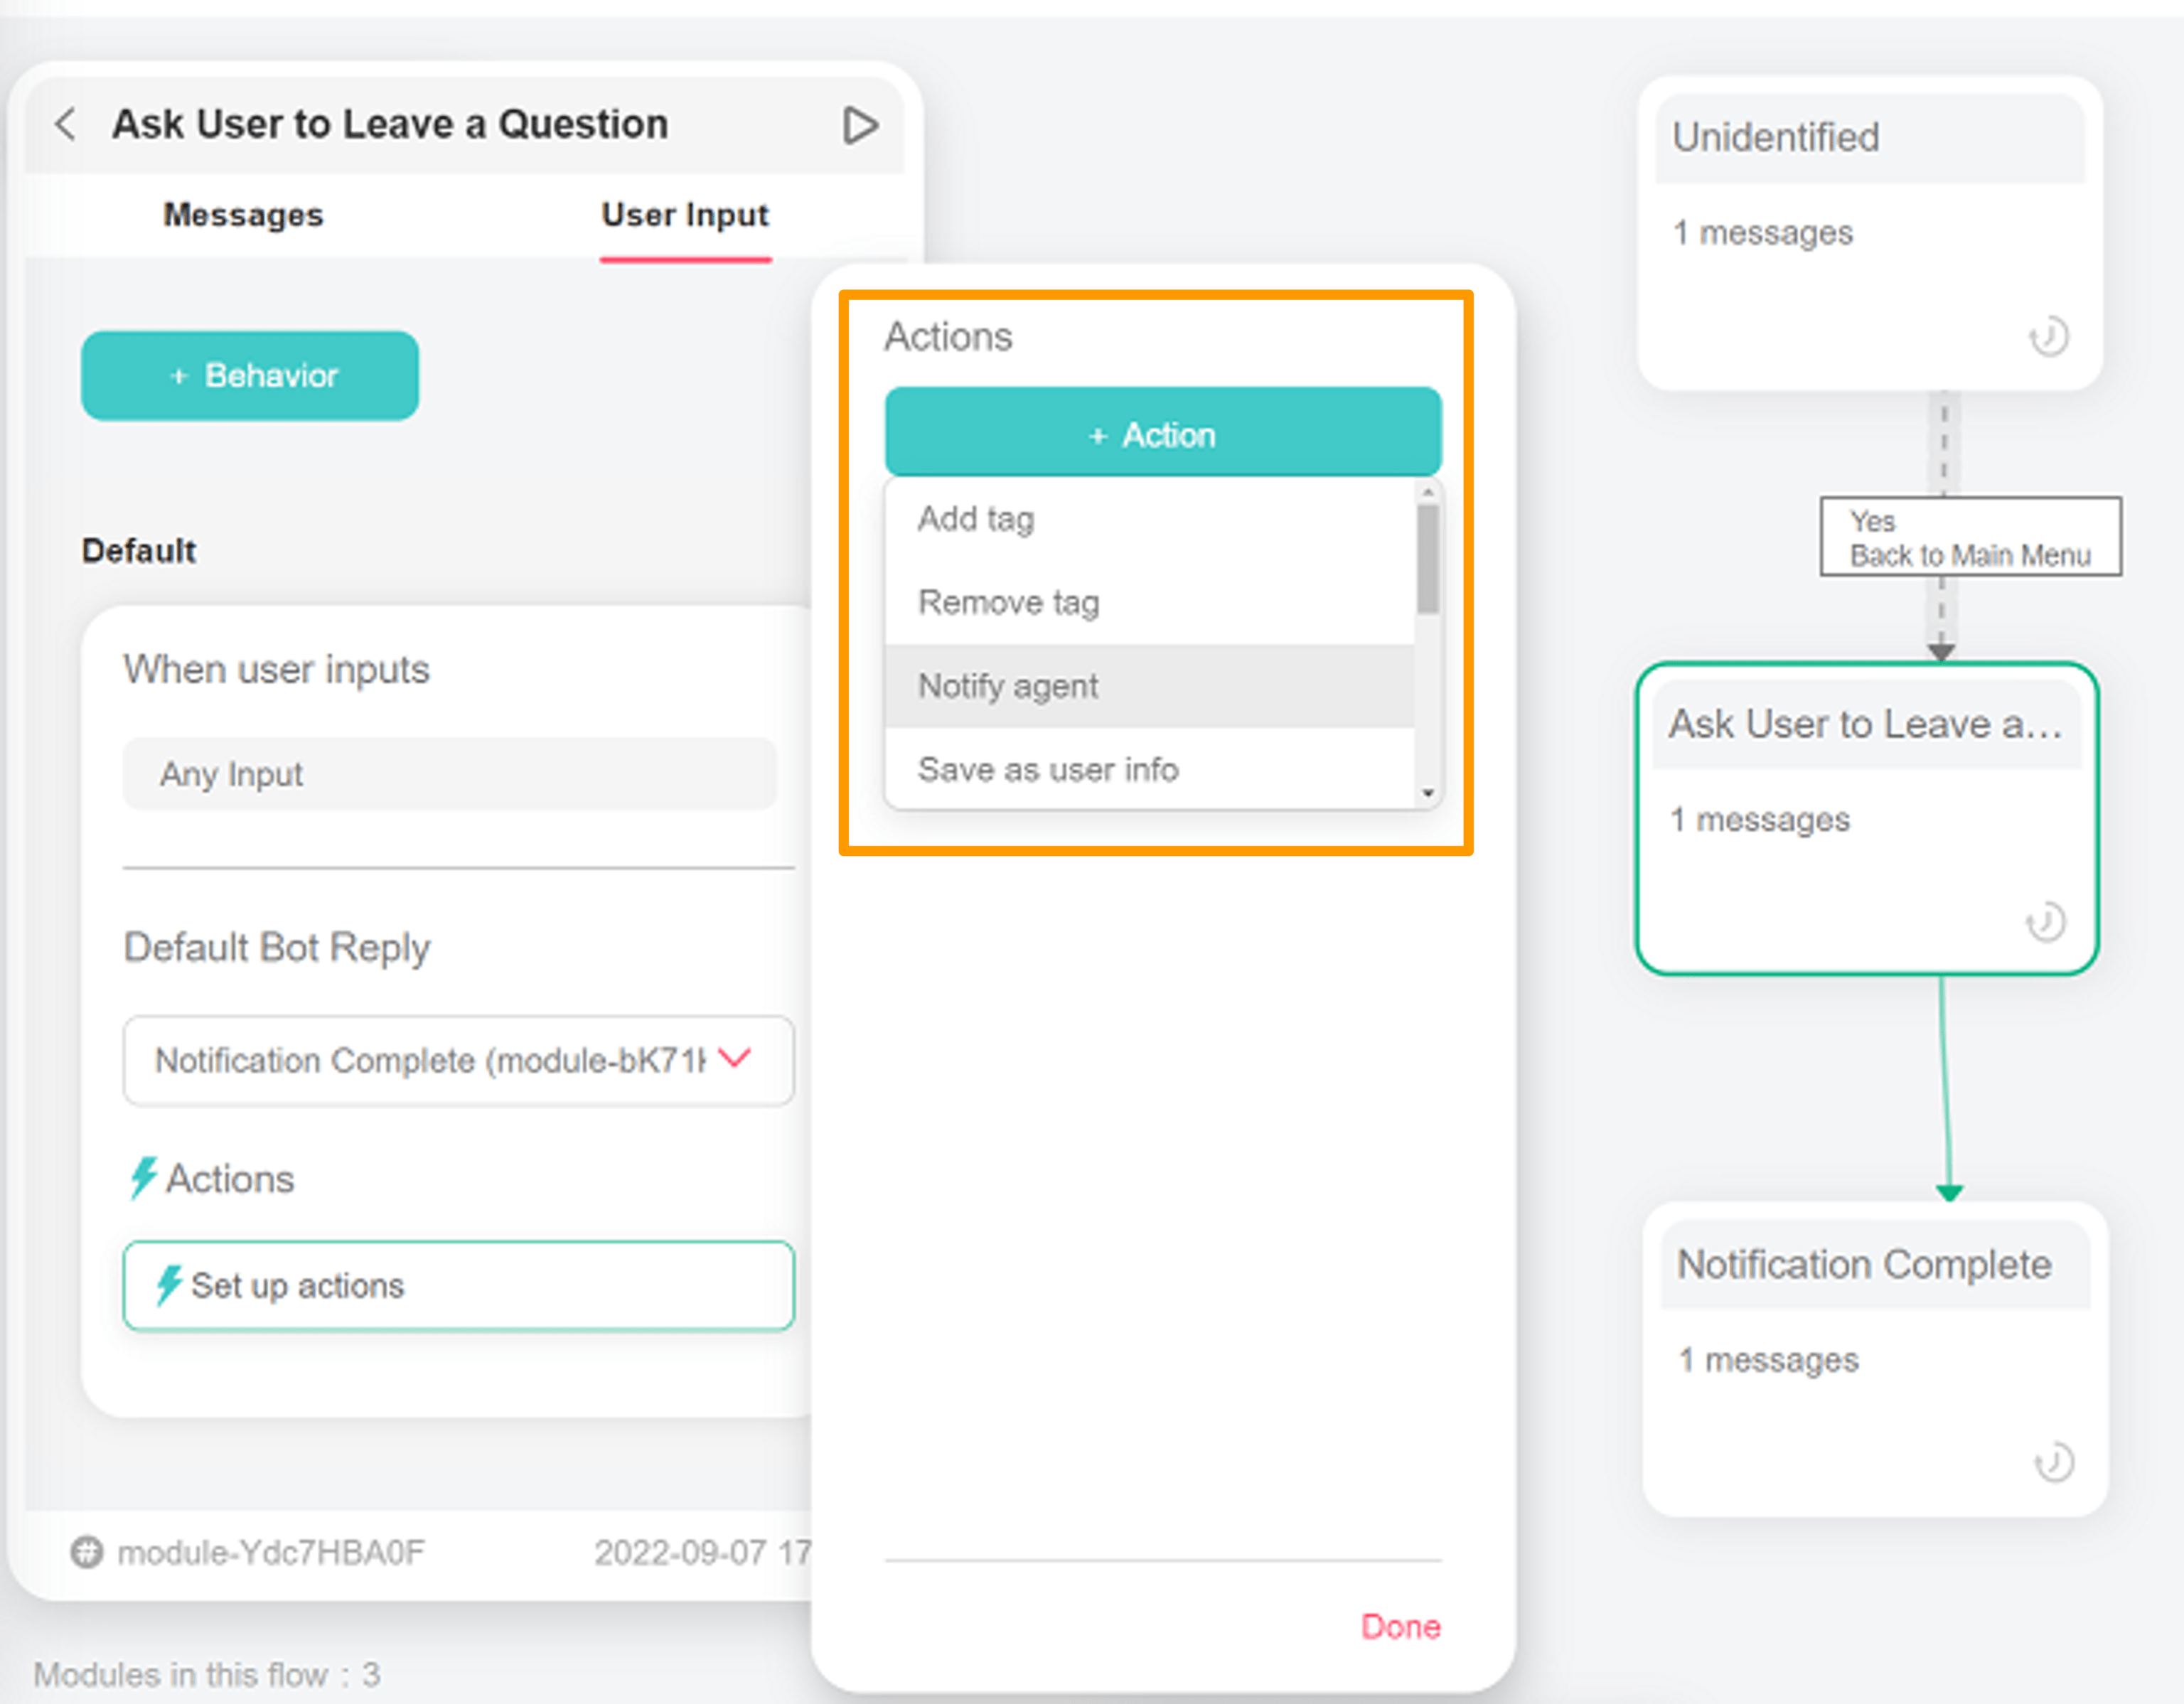
2. Set up a customer service process module group
【BotBonni’s Note】In actual practice, the second module is usually connected with a button, and the user is asked to re-confirm that they want to contact customer services in order to avoid accidentally triggering the customer service process!

3. Set up Auto Reply
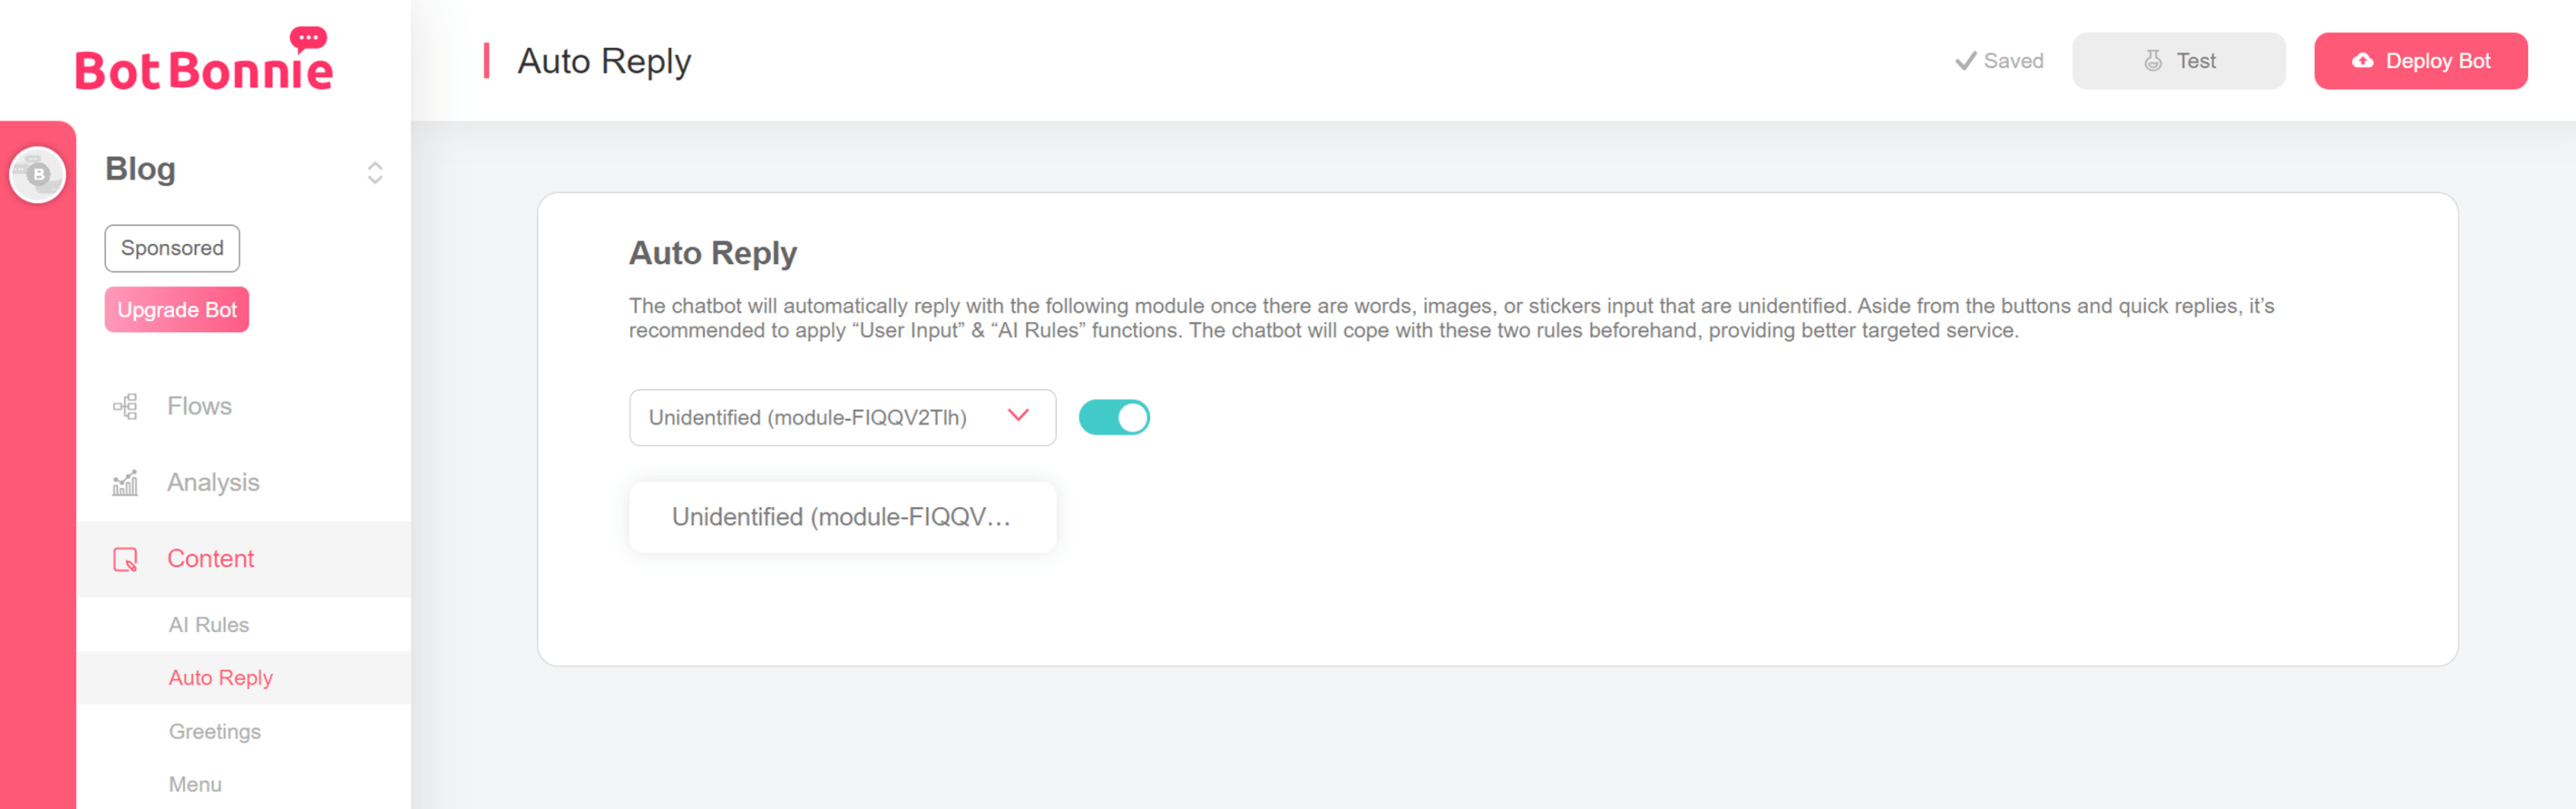
Click on the “Content Management” menu on the left, enter “Auto Reply,” and select the first “Any Input” module of the customer service process. Activate the switch on the right (it will be green when turned on)
That being done, when the content sent by the user does not match the user input settings and the keywords in the AI Rules, it will be answered by the module set in the “Auto Reply“! Customer service/editors can also instantly see the content of the user’s message in the group!
Advanced
If you do not want the bot to respond to any input from the user after the user’s question is sent, see the following settings.
【BotBonnie’s Note】Warning! If the user presses the “General Button” of the previous message, the bot will still reply according to the module’s settings
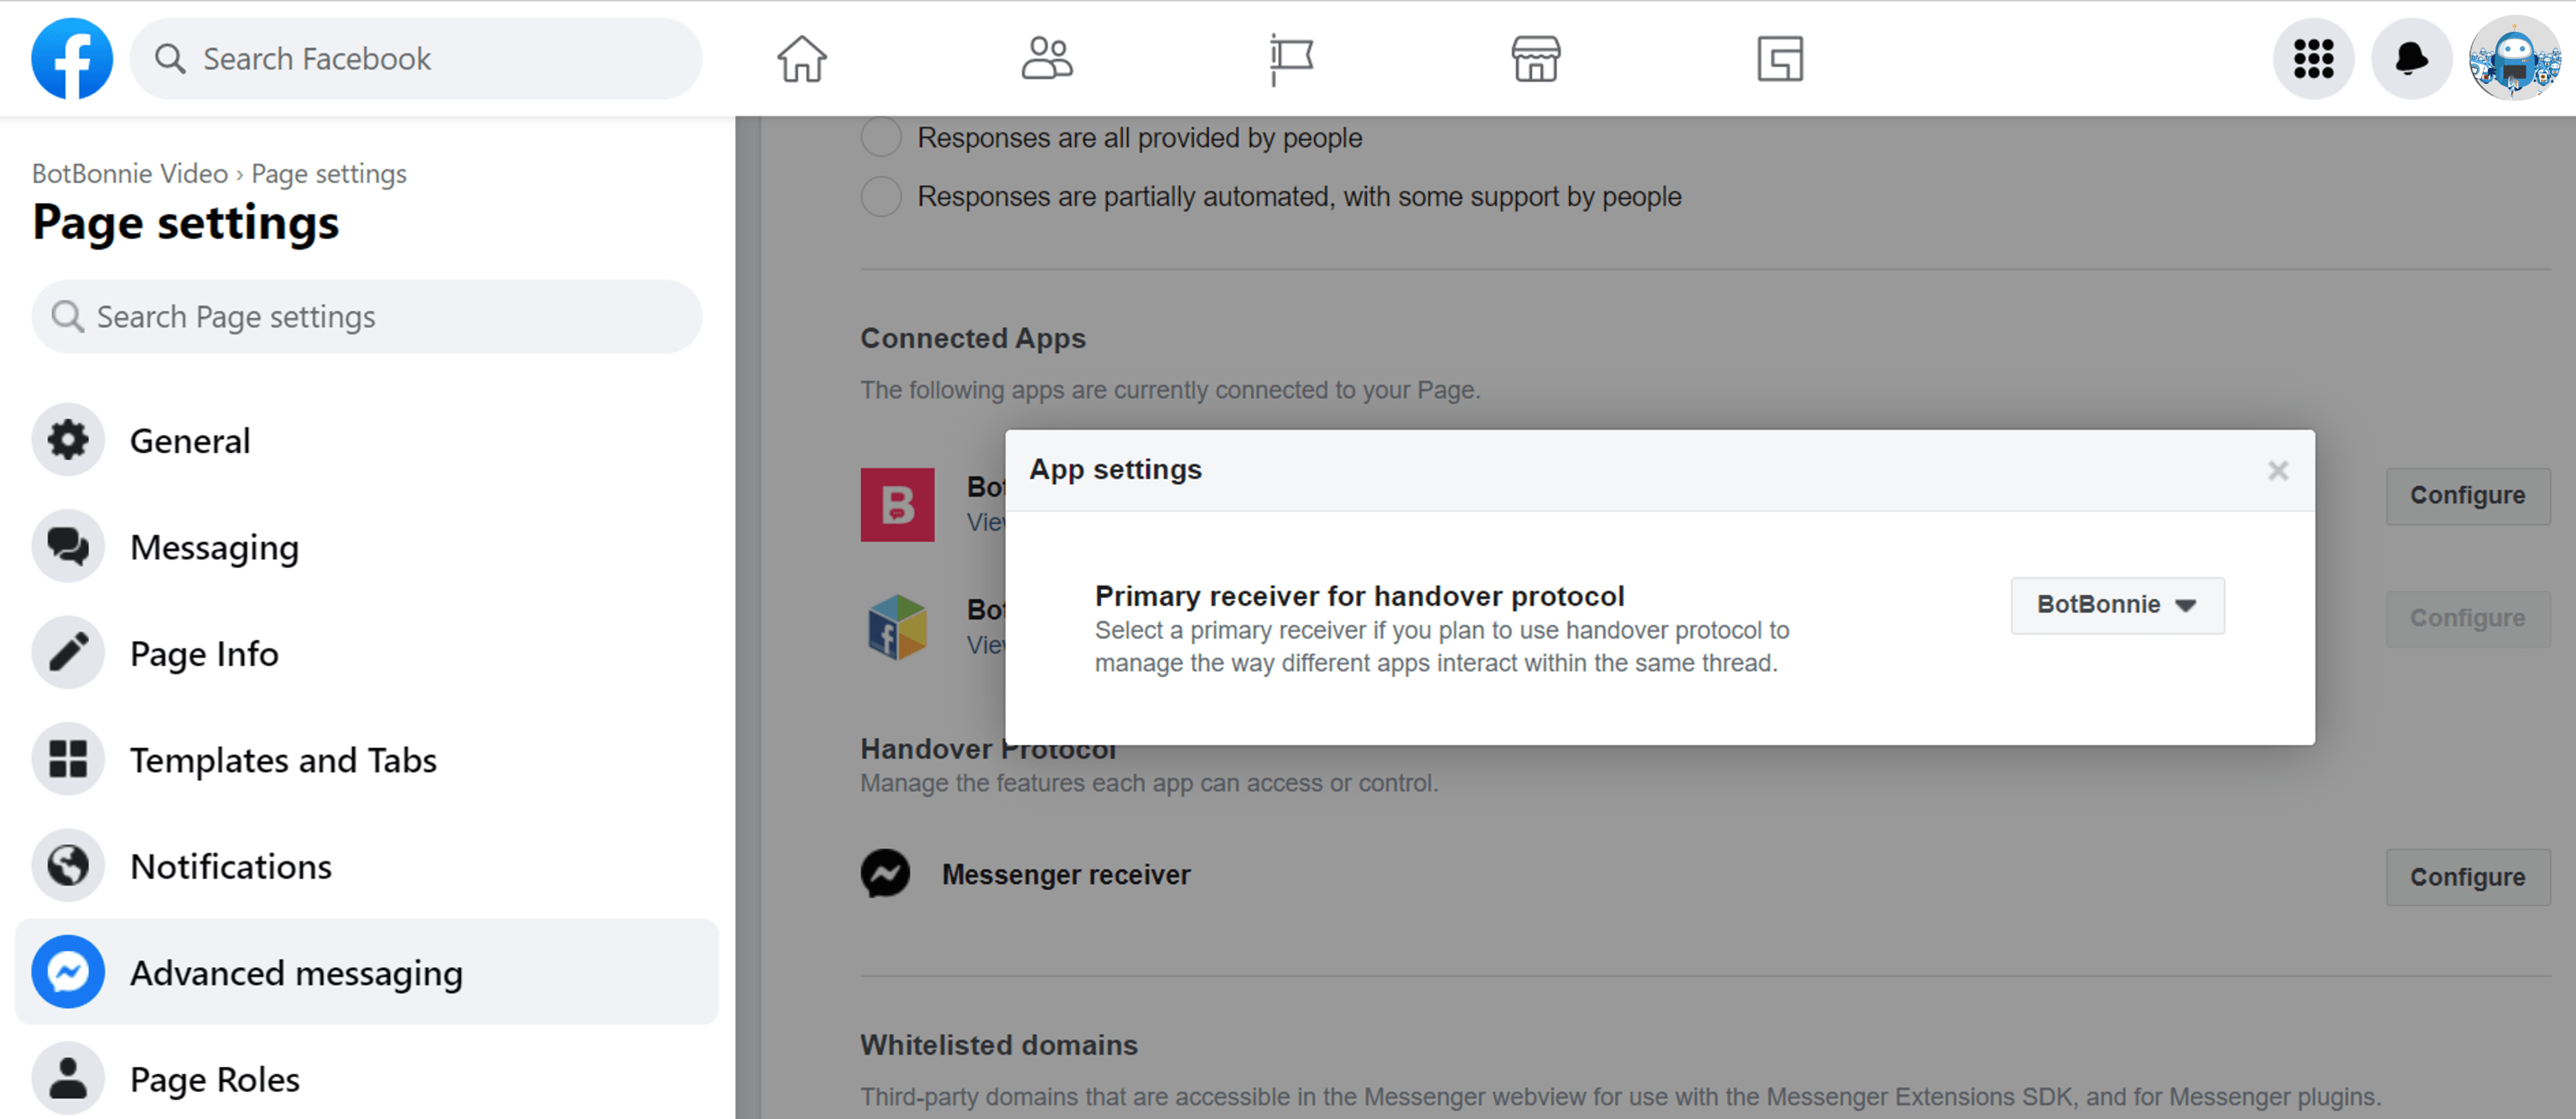
Settings for Fan Page
- Advanced information for fan page settings
- For application connection, click set
- “The main recipient of handover protocol” is set to BotBonnie
- “Secondary recipient of handover protocol” is set to Page Inbox
Congratulations! You’ve completed the Notify Customer Care settings!
- In the future, all user messages that have not been entered into the “Notify Customer Care” process will be classified as “Done” in the Live Chat.
- Once the user has a question, it will be moved to the “Main” folder in the “Live Chat.” No matter what the user types, the bot will not respond!

【BotBonnie’s Note】The bot will not respond to user input until the user is “Moved to Done”!
Congratulations! You’ve learned how to use Notify Customer Care!
