
Use Facebook audience to deliver ads to the right people!
If you want to target all users or specific user groups in additional marketing campaigns, you can use the “Push Notification” to actively send messages and use the Facebook audience function.
- Custom audience: Let customized audience groups view specific contents and information when they browse Facebook to implement “precision marketing.”
- Lookalike audience: Use the customized audience as the basis for Facebook to screen the group of potential users with similar backgrounds and convert them to target audience of the ads for “remarketing”.
Use the “Export Data” function on the Bonnie platform to upload the exported csv file to Facebook, complete the custom audience setting, and complete the lookalike audience setting.
【Bonnie’s Note】Please confirm whether you have the “Facebook Enterprise Management Platform”
1. Yes >> Please confirm whether you are the administrator of the Enterprise Management Platform or add your ad account to the platform.
2. No >> Please create a new Enterprise Management Platform and then add your ad account to the new platform.
Effortless Export of Subscriber ID to Create Customized Facebook Audience
Phase 1: Automatic export of Subscriber ID in the BotBonnie console
Enter “Audience” on the left of the BotBonnie console. Find “Audience List,” select “Execute actions” in the dropdown menu on the right, and select “Export Data.” In addition to exporting all member data, Bonnie can help you set screening criteria based on different requirements. You can make multiple selections for tags, last interaction, and first interaction under multiple conditions.

2. Download and modify user data
The recipient checks for the mail in the mailbox and downloads user data in a csv file.
Open the csv file and delete the data in the rows titled “id, name, platform, gender, pageId, etc.” and save the file as a new csv file.
If your computer runs on a Microsoft operating system, you may see the id and pageId data transformed into scientific notation formats (e.g., 2.34E+15) after you open the file. You can use the Excel toolbar function to convert the data format to “number” and the correct contents will appear.

Phase 2: Build Facebook custom audience
- Enter the custom audience console
Start by entering your “Business Manager Platform” console. You can set more detailed profile settings for your target audience. click “Audience” and select “Custom Audience.” Select “customer list” and export the subscriber data obtained from the BotBonnie console in phase 1 to the Facebook ad console.

2.Import Subscriber ID data
- After entering the “prepare customer list” and viewing the instructions, click “Next” in the lower right corner to enter the settings. As we are only importing the subscriber ID information, let’s choose the “customer list without customer value” format.

Find “New file” and click “Upload File.” Select the csv file you just exported to upload, name your audience, and click “Next.”

- BotBonnie console can automatically export the Audience List data in csv file to help you compile audience data. Select “New file”, upload the subscriber list, and name the audience.
3.The corresponding column for the audience is the Facebook Page User ID
- First, change the corresponding column to “Facebook Page User ID” and click “Action needed” to edit the data that have not been connected.

- Enter the first batch of data and select “Enter Facebook Page number” to enter the Facebook page number for binding the bot.

【Bonnie‘s Tip】
The Facebook Page number can be acquired from the About page in the Facebook Page. You can also copy the string of numbers in the fifth data entry in “Action needed.” The string of numbers is your Facebook Page number.

- Confirm that the Messenger page-scoped ID (PSID) is set to the Facebook Page user ID. Green indicates that the identification was successful. You are only required to complete this step for the first data entry and you can maintain the status “do not upload” for other data entries before clicking the “upload and create.”

Congratulations! You have successfully set the custom audience! After the audience is set, you can start creating ad content.
After uploading the audience data, you can start creating ad content.

Phase 3: Produce Facebook ad
You can view information and records of the audience you created in the Audience page.

📚 References: Facebook custom ad audience tutorial
Identify lookalike audience with ease!
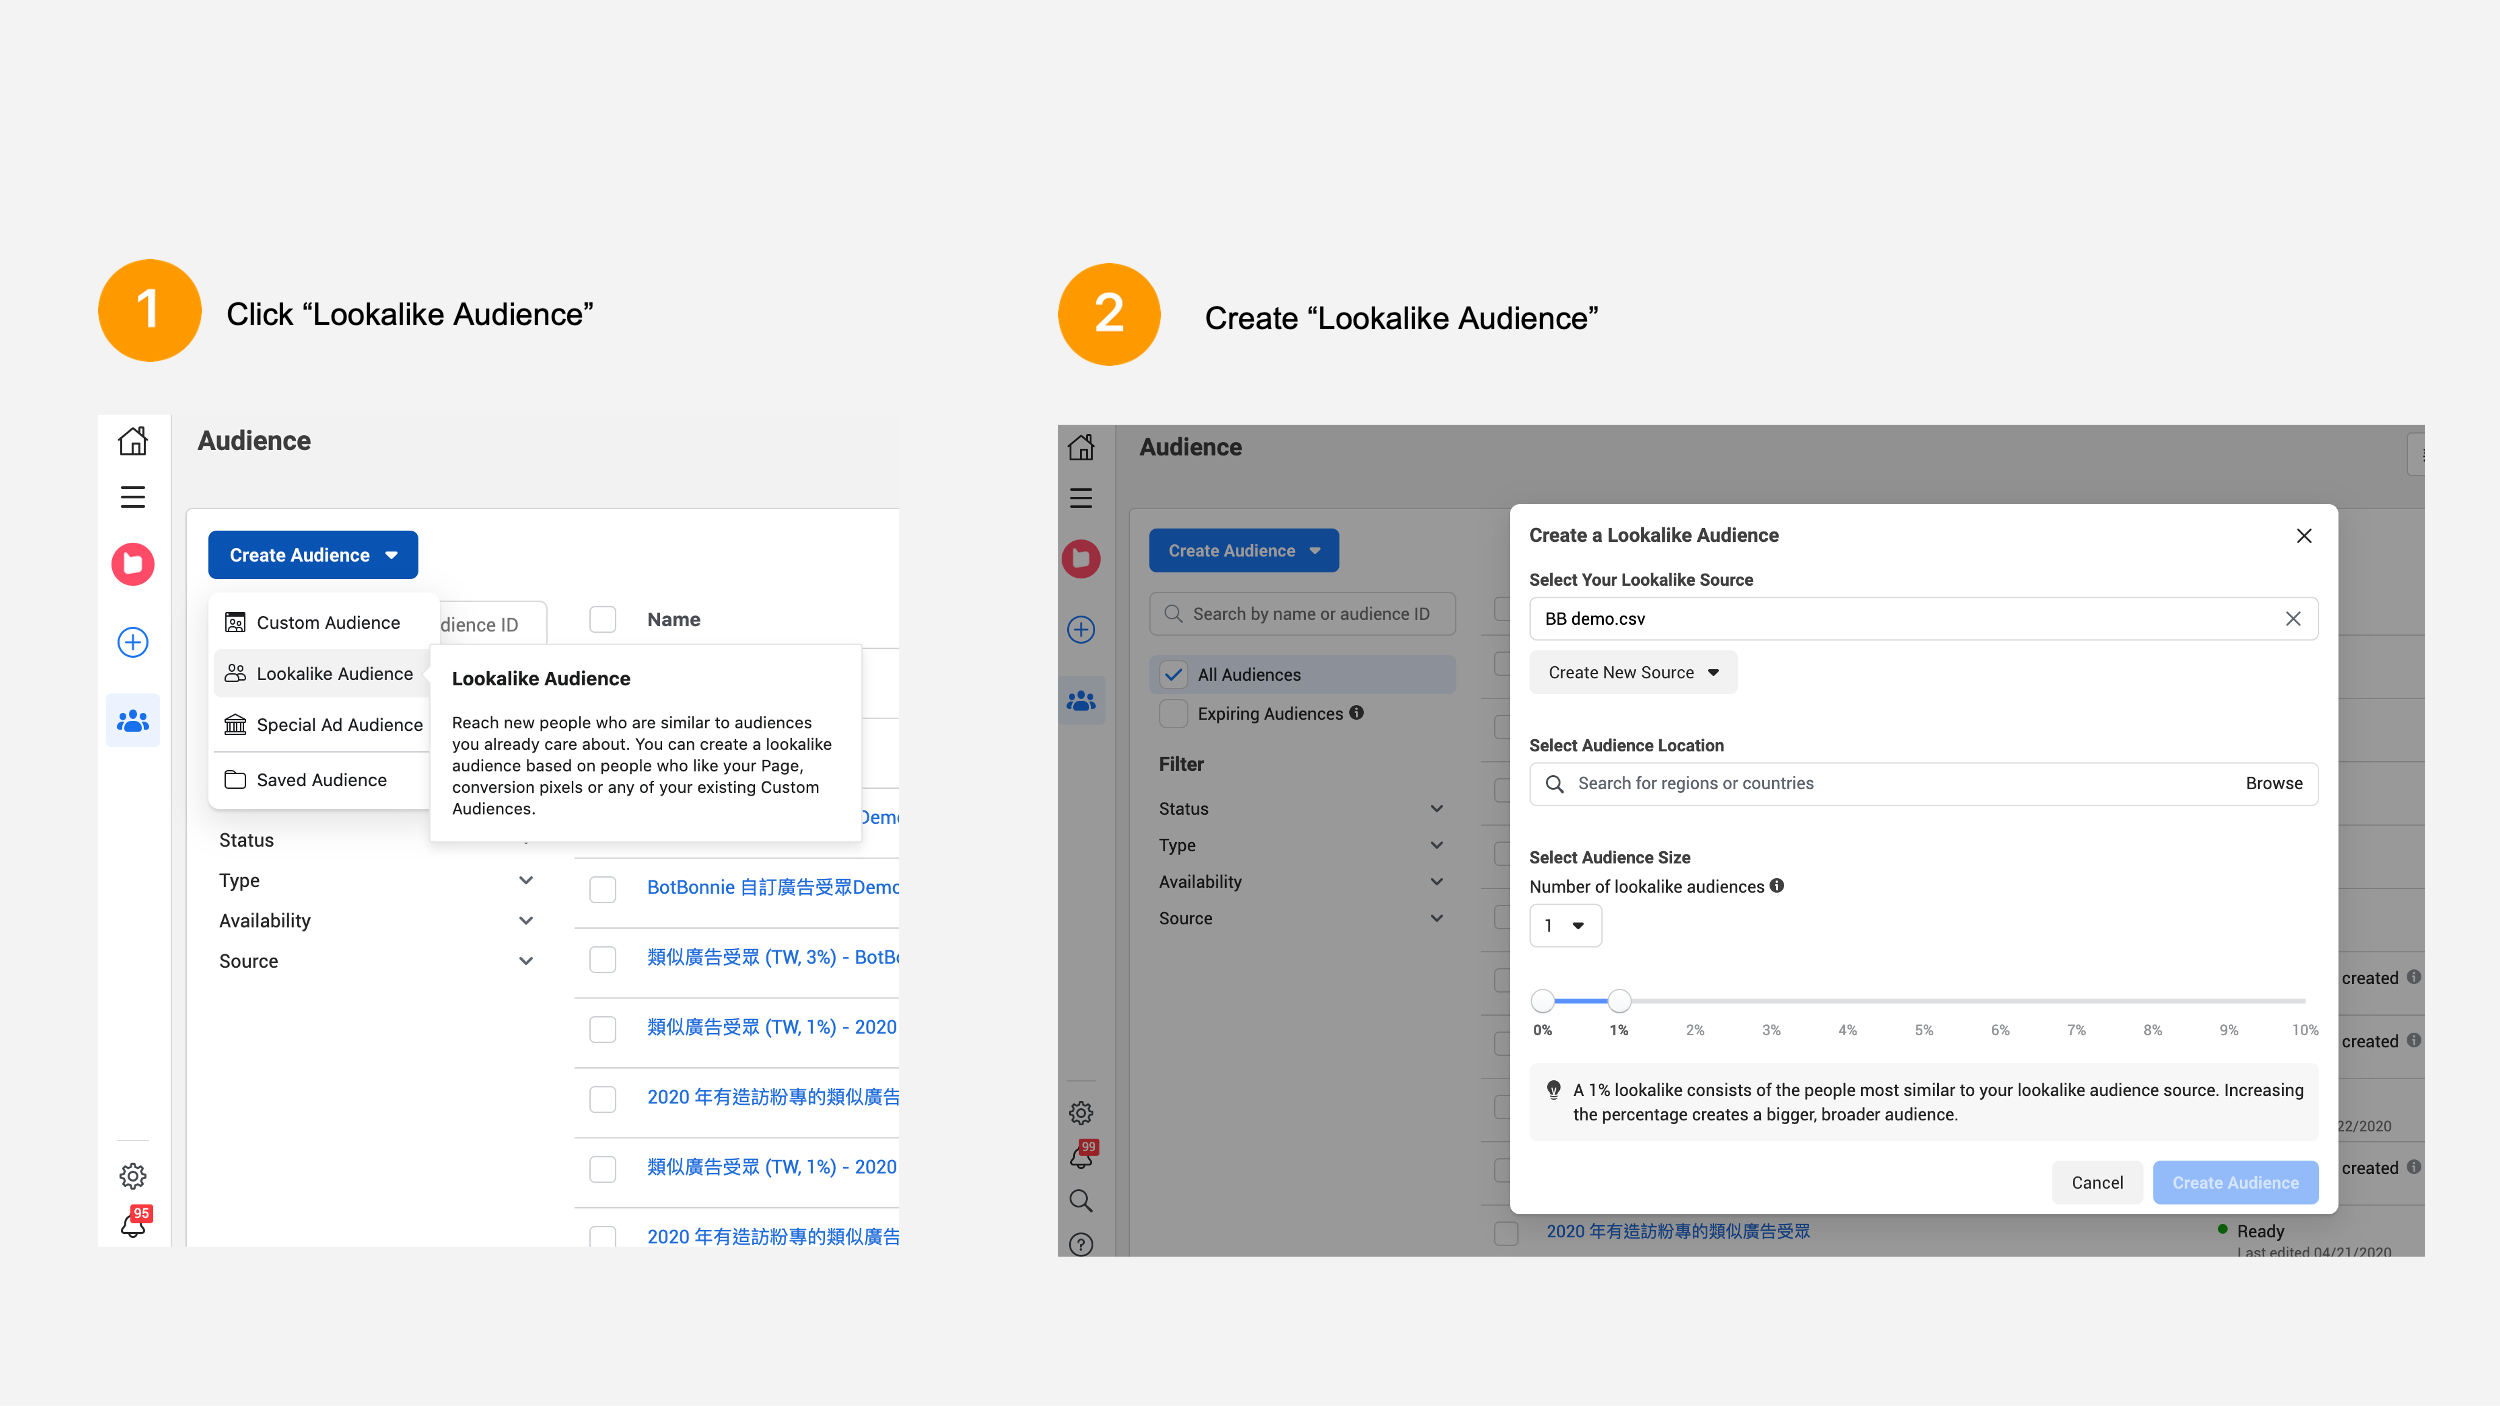
Go to the “Business Manager” console and click “Create Audience.” Select “Lookalike Audience” and edit the audience information.
1. First, select the reference user data source for the lookalike audience. You can click on the bar to select an existing audience source, or click on the “Create new source” menu at the bottom of the bar to create a new audience (follow the tutorial above to create a new audience).
2. Next, select the “location” and “size” of the audience. Select “Create Audience” at the bottom right corner to complete the lookalike audience settings.
📚 References: Facebook lookalike audience tutorial
Congratulations! You have successfully created a Facebook audience!
Official website / Facebook Fan page / Tutorials