
One of the most powerful functions of BotBonnie is to “Collect User Lists,” where users who have been in conversations are potential customers. Chatbot allows trainers to avoid trivial and annoying questions or questionnaires, instead allowing users to have a humanized conversation experience. Chatbot automatically helps you collect lists of customers, which can be exported as a .CSV file. You can also use this information for Facebook advertising remarketing.
【Bonnie’s Tip】
Q: What counts as a “user who has interacted with a chatbot”?
A: You must talk to the bot (send messages with text/pictures) or click the button to appear in the list.
If the user only leave the comment on Facebook post, the bot auto replies to the message or sends back a message It won’t be a subscribed user and won’t appear in the Audience List!
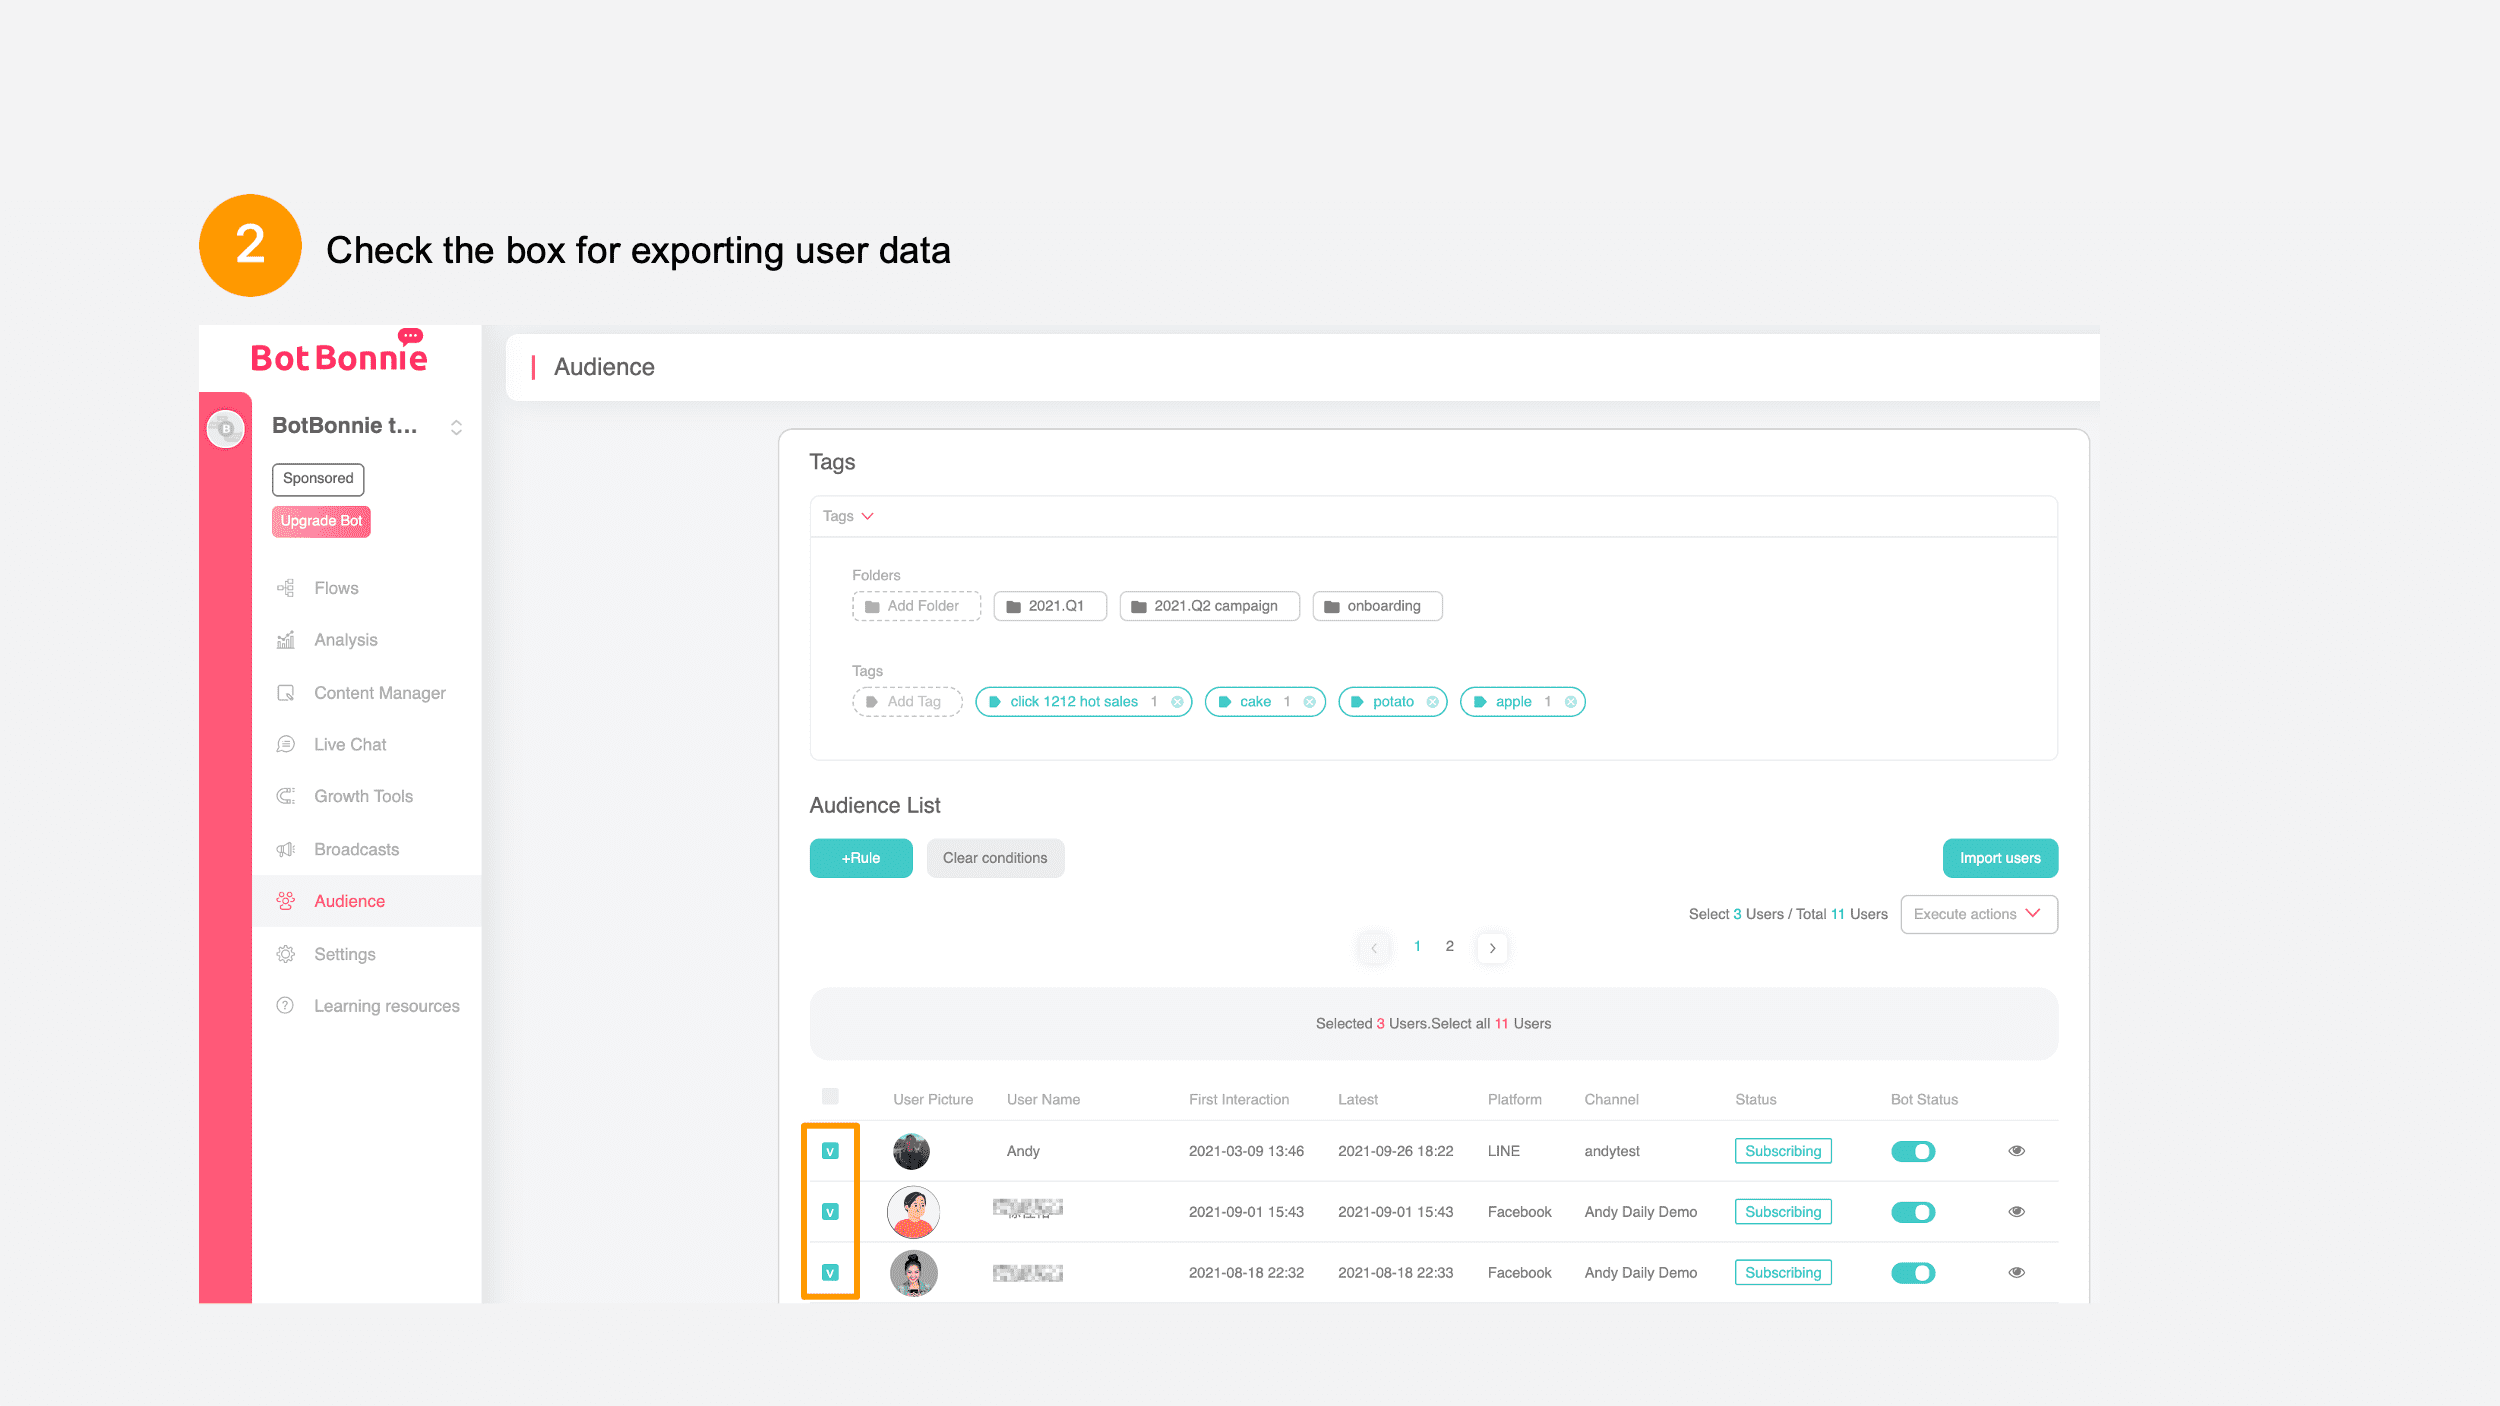
Click on “Audience” in the menu on the left to view the “Audience List.”

Check the box to the left of the user for exporting their data.
Click the “Execute Action” drop down menu at the top right → “Export Data,” enter the inbox, select the user content you want to export, then click “Confirm”
It is estimated that the exported user list will be received within 1 hour. If there are only a few user lists, you will receive it within 15 minutes!

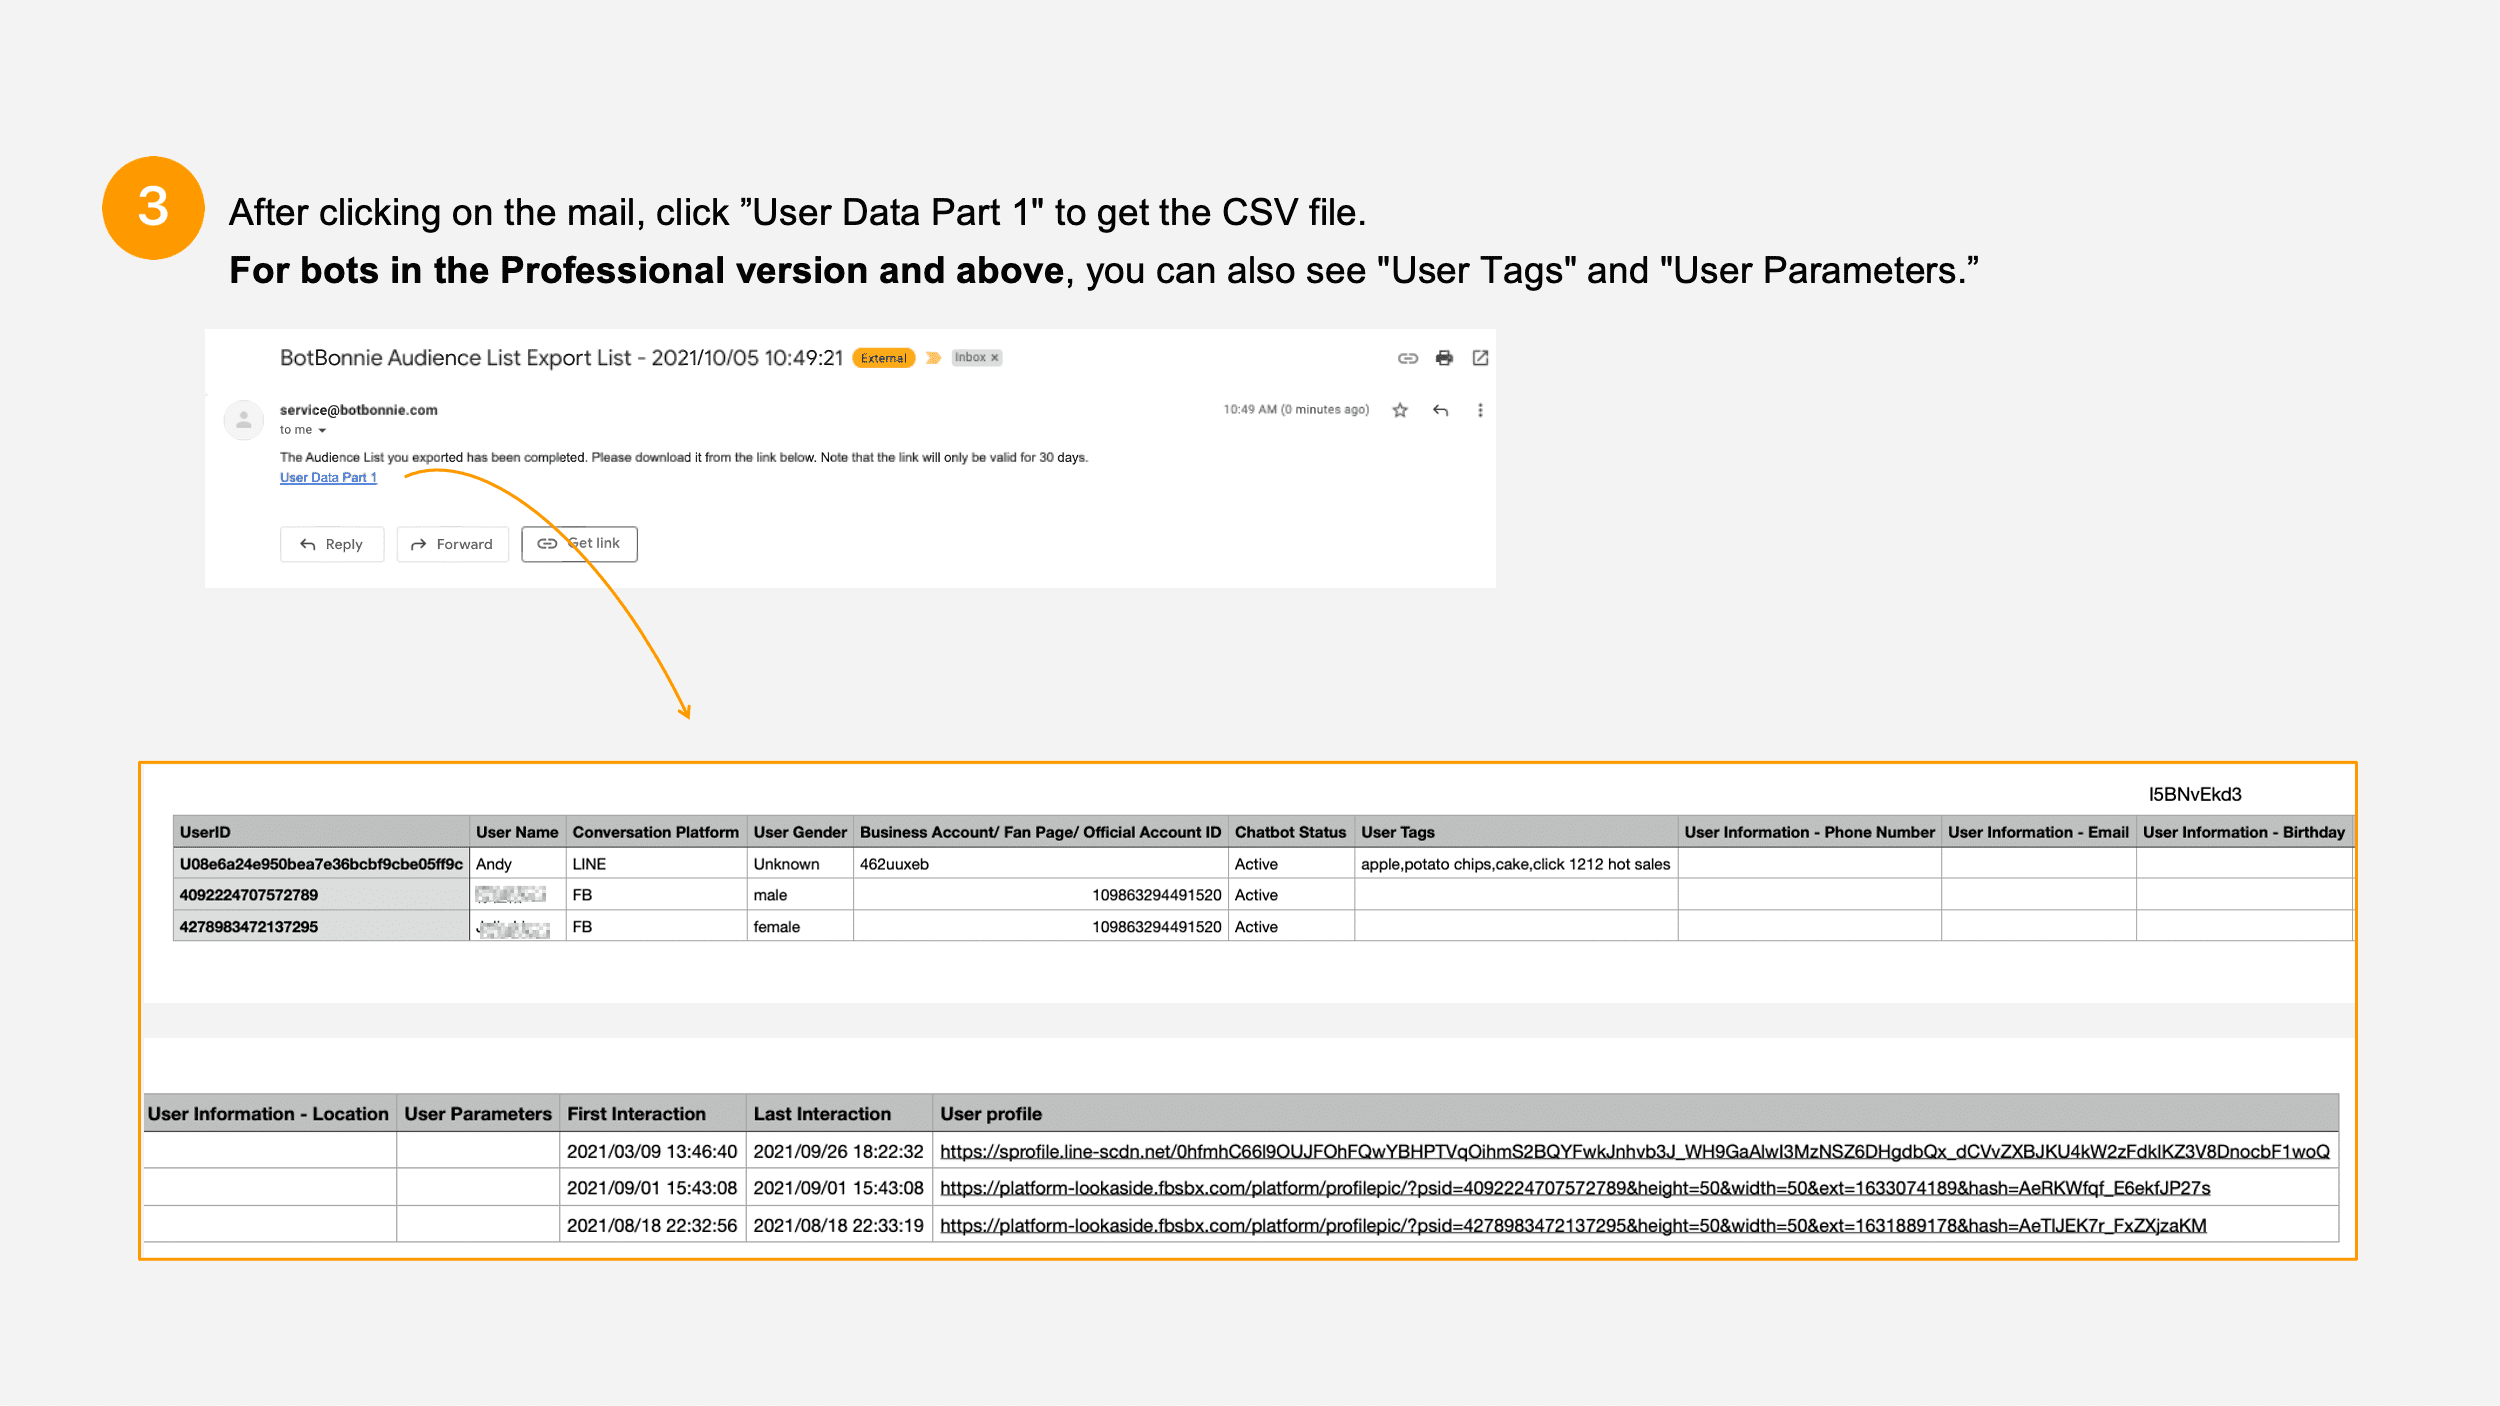
After clicking on the mail, click “Click me to download” to get the CSV file.
The data that can be seen in the user data includes: User ID, User Name, Platform, Gender, Fan ID, Bot Status, First Interaction, Last Interaction, and User Picture.
For bots in the Professional version and above, you can also see “User Tags” and “User Parameters” when you export the user list.
A computer is the processing method of the Microsoft OS
If you use a computer with Microsoft as its operating system, you may see that the ID data changes to scientific notation after opening the file (e.g., 2.34E+15). Follow the steps below to convert the format of the data:
Open a blank Excel file, then click “Data” → “From Text/CSV” in the toolbar

Select the user data CSV file downloaded from the email

Click “Data Conversion” in the lower right corner
Click the ID field

Select “Data Type” → “Text” in the upper toolbar

Select “Replace existing”

You will see the correct value in the ID field.

Save the data, and now you can import it into the Facebook backend to use it as an ad audience!
Congratulations! You now have the ability to export user data for follow-up marketing!

Official website / Facebook Fan page / Tutorials