
1. Add Button
Click “+Button” to add a new button. To edit the button name, you can select the “Postback Module” and select the “Module” you want or select “Add Module.” Click “Complete” at the bottom right corner.
In addition, you can click the button and click “Delete” at the bottom left corner of the Editor to delete the button.

【BotBonnie’s note】Text, carousel, and lists can be used with the button. You can add up to three “regular buttons” for text.
2. Change the button sequence
Simply click the “↕” button on the left with the mouse to change the sequence of the buttons.

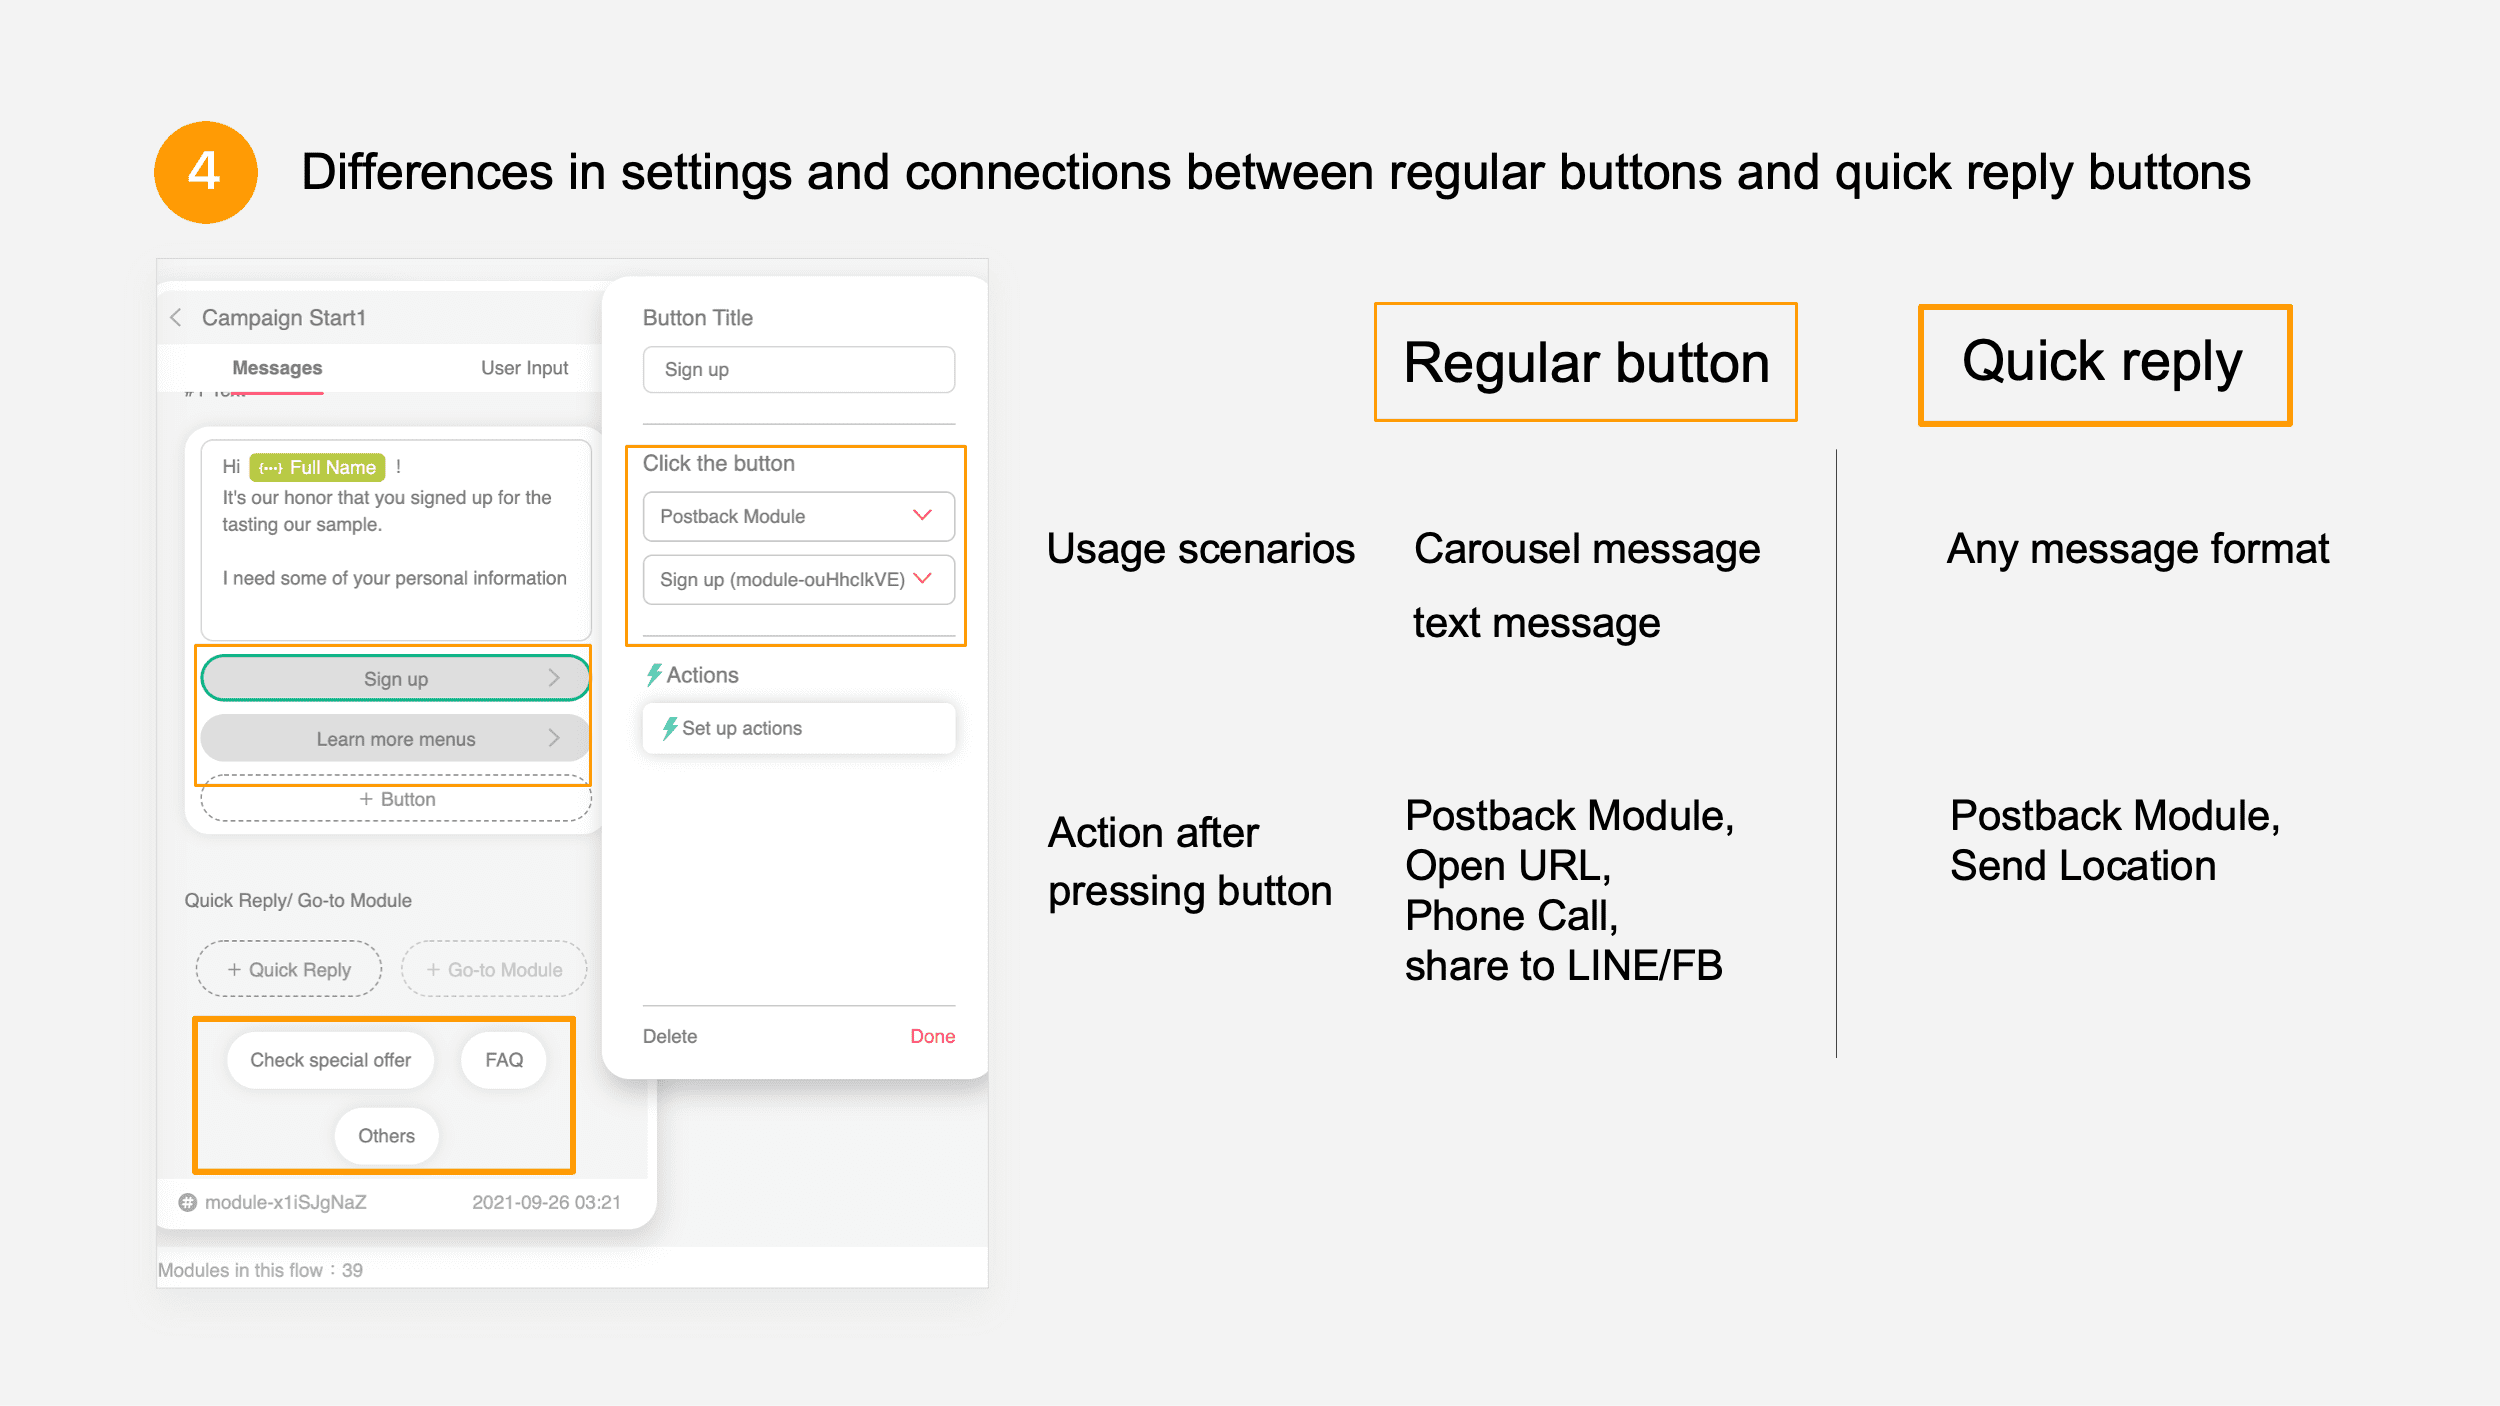
3. Difference between the “regular button” and “quick reply”
In the next article, we will learn about a function that is very similar to buttons – “quick reply”. What is the difference between quick replies and the buttons we just learned about? First, let’s take a look at how they are displayed in the chatbot messages.
In addition to differences in the display, the biggest differences between the two are the number of messages and the life cycle. You can set up to 3 buttons and 13 quick replies. Quick replies will disappear after the user clicks on them. Therefore, it is generally used in interaction procedures where you don’t want the user to go back and click on other options, whereas regular buttons are always in the messages and can be accessed by the user to start new conversations at any time.

4. Console settings for buttons and quick reply
Note that the “Button” can only be used with text and carousel cards when you change settings in the console. The quick reply can be used with any message format. In addition, regular buttons can connect to more actions than the quick reply buttons such as sharing to FB/LINE, open URL, and phone call.
Congratulations! You have successfully added a button.

Official website / Facebook Fan page / Community / Tutorials