
Open the link and interact with customers in just five steps!
Before you read this tutorial, be sure to:
- Confirm that you are a paid PRO version user (free Starter version users cannot connect to LINE official accounts)
- Set up an official LINE account >> Apply Now
1.Connect to LINE OA on BotBonnie platform
Click the “Settings” menu in the left field → select the “Connect to Bot” tab → click “+Connect to LINE OA,” and follow the six steps to connect the BotBonnie bot with LINE.

2. Connect bots with LINE OA in five steps
2–1 Create Messaging API Channel
If there is an API Channel, click “Yes, next step” to go directly to the 2-2 tutorial. If you choose “None, create new,” see the “How to create a Provider” tutorial below.

“How to create a Provider” 3 Steps:
A. Basic: Go to the LINE Developers website → click “Providers” in the left field → press “Create” to add a Provider → name the Provider according to the name of the individual or company with which you actually provide the official account services
e.g.: Bonnie uses its company BotBonnie to provide official account services, so we use that name.
B. Select the channel type and start building the channel: After creating the Provider, click the “Create Messaging API Channel” drop down menu to start creating a channel.
C. Fill in channel information and complete creation of channel: After selecting the channel type, fill in the name, description, parent class, subclass and email address of the channel. The channel can be created after the same terms of use.
After settings are complete, you can go back to the BotBonnie platform and click “Yes, next step” to continue with settings.
2–2 Set up Channel ID
Use an admin account with LINE Developers Admin permissions to log in to the LINE Developers backend. Then, enter the Provider of the account to be connected. Open the Provider channel you want to connect, find Channel ID on the Basic settings > Basic information. Copy it and fill in the BotBonnie Console.

2–3 Set up Channel secret
After getting the Channel ID, scrolling down to the Channel secret part. Copy and paste it into the field below.
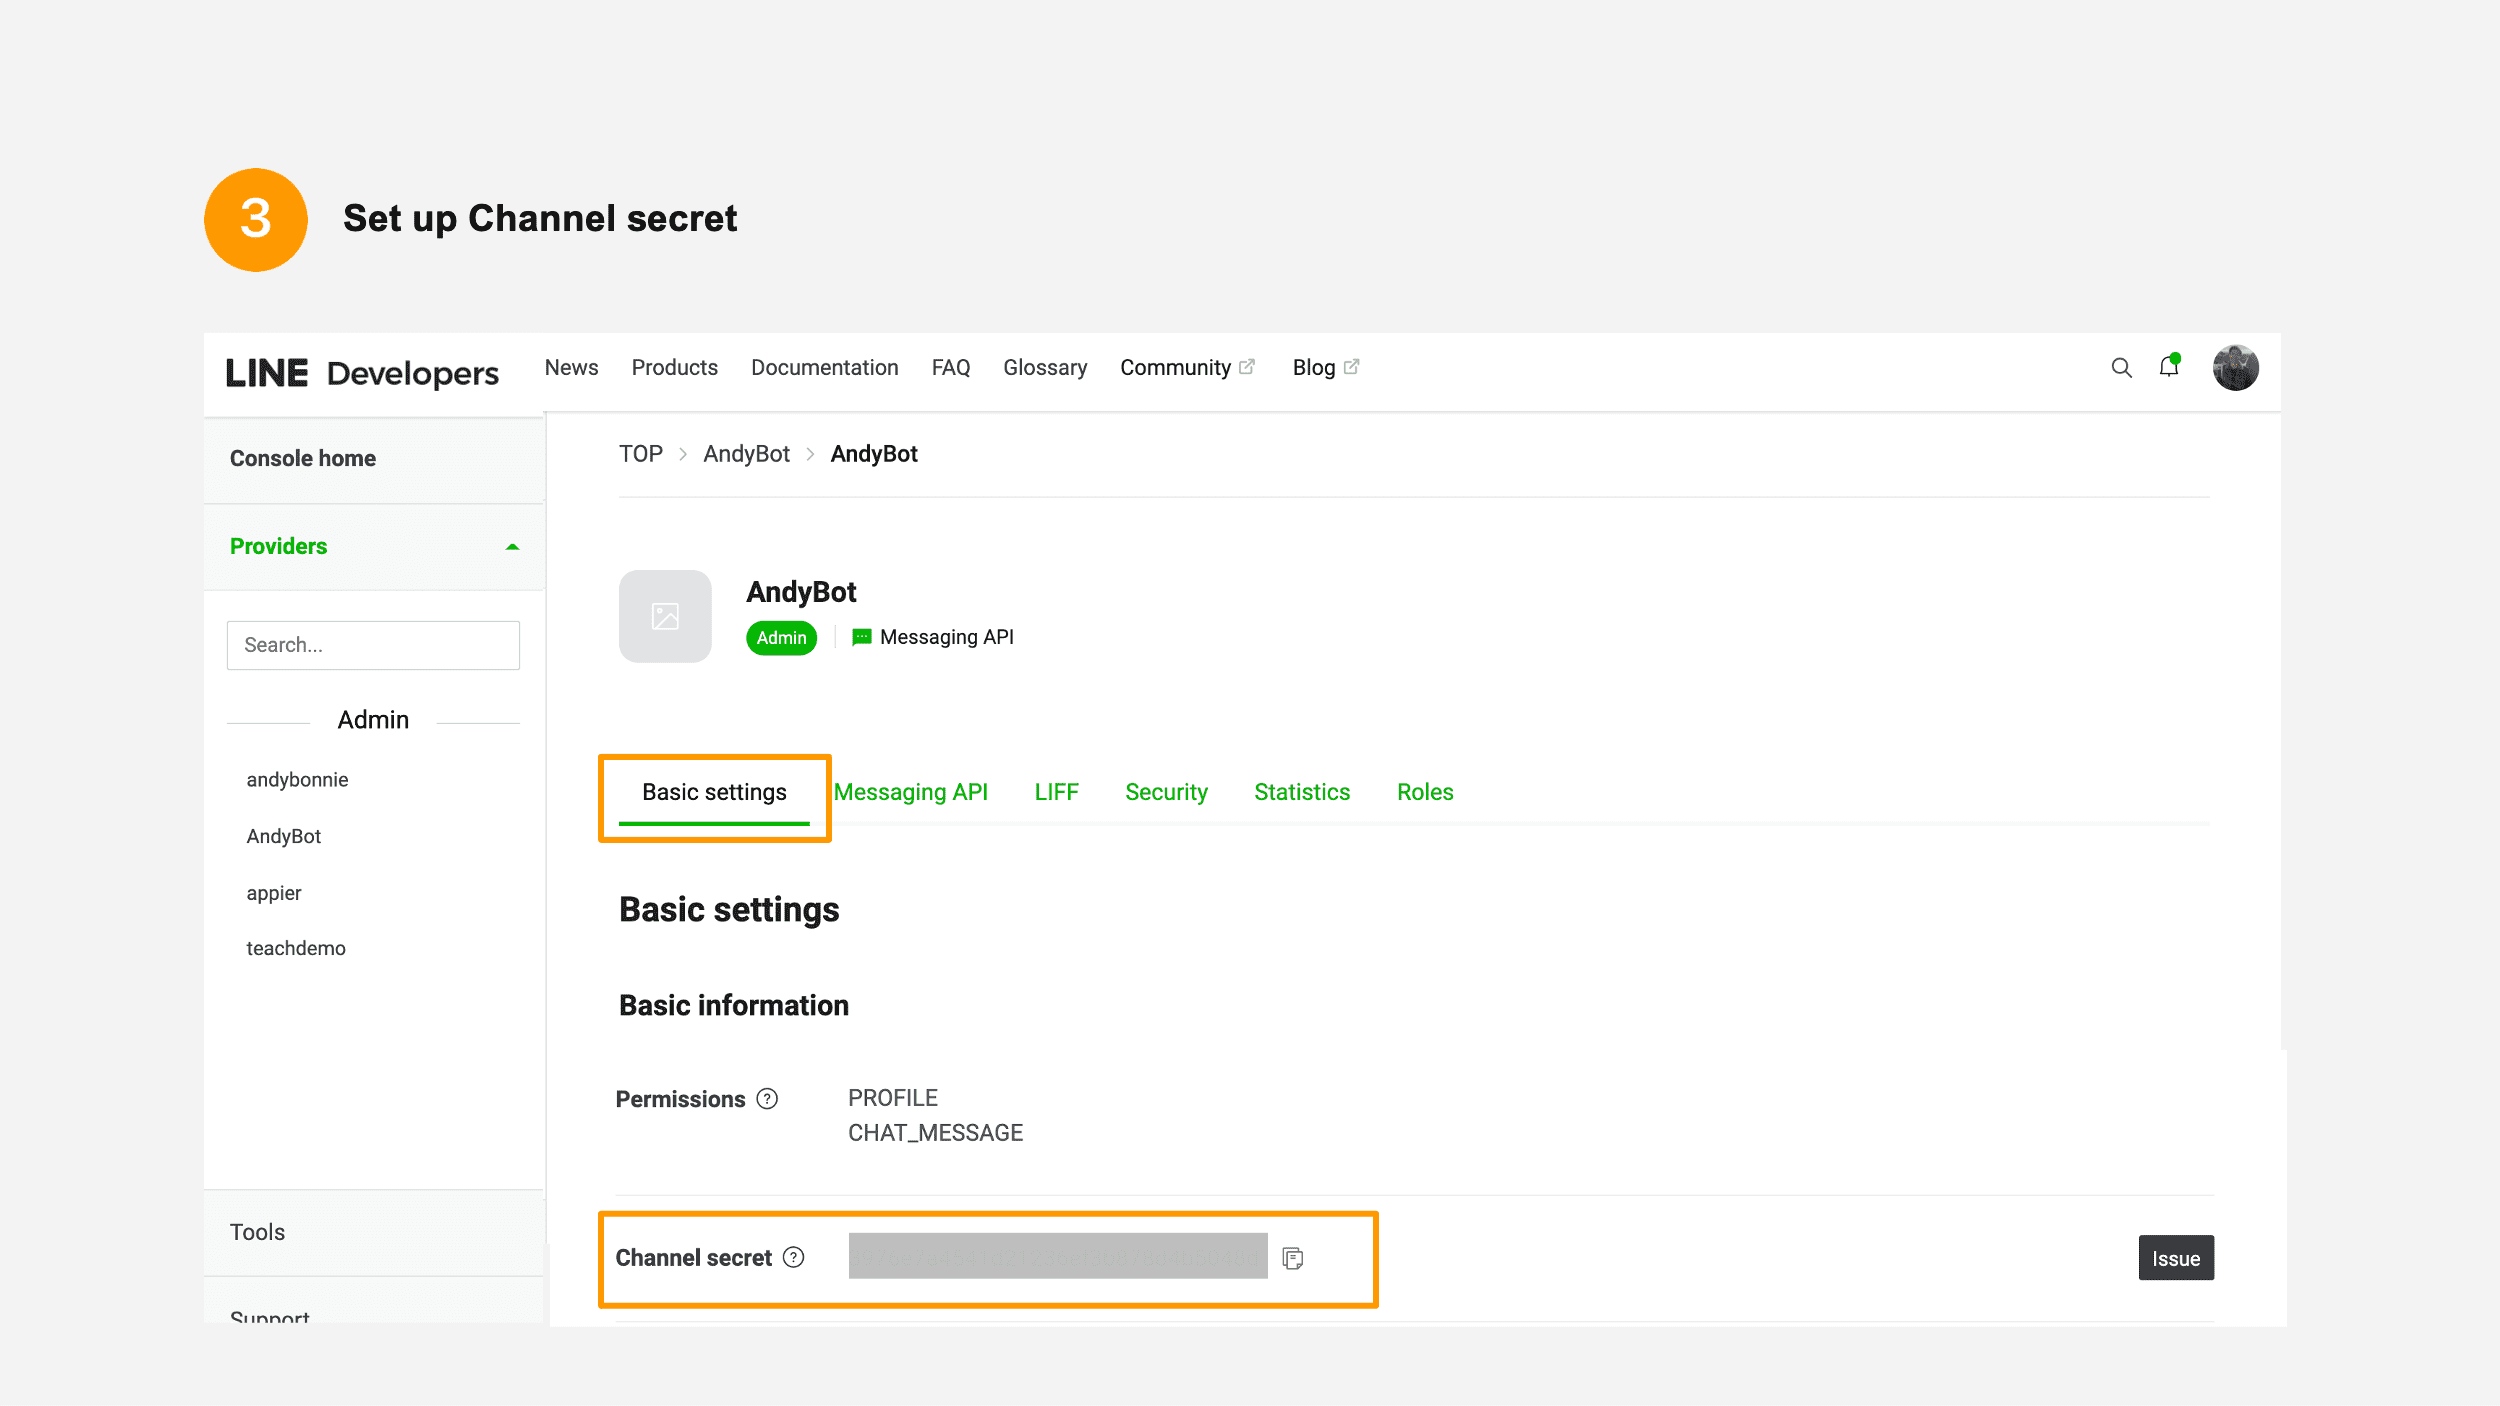
Return to the BotBonnie console, paste the Channel secret in the field, and click Next when finished.
2–4 Set up Channel access token
Go to the Messaging API settings tab of the LINE Developers backend → scroll down to the Channel access token field → click “Issue,” and then copy the generated alphanumeric string (token).
Return to the BotBonnie console, paste the alphanumeric string into the “Channel access token” field, and click Next when finished.
2–5 Set up Webhook
After reloading the page, go to Messaging API settings > Webhook settings, scroll down to turn on the “Use webhook” switch, and click Next when finished.
2-6 LINE Official Account Manager Settings
Then go to the LINE Official Account Manager and select the LINE OA you just set. After entering the console, adjust the reply method based on the following two points:
Open settings in the upper right corner. Go to the menu on the left and select “Response Settings.” Set “Add Friend Welcome Message” to “Deactivate” and set “Auto Response Message” to “Deactivate.” Then go back to the BotBonnie backend and click “Complete Link” to complete the binding.

After completing the binding, you can see your newly added LINE account on the “Connected Fan Page.”

Congratulations! You’ve added an LINE official account 🎉

Official website / Facebook Fan page / Tutorials