
Are you always troubled by ways to increase return visits and improve adherence of users? In addition to using lucky draws, psychological tests, and scenario interactions, you can also do this! Use the daily check-in mechanism with check-in incentives to encourage users to start using your product, attract customers to sign in every day, quickly increase interactions, and increase return visit rate!
How to make customers sign in every day with daily check-in
With the BotBonnie daily check-in kit, you only need to provide continuous check-in incentives, and you can use a gamified interactive mechanism to attract customers to your door every day. The number of check-in days and rewards can be set according to the needs of different activities. If you want to give big prizes for checking in for seven consecutive days, you can do that too!
In addition to the highly flexible prize settings, you can also perform effectiveness analysis! Check the performance of the event and the real-time inventory data of the prizes at any time, which allows you to grasp the performance status of the event in real time. Just enter the Google email address and the results list will be sent to your email!
Daily check-in settings can be completed in three simple steps!
1. Adding the daily check-in kit
First, log in to the bot backend, click “Kits” -> Select the “Daily check-in” kit and the daily check-in function window will appear. Click “Create kit” and then click “Start Editing” to enter the daily check-in kit setting screen.
You can edit the settings through “Settings” and “Sign in” buttons on the screen.

2. Basic
When you click “Settings” and enter the BotBonnie check-in kit setting screen, you will see a description of the check-in kit setting logic. BotBonnie’s check-in kit allows the operator to set the number of days of “continuous” check-ins to qualify for the reward, and at the same time, when the user meets the specified number of consecutive check-in days, he can re-participate in the check-in event during the event time. For example, the maximum number of consecutive check-ins is 3 days, and the user has checked in for 3 consecutive days, then when the user opens the check-in page the next day, the user will check in again from the first day.

Next, adjust the red-framed area on the screen according to the content of your event schedule. Bonnie recommends that you name the kit after this event to facilitate future tracking. At the same time, use an attractive slogan within 8 words to attract users to sign in. The rules and description of the event will be displayed below the check-in button so that users can refer to the information.
In addition, on the top right, you can click “Test this kit”. Click on the three-dot icon and click “Copy Test Module URL” to enter the Bonnie Lab to try the check-in process and perform the test.

3. Prize rule settings
First of all, you need to set the number of check-in days according to the event plan. You can choose between 1 to 7 days. The following will set the prizes for the amount of days you set. You can give the prizes to the user in three different ways: Inform users of prizes won, on-site redemption, and one-time serial number upload. Choose the setting that is most appropriate for your event and prize.

The check-in kit provided by BotBonnie can be applied to various scenarios, such as: Scenario 1: Sign in and get rewards every day. Scenario 2: Sign in for a certain number of days to get the big prize again, highly flexible to match your various event scenarios!
Just use the “green switch” shown in the figure above to easily set whether there is a reward for the day. Scenario 2 shows the screen displayed when the switch is turned off on the first and second days of check-in.


Three types of prizes to satisfy all applications
After the user has checked in, he can return to the “Prize Record” in the dialogue box to see the prize status for daily check-ins.
1. Inform users of prizes won:
Users are notified of the names of prizes won directly on the prize record page; the exchange status field will display that no physical exchange is required.

2. On-site redemption:
When the user clicks “Redeem” on the prize-winning record screen, they can see the prizes they’ve won. At the location of the physical event, the business owner can appoint a staff member responsible for telling users about “Click me to redeem” to provide confirmation for the event. This function is very suitable for businesses with brick-and-mortar locations and physical events, as it can help connect and integrate online and offline events!

3. One-time serial number upload:
This prize is one of the hottest types used by major companies today, and is suitable for the game and e-commerce industries. It works by providing serial numbers that are used to exchange for virtual treasures or LINE Points!
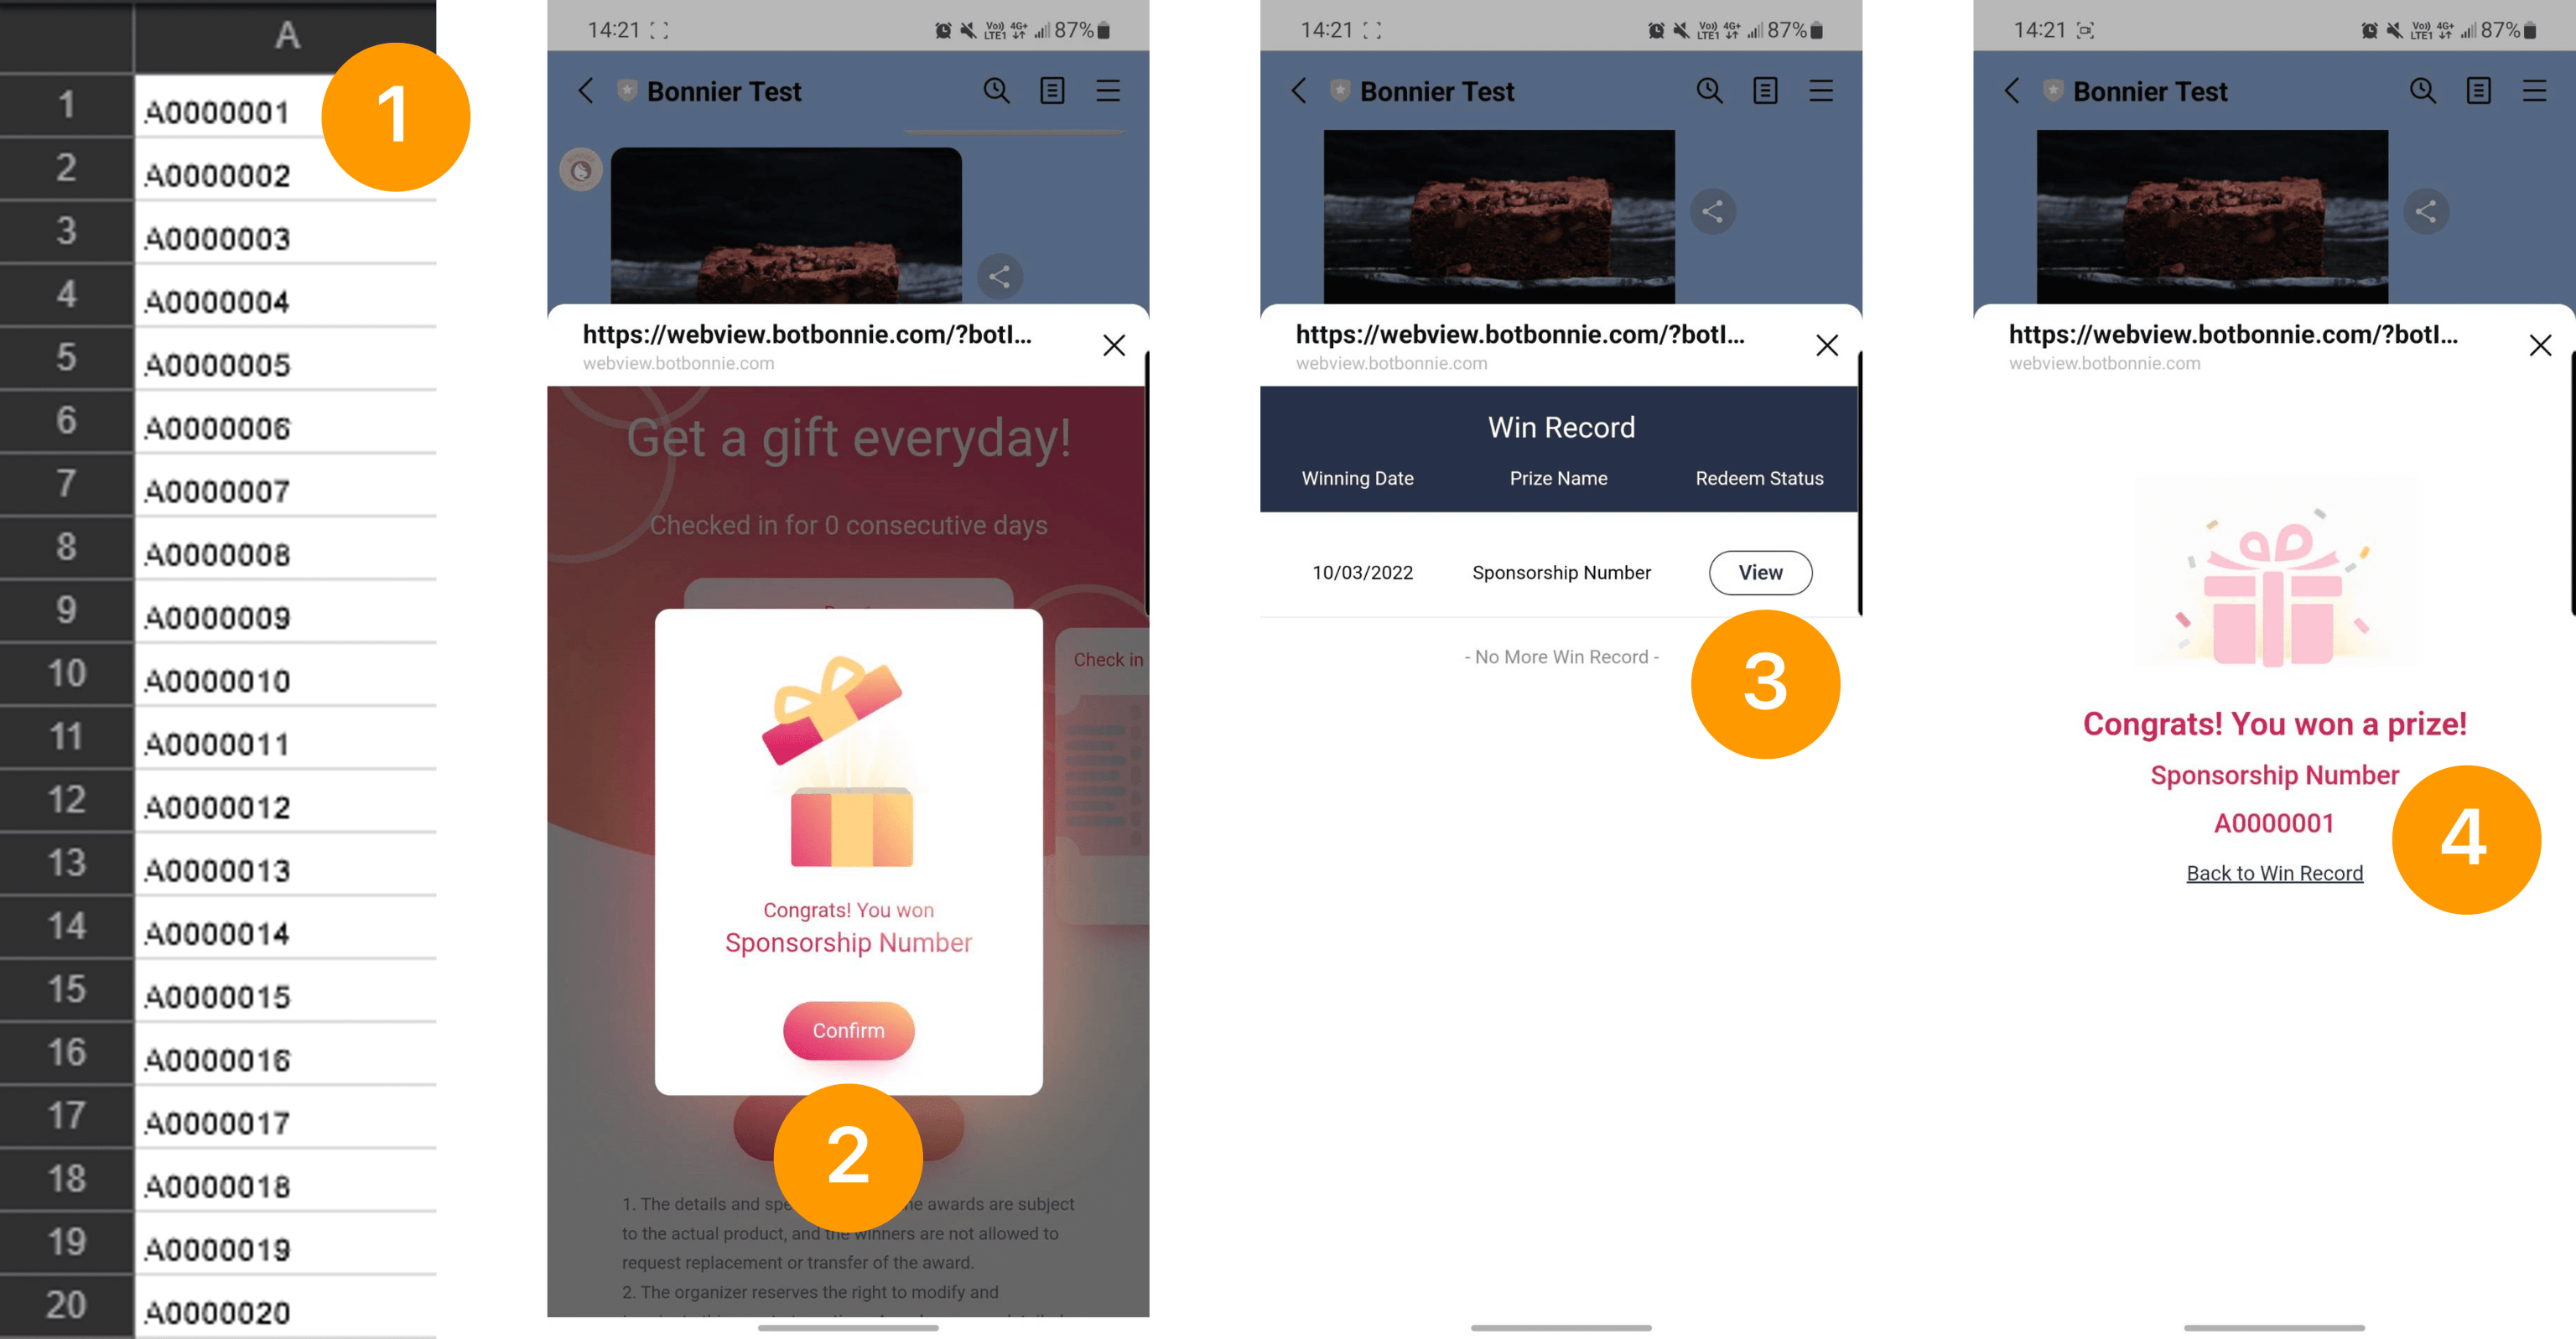
First off, you need to create a .CSV file with the serial numbers of the event prizes and upload it to the BotBonnie backend. Users will receive serial numbers in the order of prizes won. As shown in the figure below, the first winner will receive the serial number 001, and the second winner will receive the serial number 002.
Always stay up-to-date on inventory status, giving the operator the best experience!
In the Review field, we can view the remaining number of prizes to evaluate the effectiveness and adjustments of the event.

Internal event staffers at businesses often need to do repeated testing, meaning that the number of checked-in users in Review needs to be reset to zero and then re-simulated. That’s why Bonnie provides a “Reset Event Record” function that restores the remaining number of prizes not yet sent. Remember that this action cannot send replies!

Create scenario messages with ease
After setting the check-in content, we then click on the blank space to return to the Flows screen, where we can begin adjusting the event invitation copy before the user enters the check-in kit. Select “Prepare check-in” to edit the content of the message and set the buttons below.

In addition to being able to fill in the start message according to the event requirements, you can also send a check-in completion message or award information message each day after the users complete the check-in!

