
Many operators have been inconvenienced by the three major Facebook Messenger policy changes from 2020, which only allows them to push messages to fans who have interacted with the fan page within 24 hours. In addition to Facebook providing 4 kinds of message tags that can avoid the restrictions of the policy, you can also invest in Facebook ads. According to the new policy, Facebook has launched two ad types that are closer and more familiar to users: Messenger-sent ads, sponsored messages.
What is a Click to Messenge ad?
Click to Messenge ads can be posted on three major communication platforms: Messenger, Facebook, and Instagram. In addition to choosing the platform for exposure according to your business, you can choose to import a custom ad audience/lookalike ad audience, or use a saved ad audience. That audience will see the ad message you set in the Facebook post matched with a call-to-action button in the lower right corner of that post. That button connects to a chatbot that automatically starts a series of dialogues and interactions with the target audience you’ve chosen. This not only helps develop potential customers and enhance brand or product awareness, but also promotes sales and business performance.
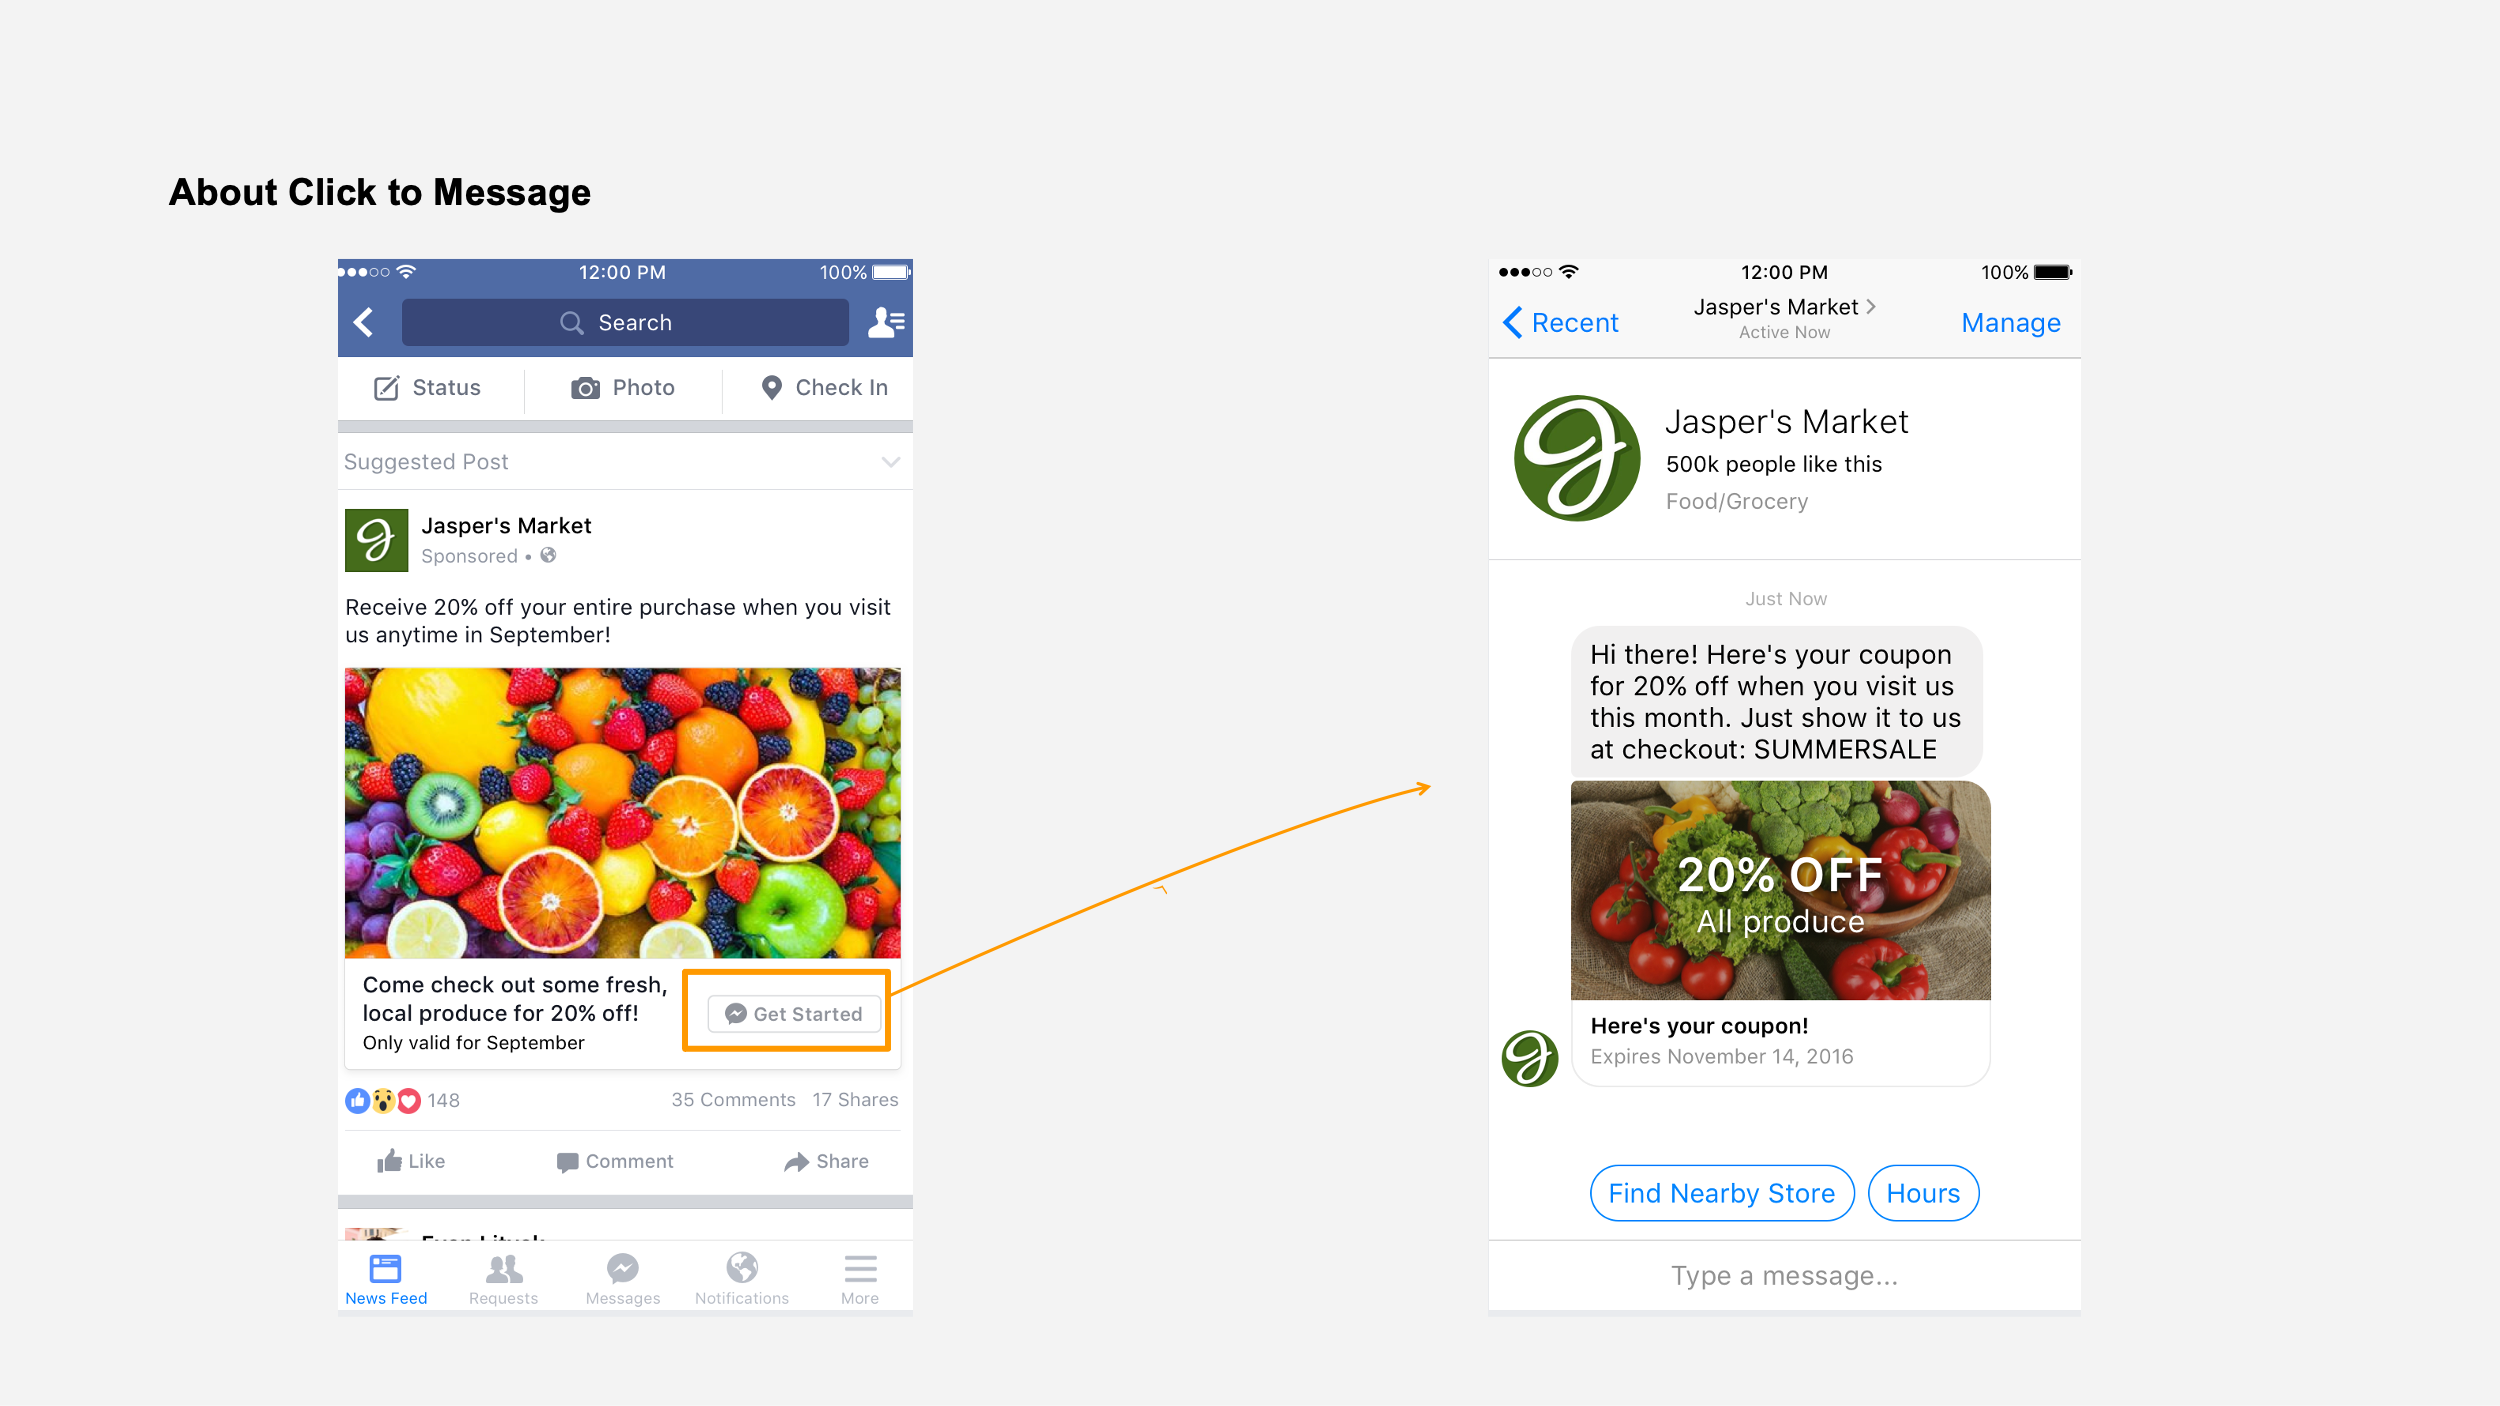
🎬 Let’s take a closer look at how Facebook Messenger’s ads interact with users!
Let’s create a Click to Messenge and break through the 24-hour limit!
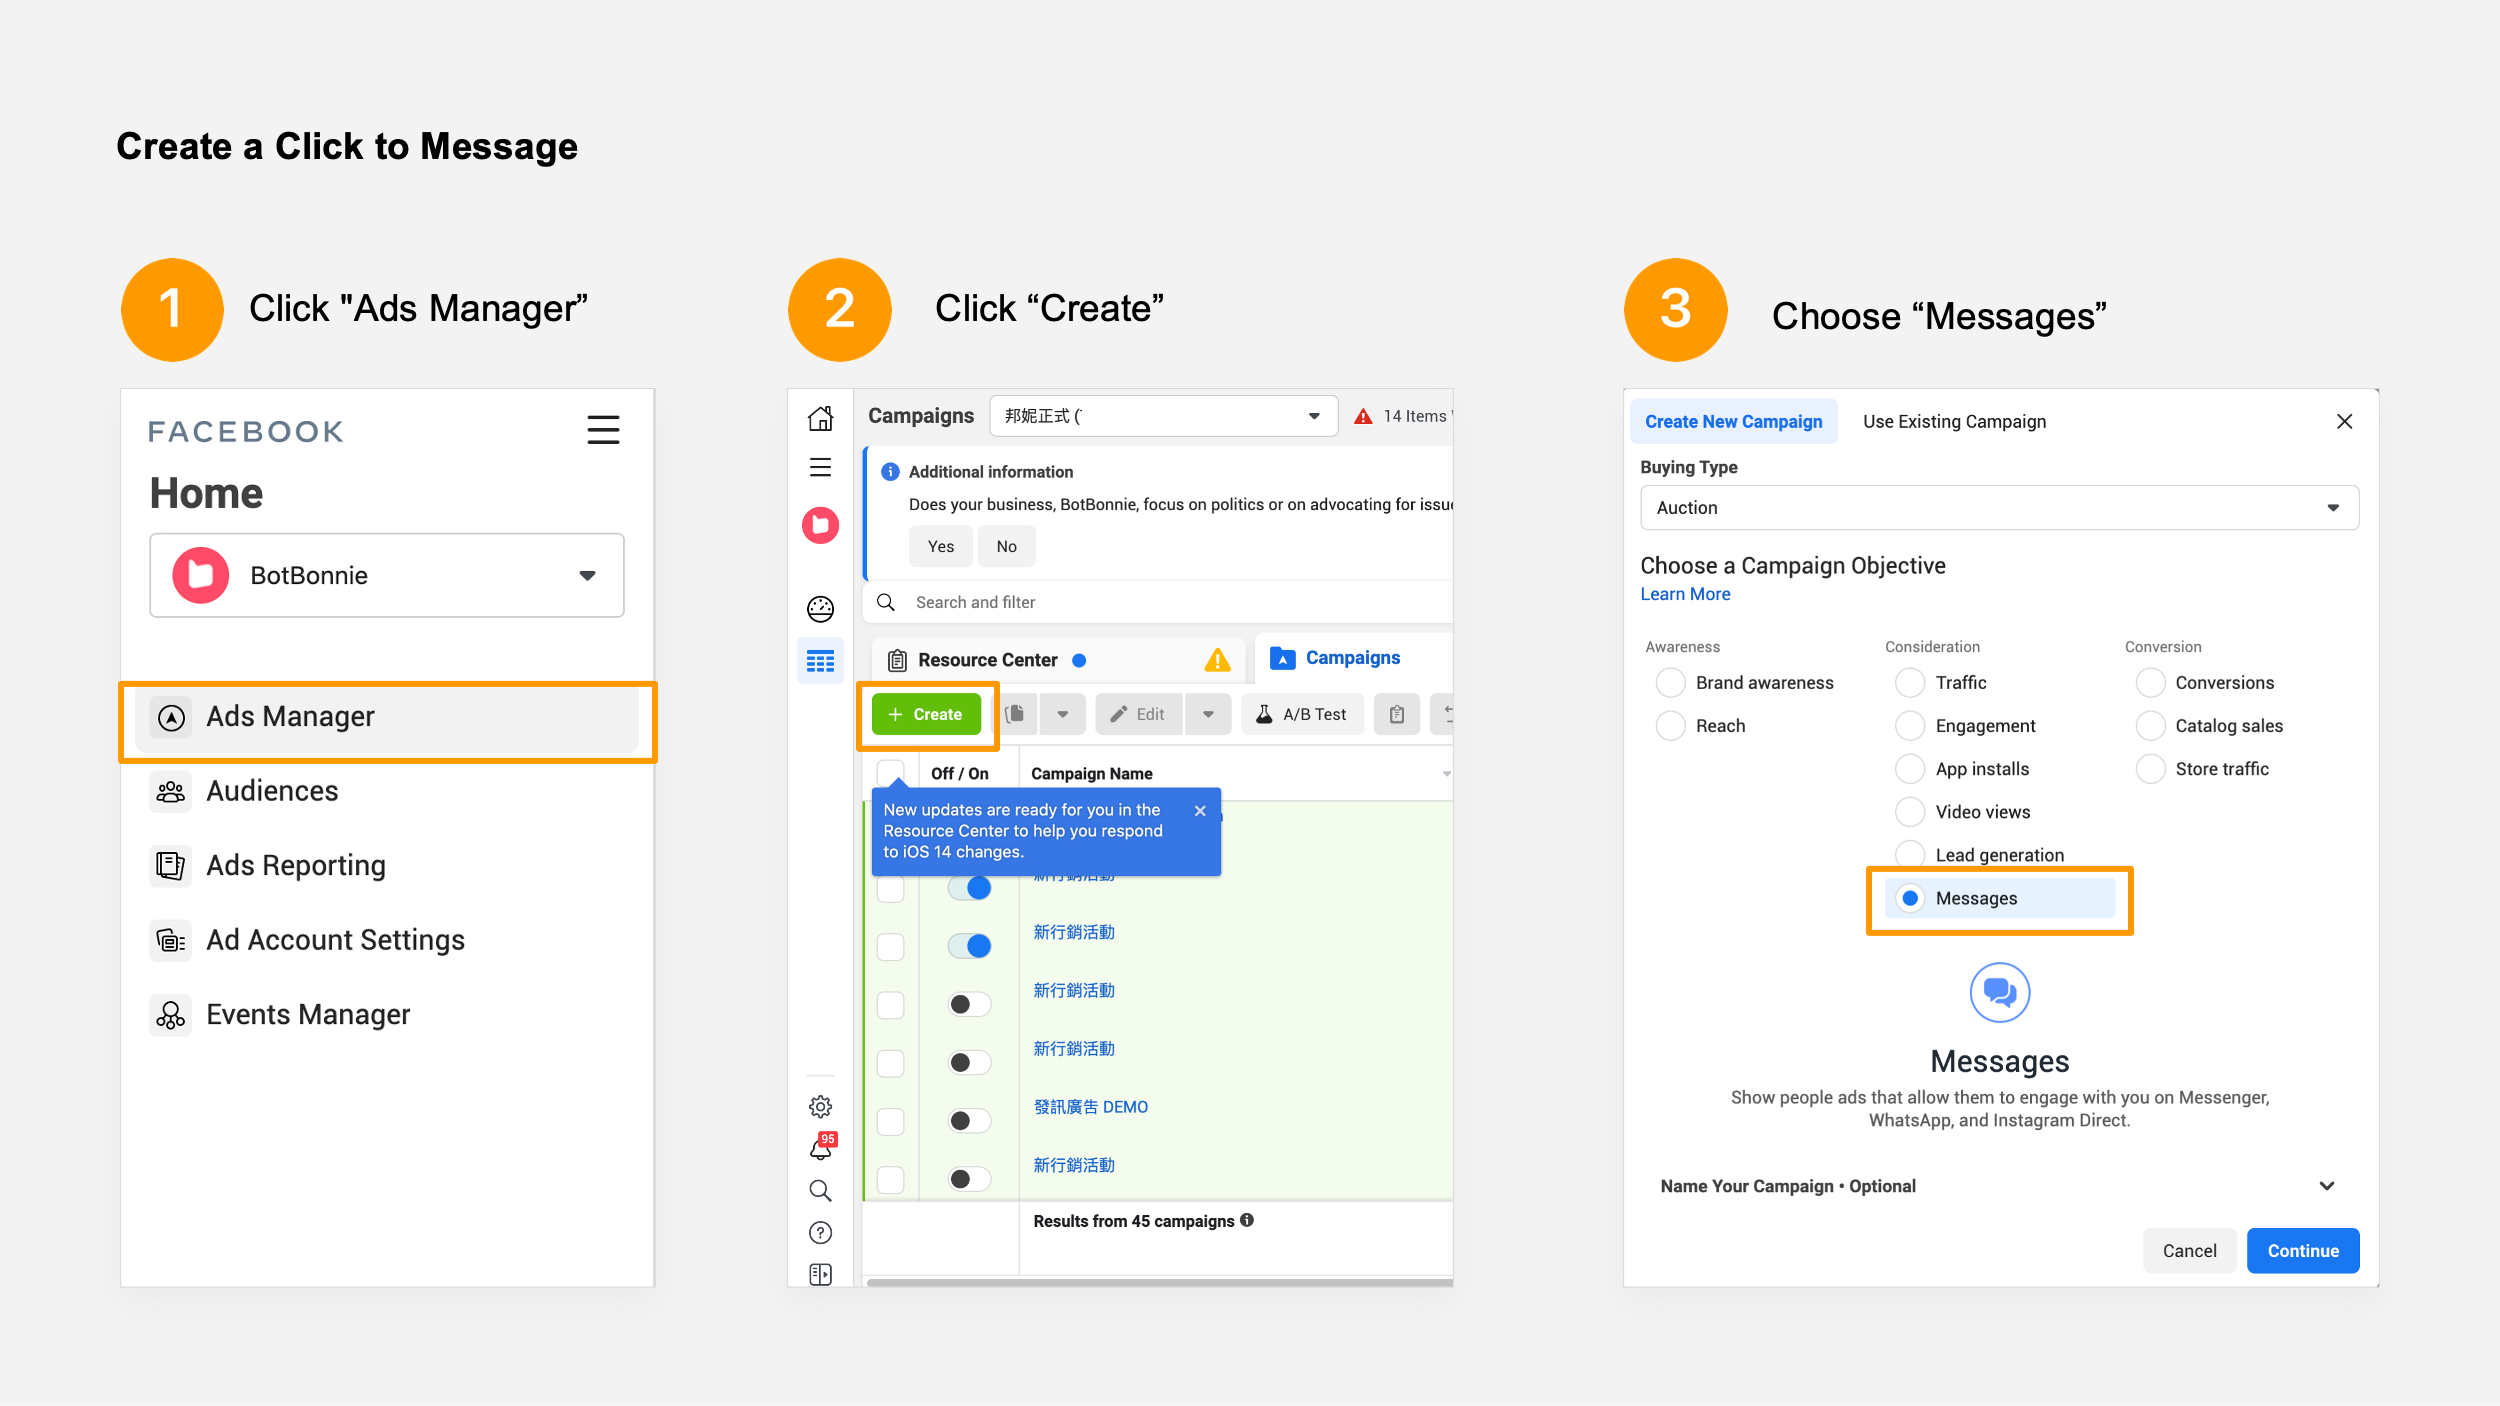
1. Create a “Click to Message”
First, go to the console of the Business Manager and click “Ads Manager” then create a new ad, and select the “Messages” in the campaign objective.
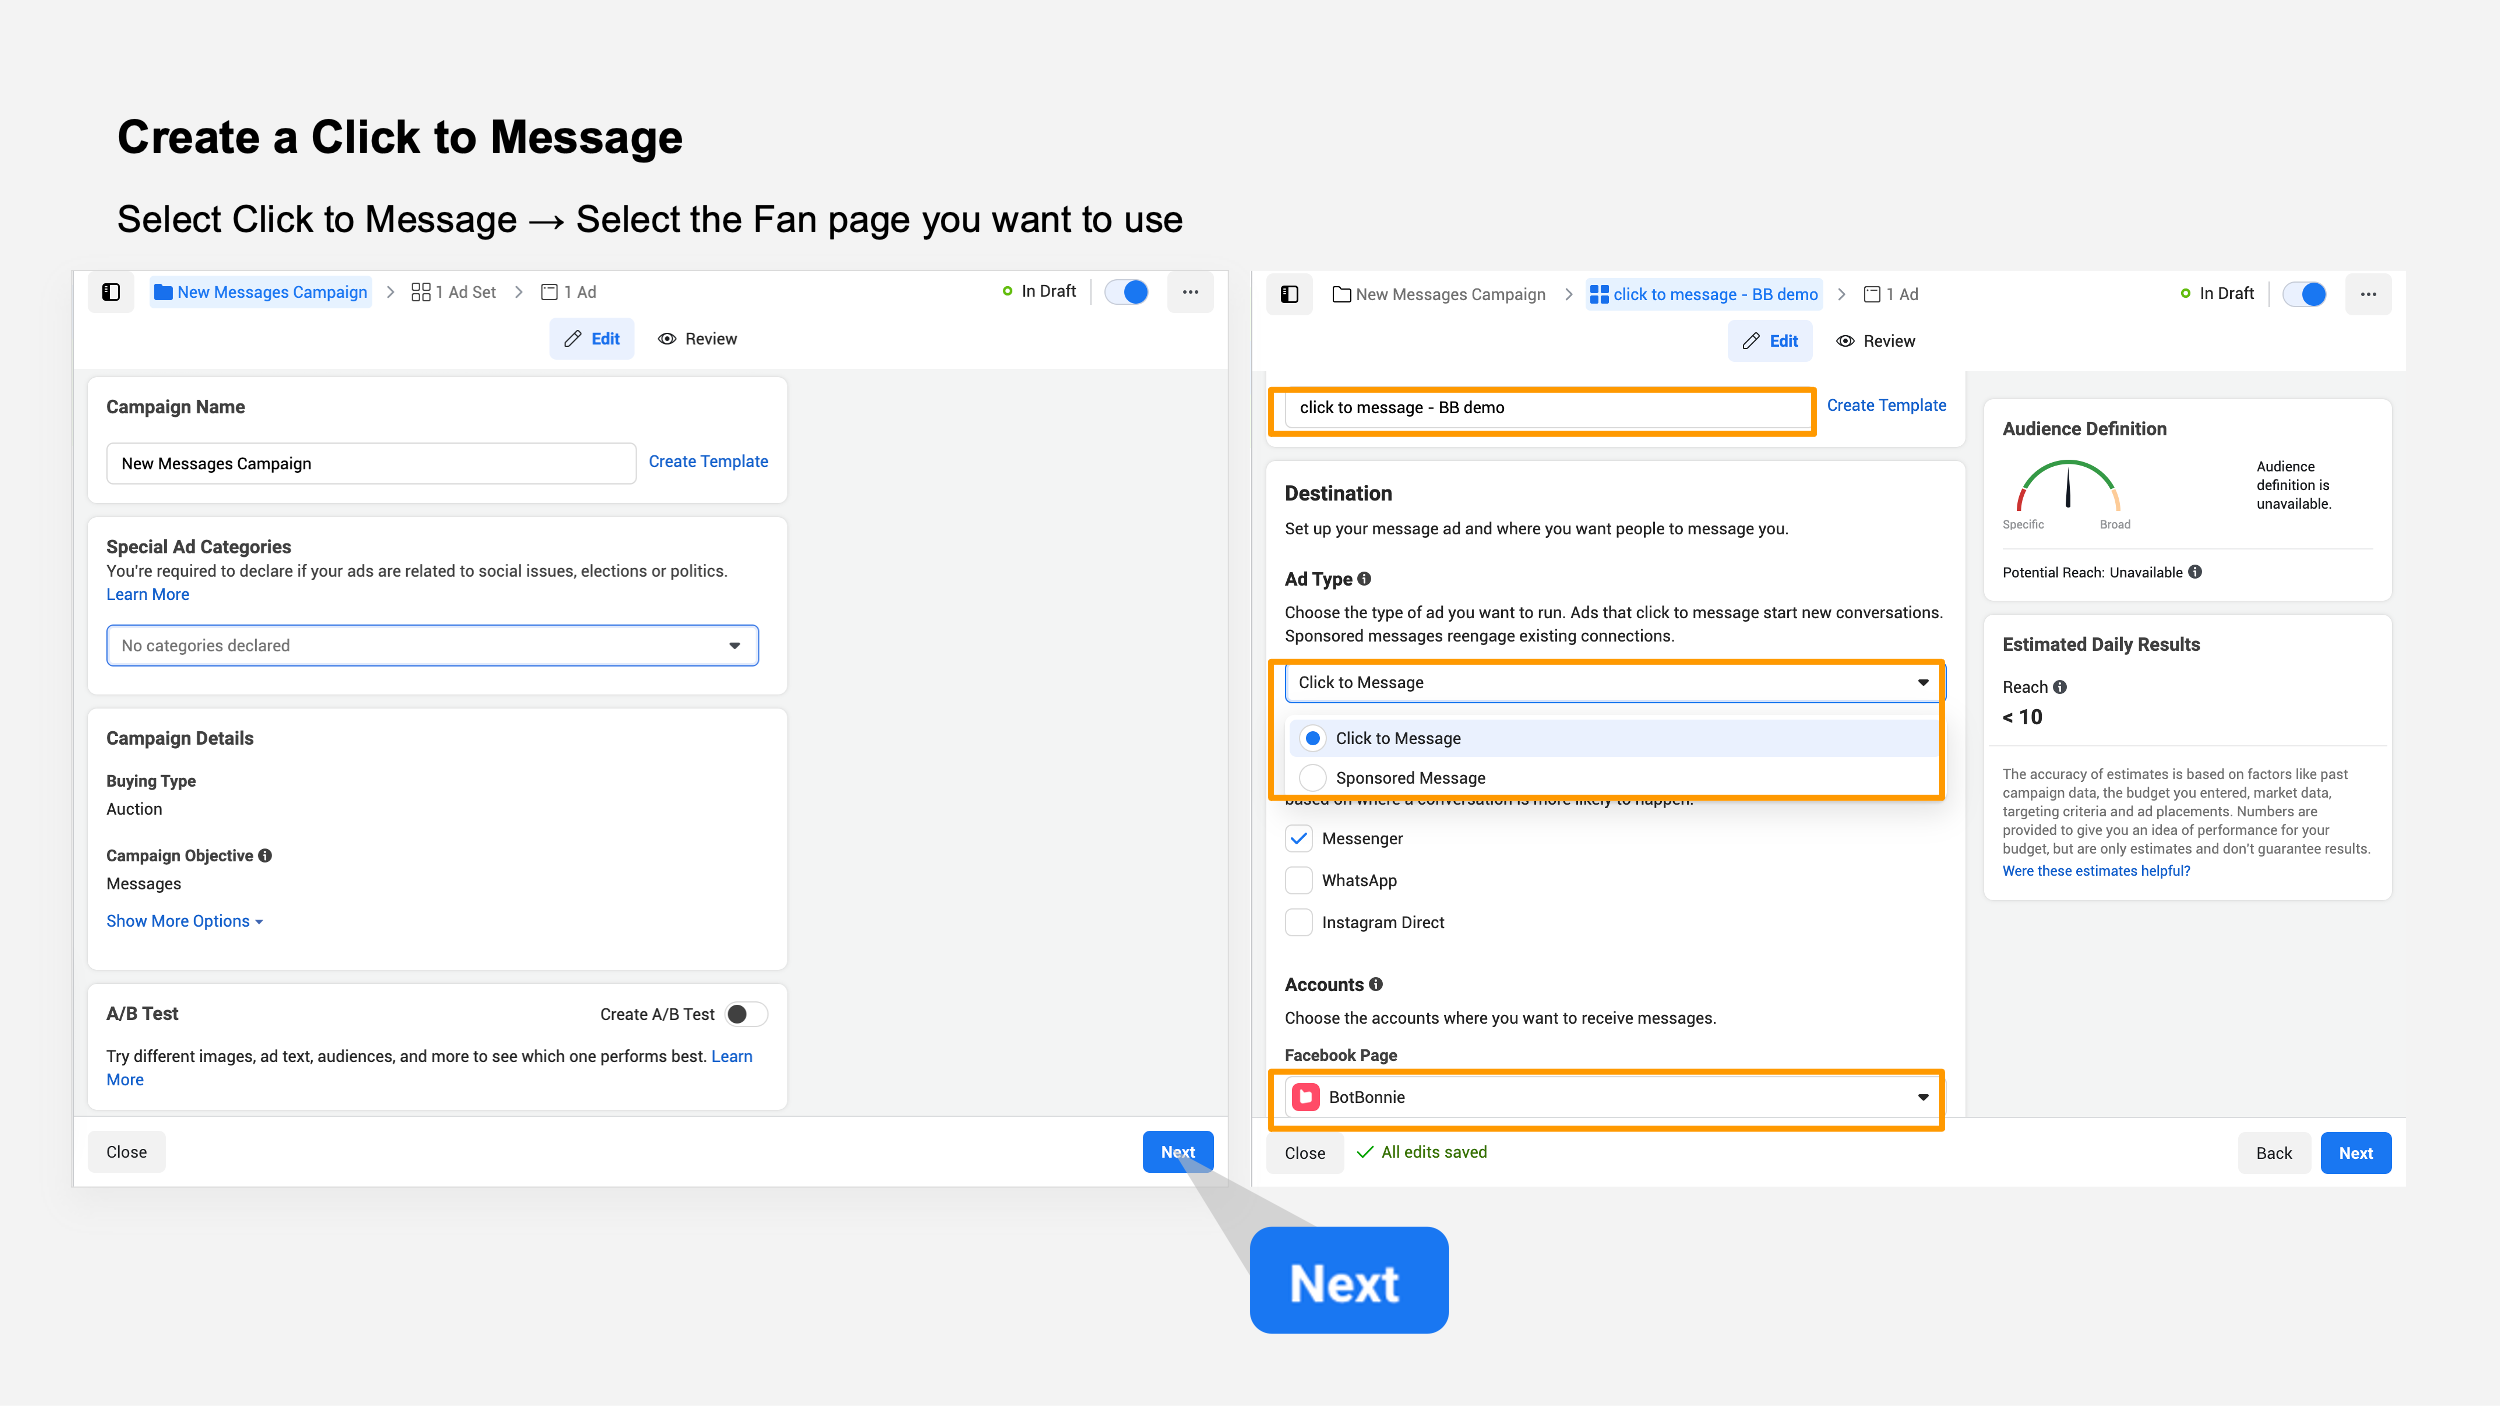
2. Create ad name and set ad combination After we have renamed the ad combination, select the ad type to be used in the “Message Destination” field. Here we are using a Click to Messenge as an example. There are two types of message ads:
1. Click to Messenge : Uses posts to attract recipients into bot messages.
2. Sponsored message: Directly appears in the form of a message in the recipient’s messenger inbox.
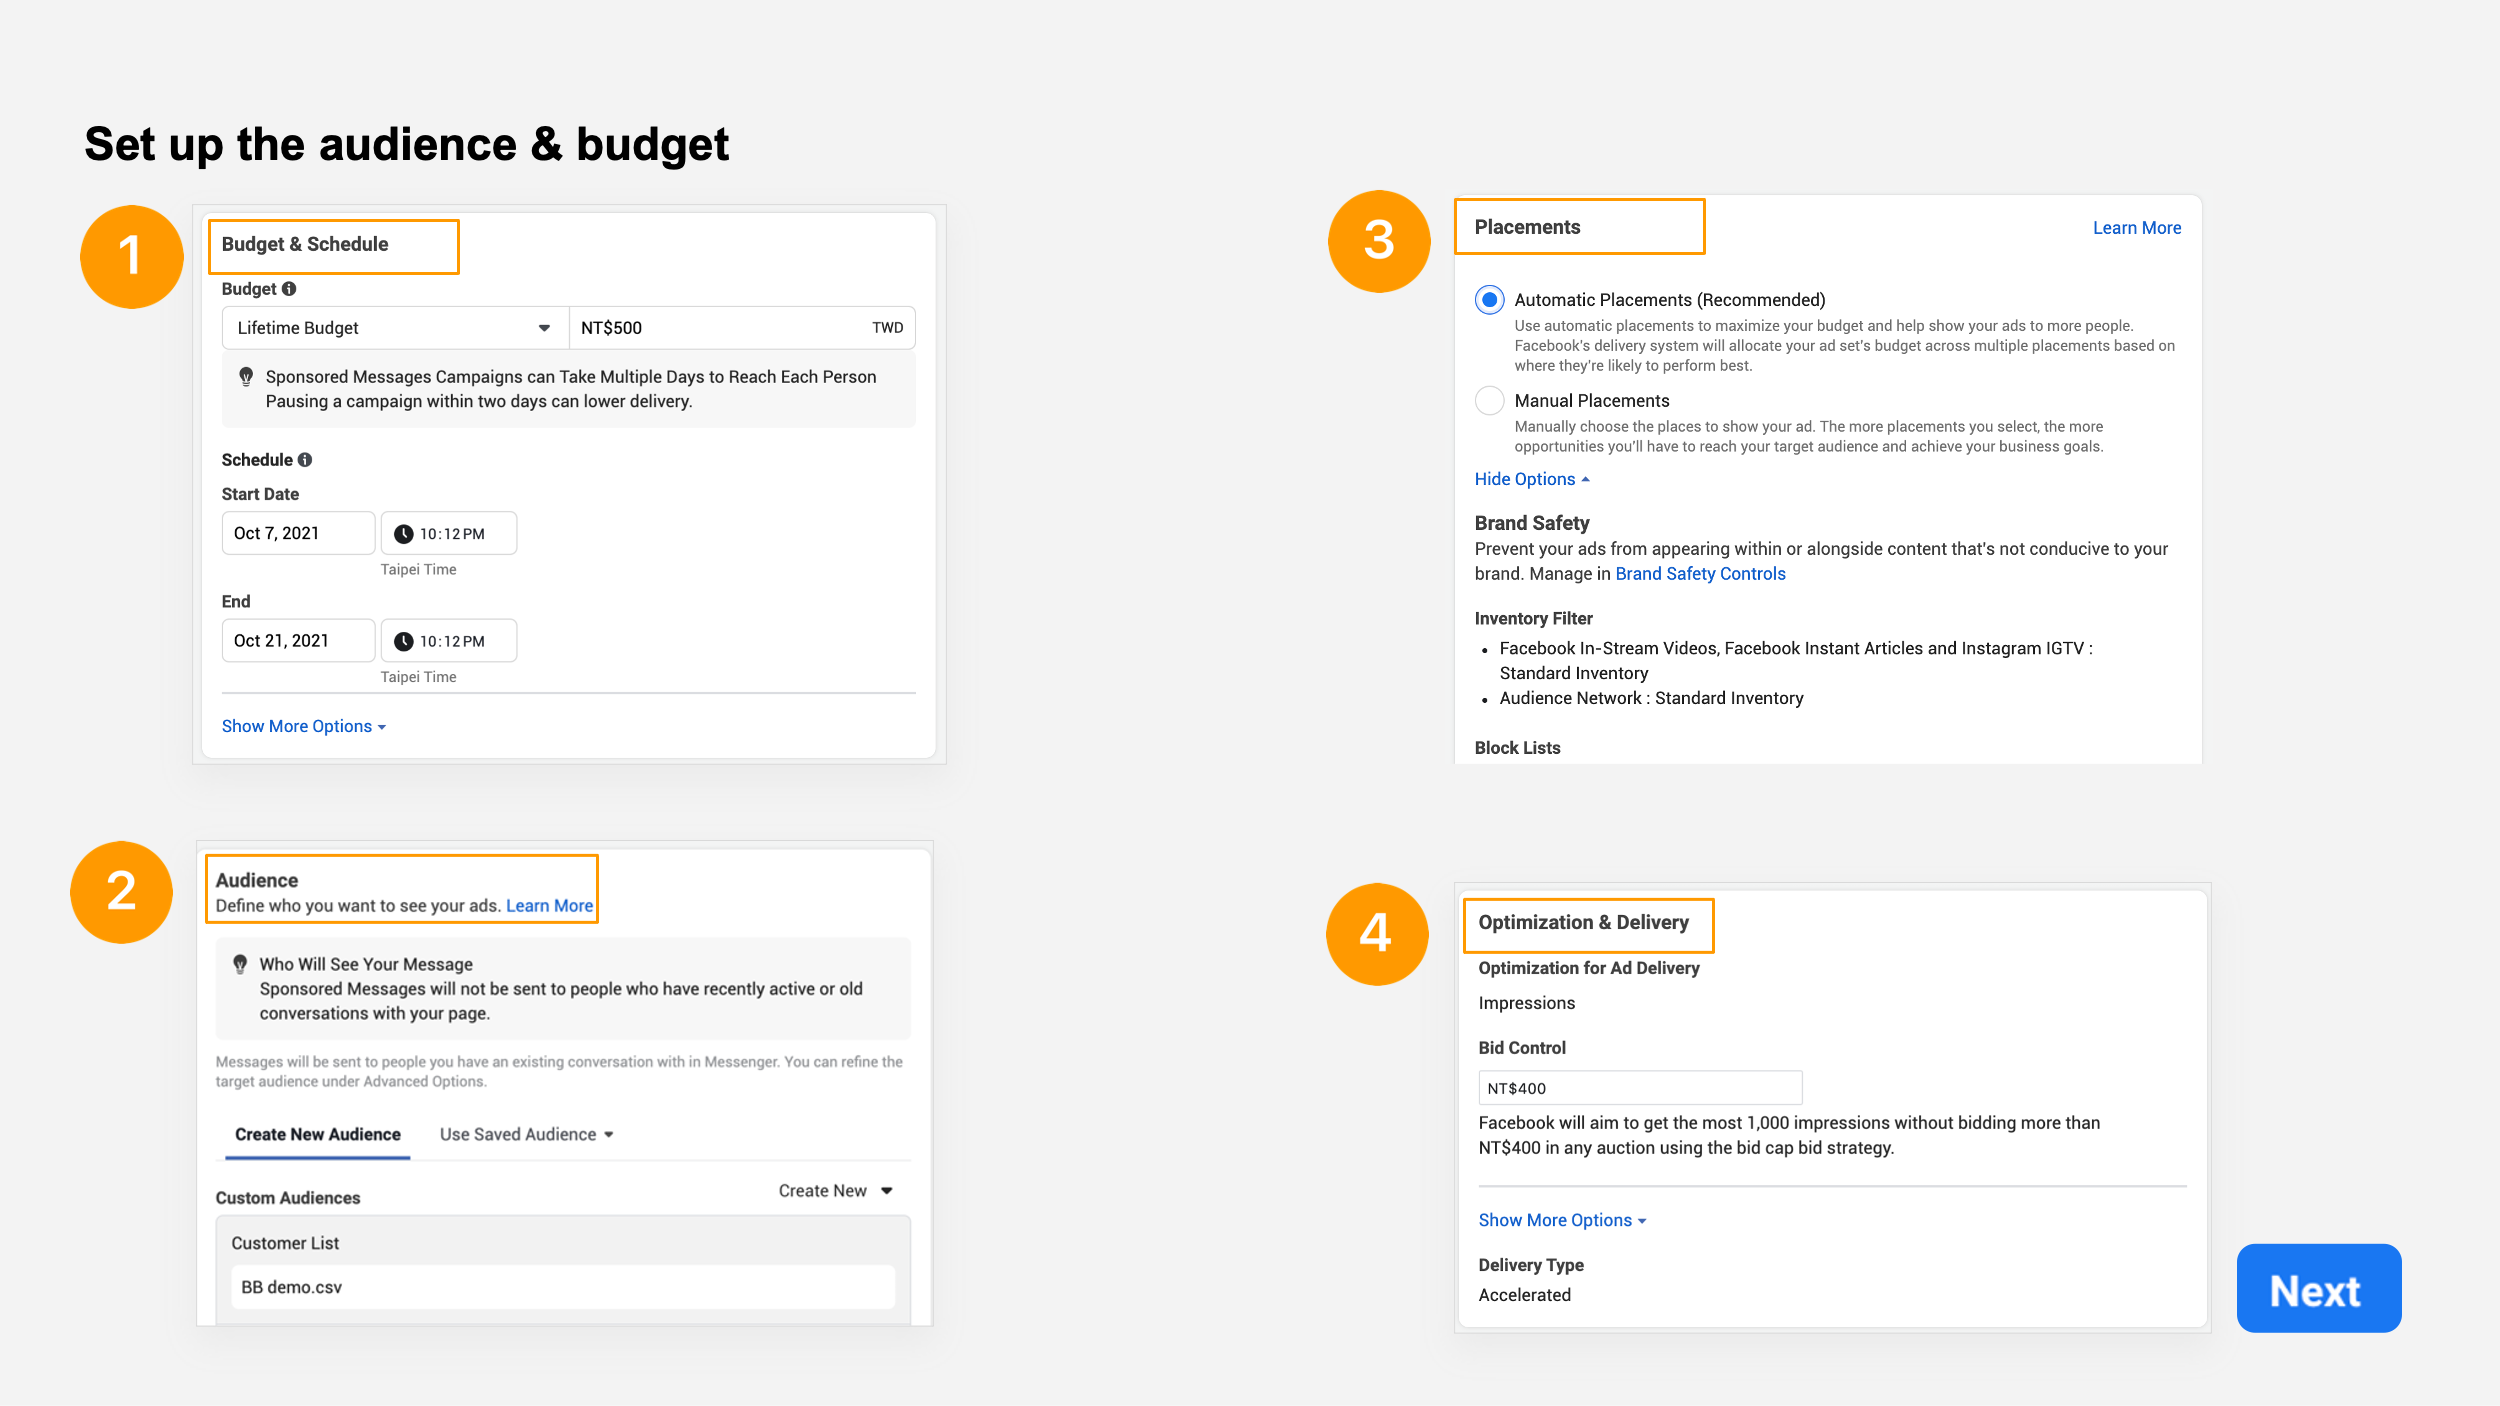
Then set the ad audience, placement, and budget. In addition to creating audiences, you can also further narrow down your audience based on location, age, gender, and language. In the “Placement” field, you can select “Automatic Placement”/”Manual Placement” according to the requirements of the particular activity.
👉 How to customize the ad audience? Learn 3 ways to export user data using bots
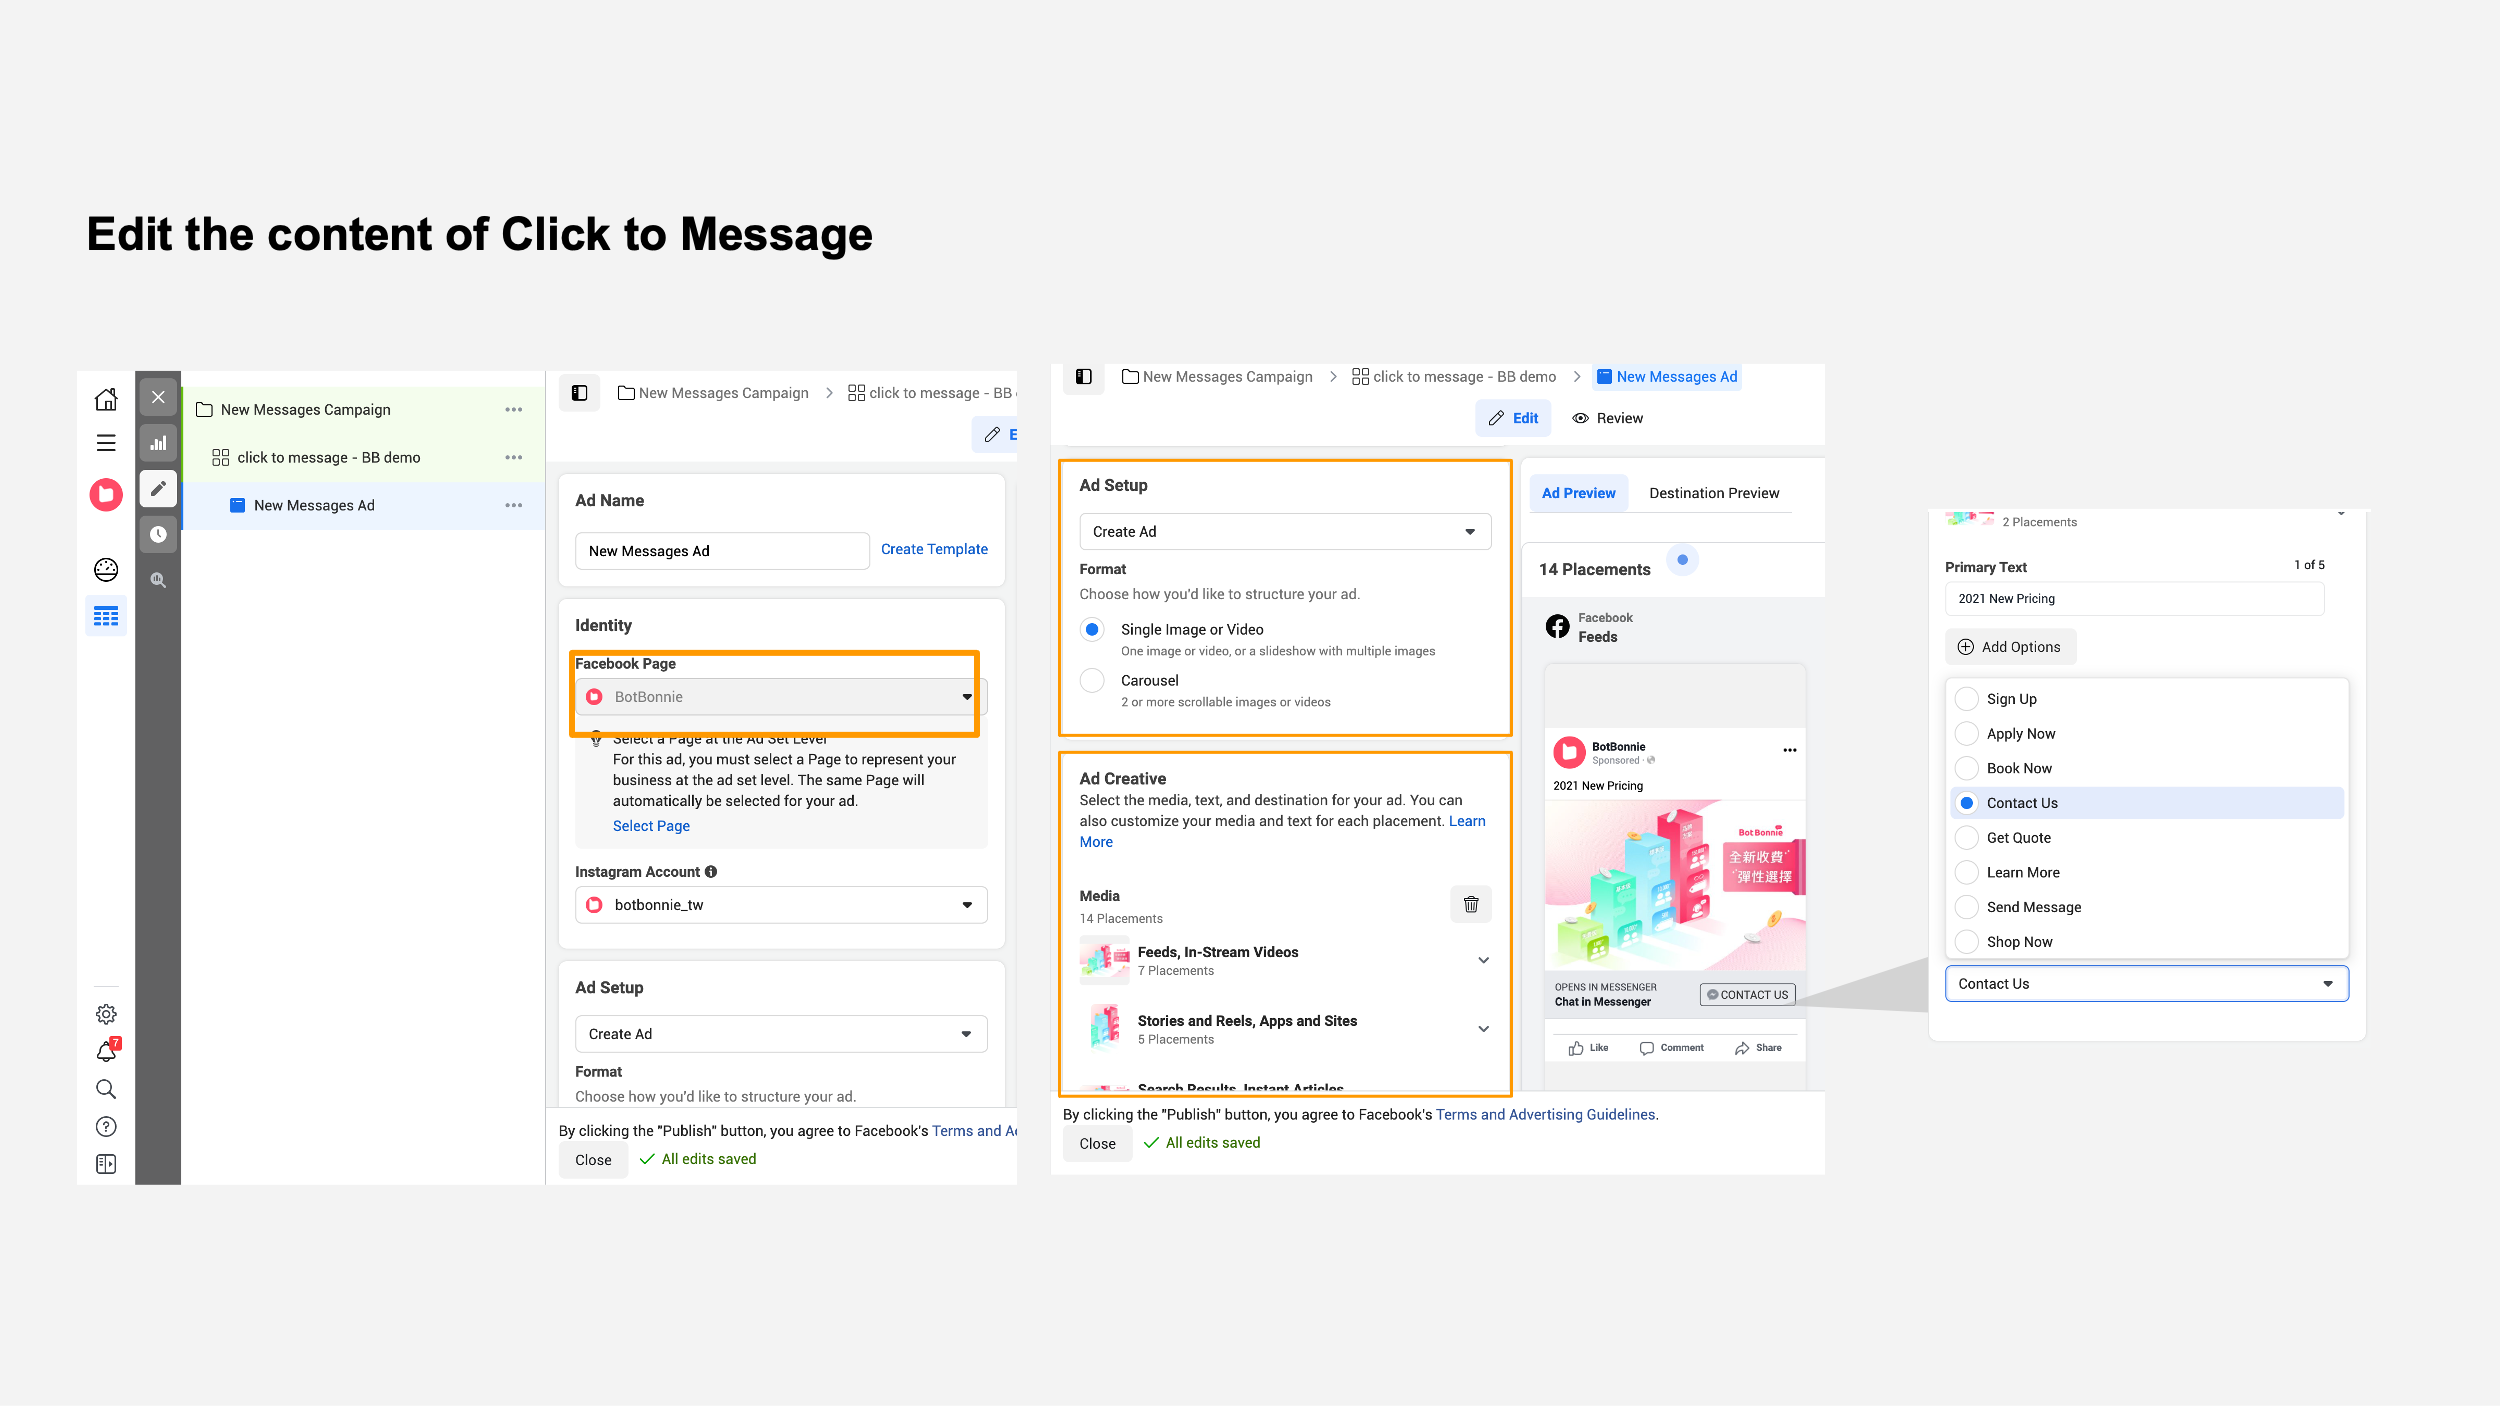
Edit the content of Click to Messenge posts
First, you need to confirm the Facebook fan page to expose in the ad, and then choose the ad format. You can choose a single image or video/new carousel post ad, or use an existing post.
Then, we can set the name of the button in the “call to action” field in the lower right corner of the post. There are 8 types available. When the customer presses the call-to-action button, the messenger bot interaction will be activated.
Create personalized ads by connecting chatbots
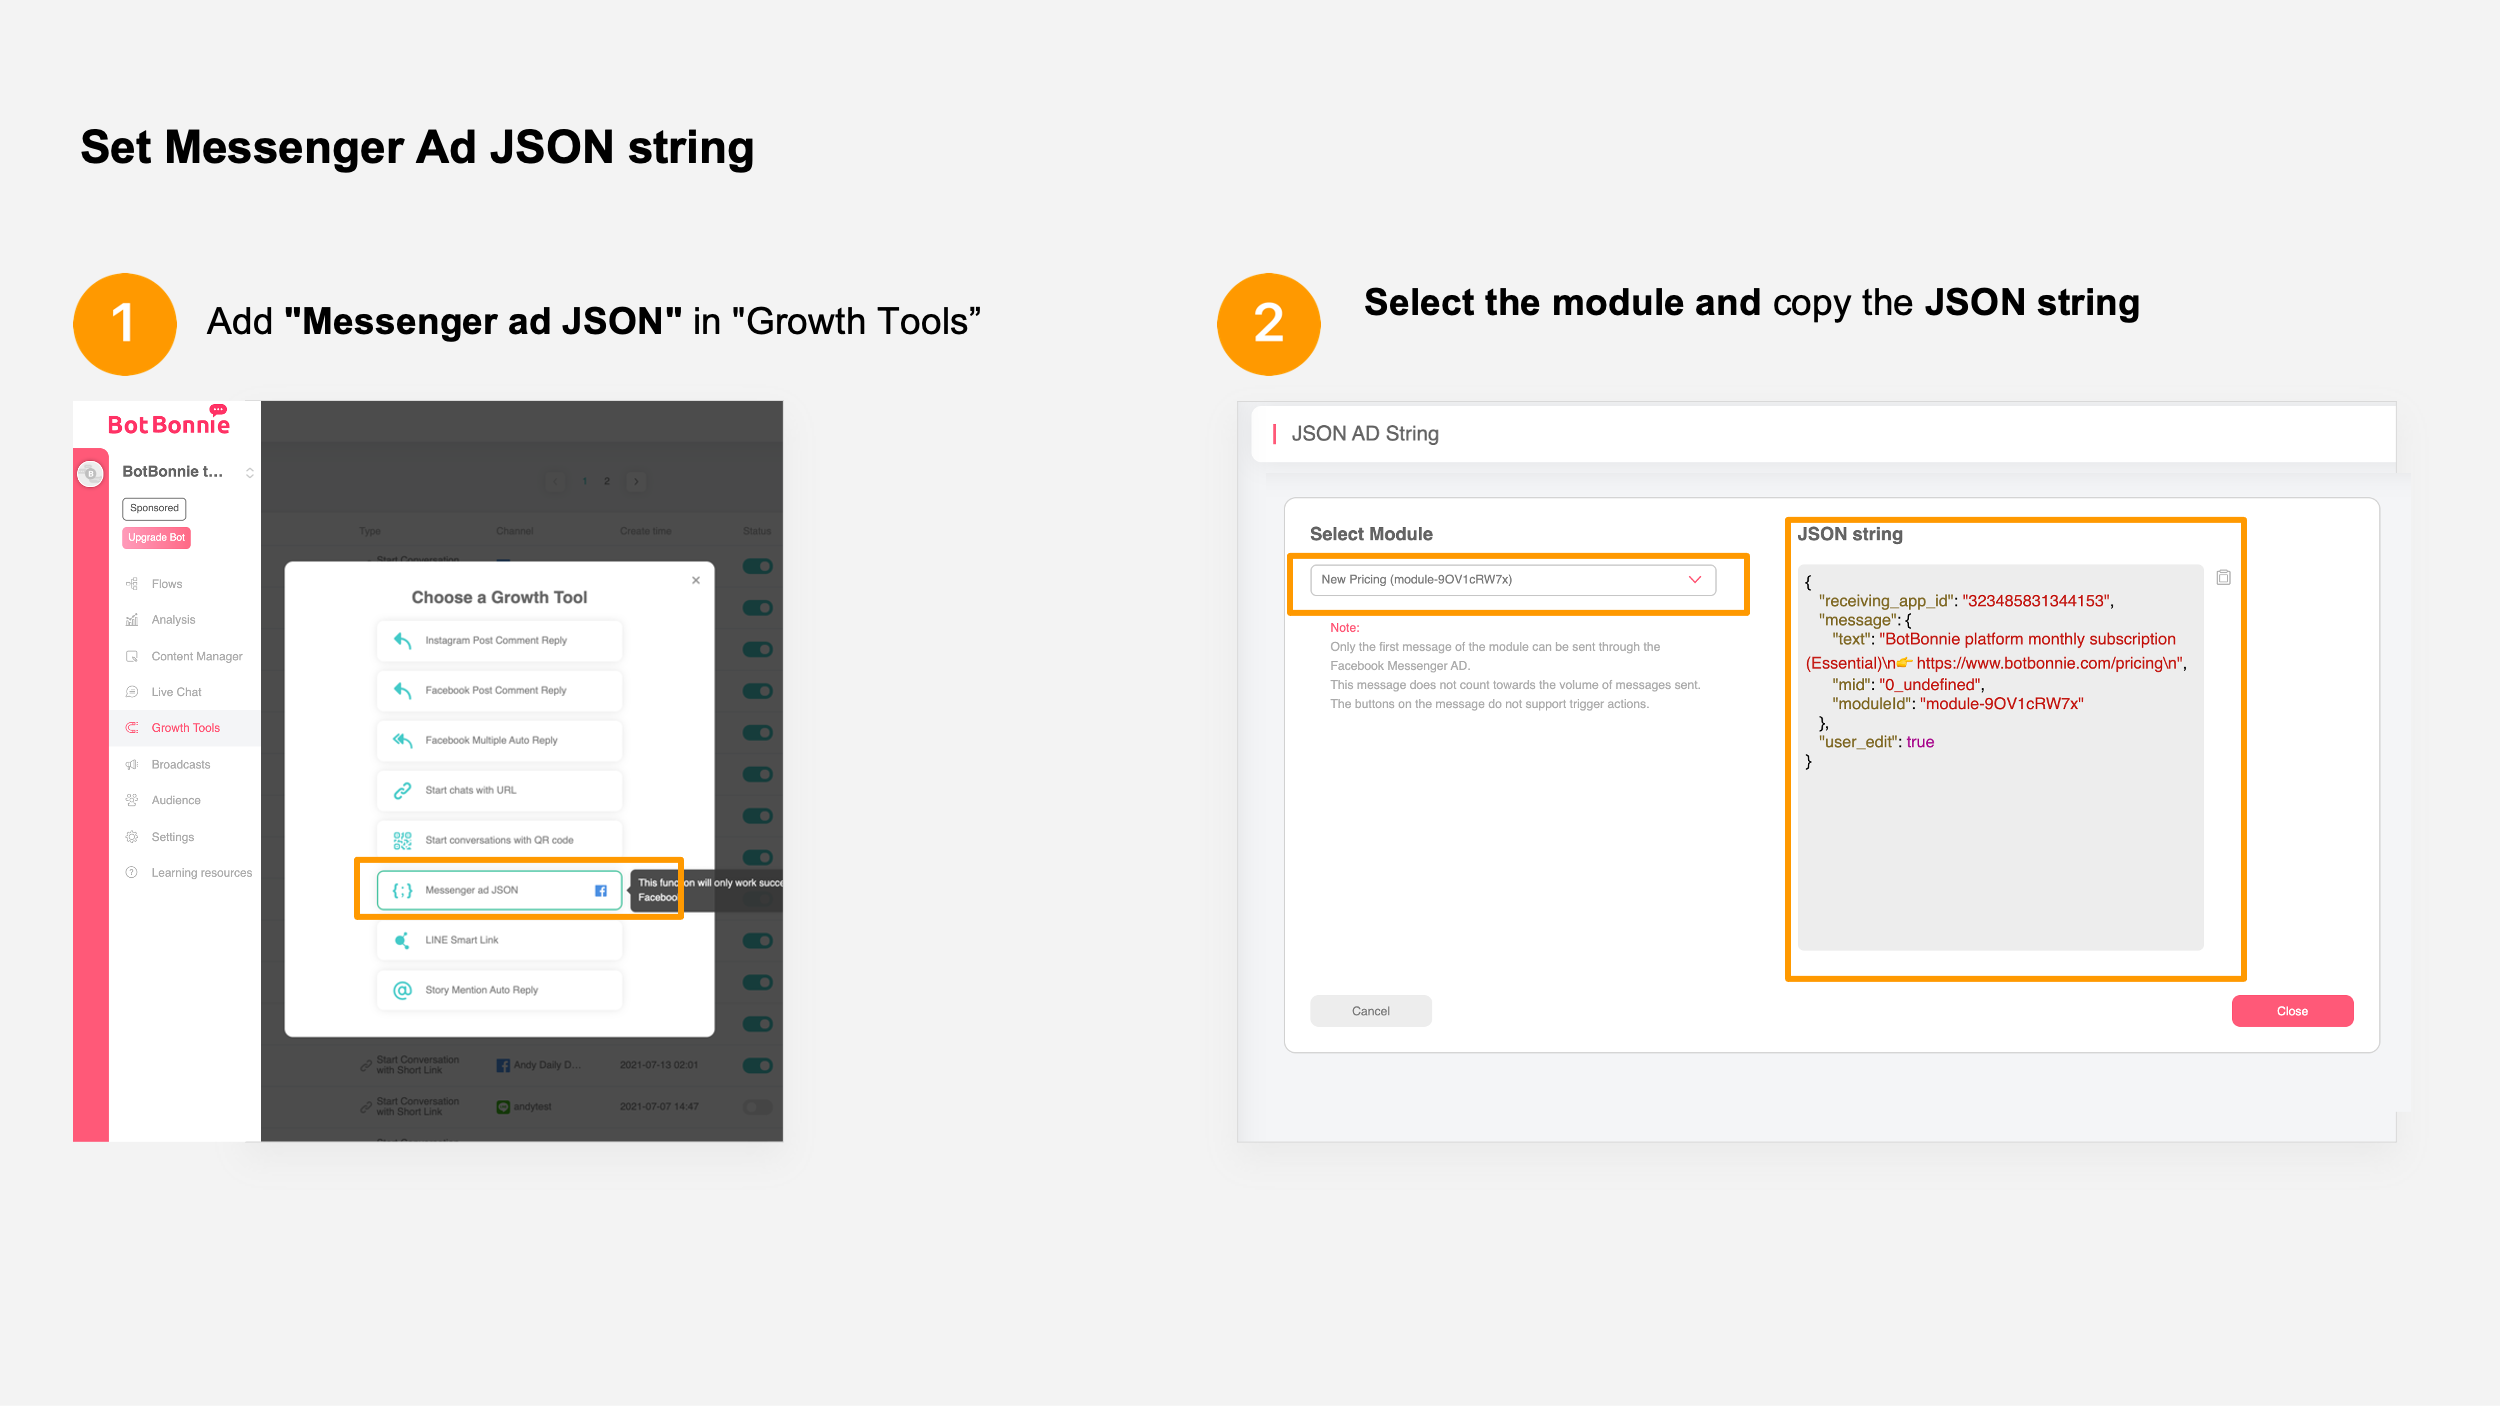
After we have set the content of the ad, we need to guide customers to click on the ad, which will directly bring them to the chatbot for a one-to-one humanized message string. So, we will now connect the modules made in the BotBonnie bot platform.
Go to the BotBonnie operating platform, add “Click to Messenge JSON String” in “Growth Tools,” select the dialogue module that will open after the customer presses the call-to-action button, copy the content of the JSON string on the right, and then paste it in the Facebook ad console.
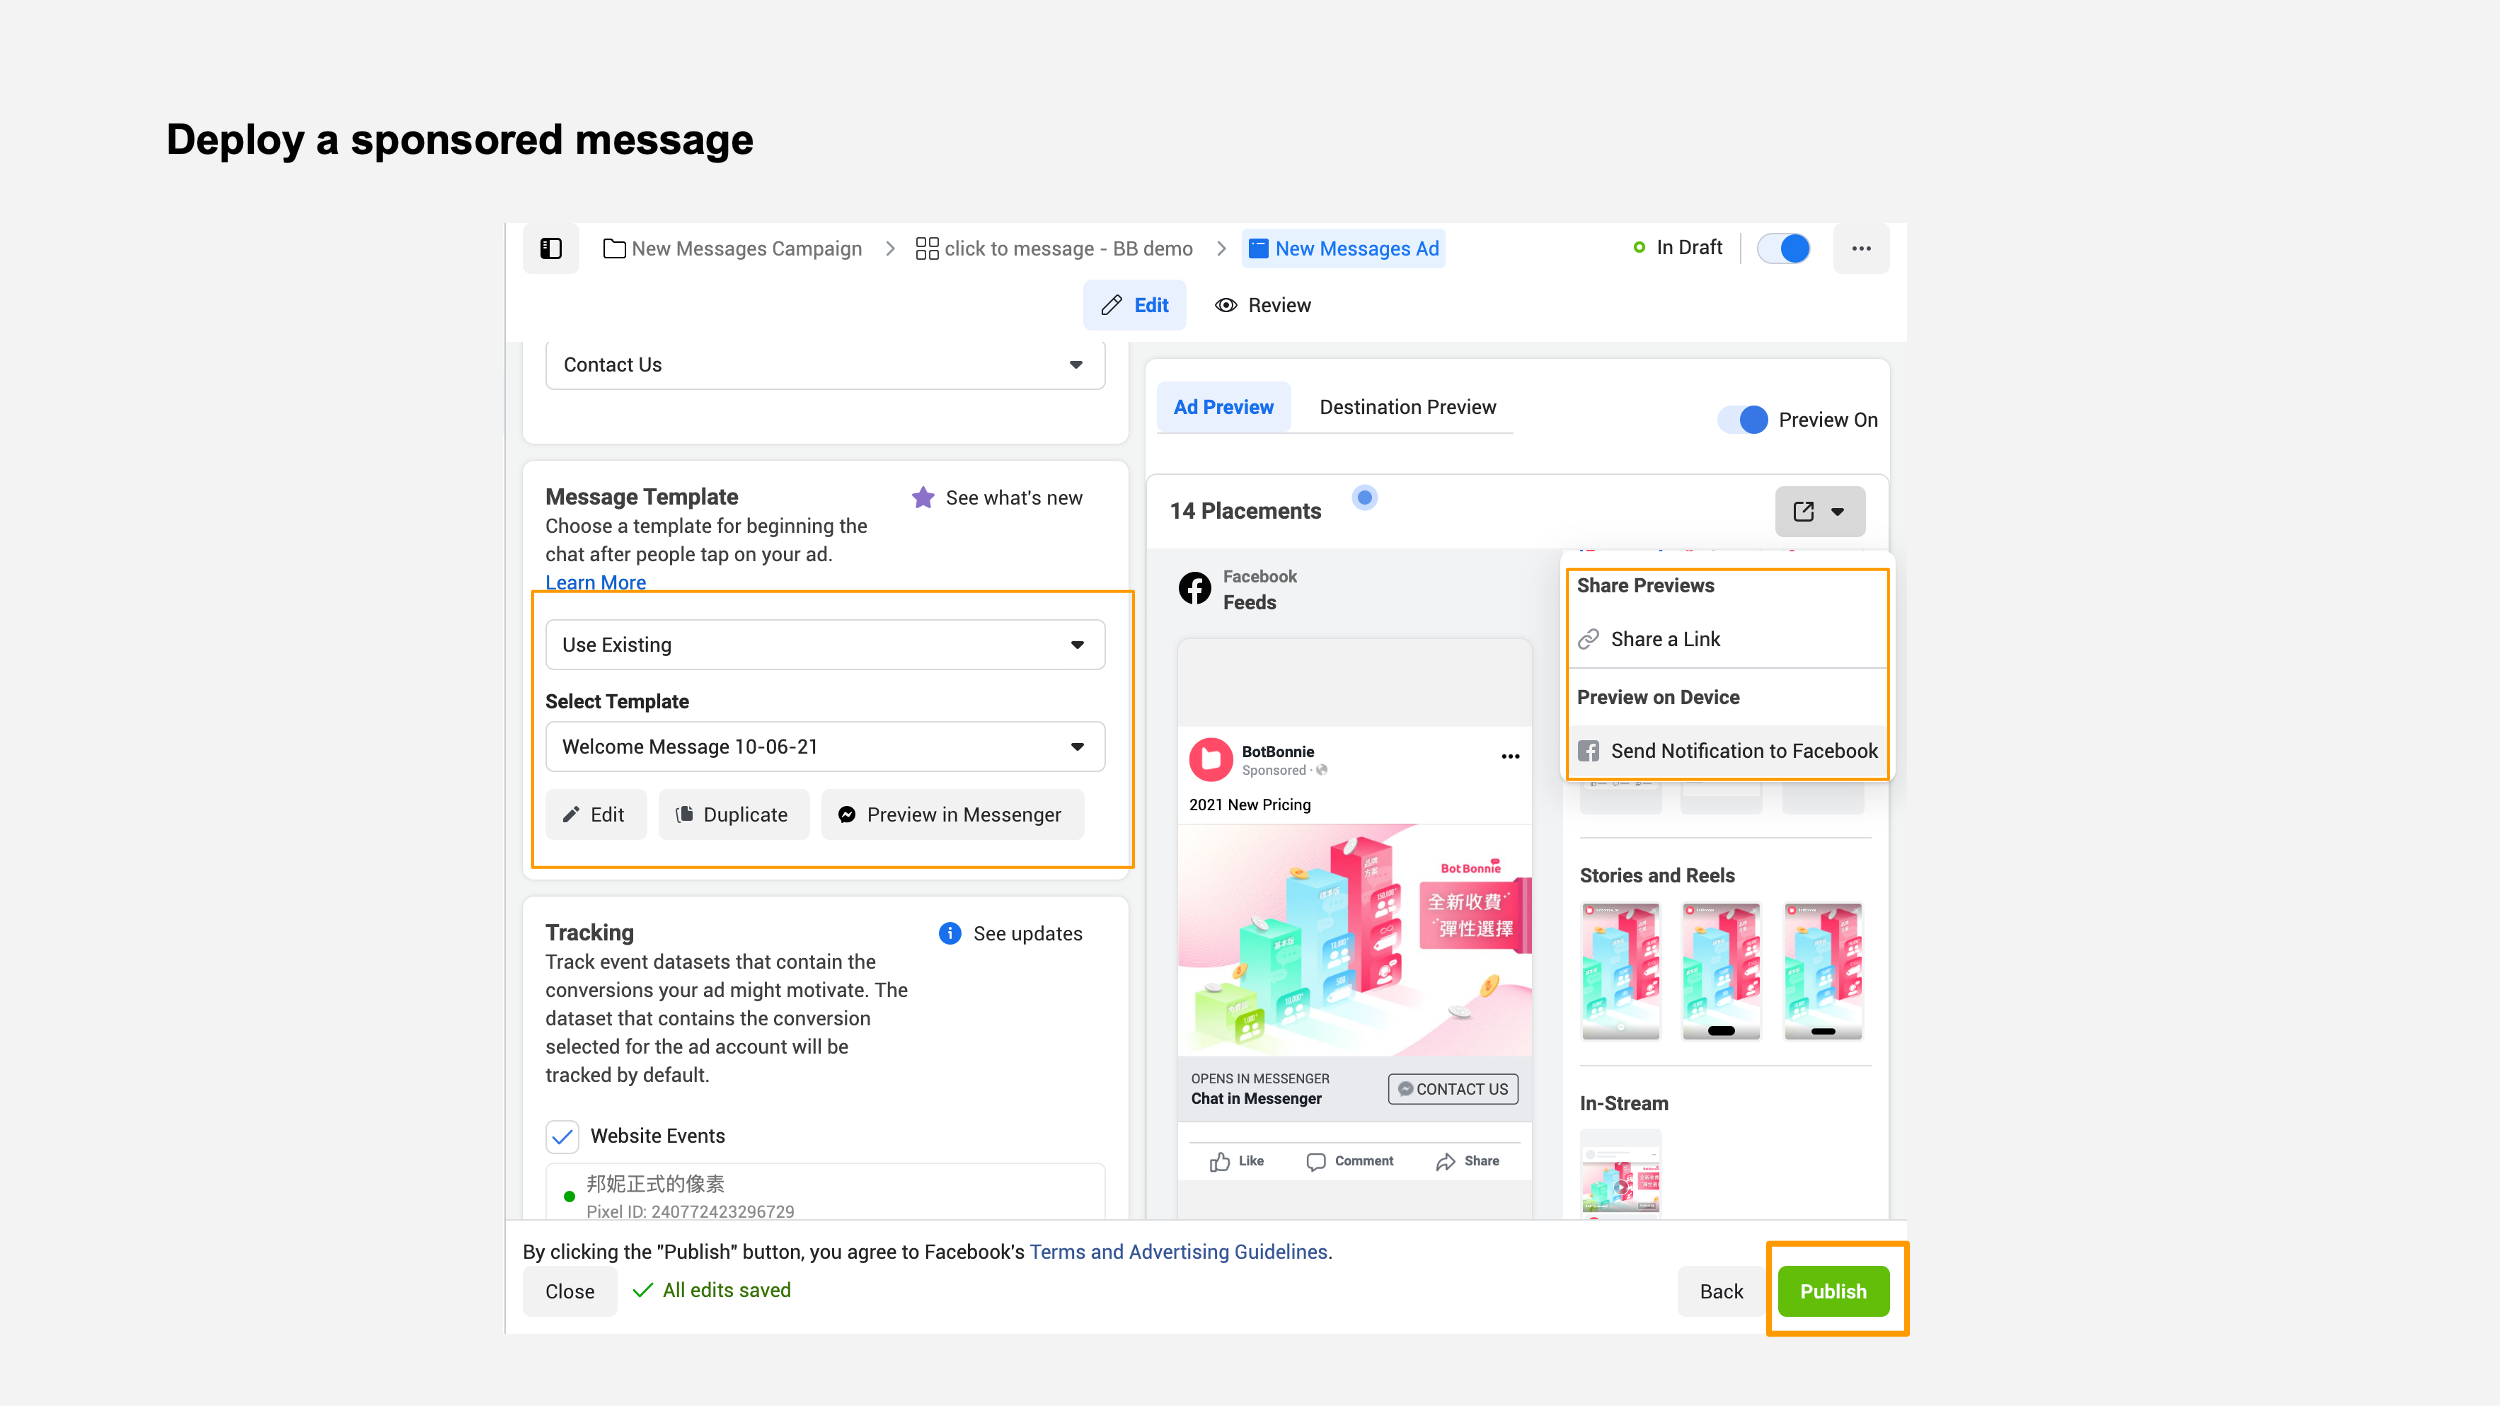
Return to the Facebook Ads Manager and select “Advanced Settings” in the “Message Template.” Click “Edit” and then delete the original JSON string on the left and paste the content of the JSON string you just copied. Click “Save and Complete” at the lower right corner. This makes it easy to bind the bot to the Click to Messenge!

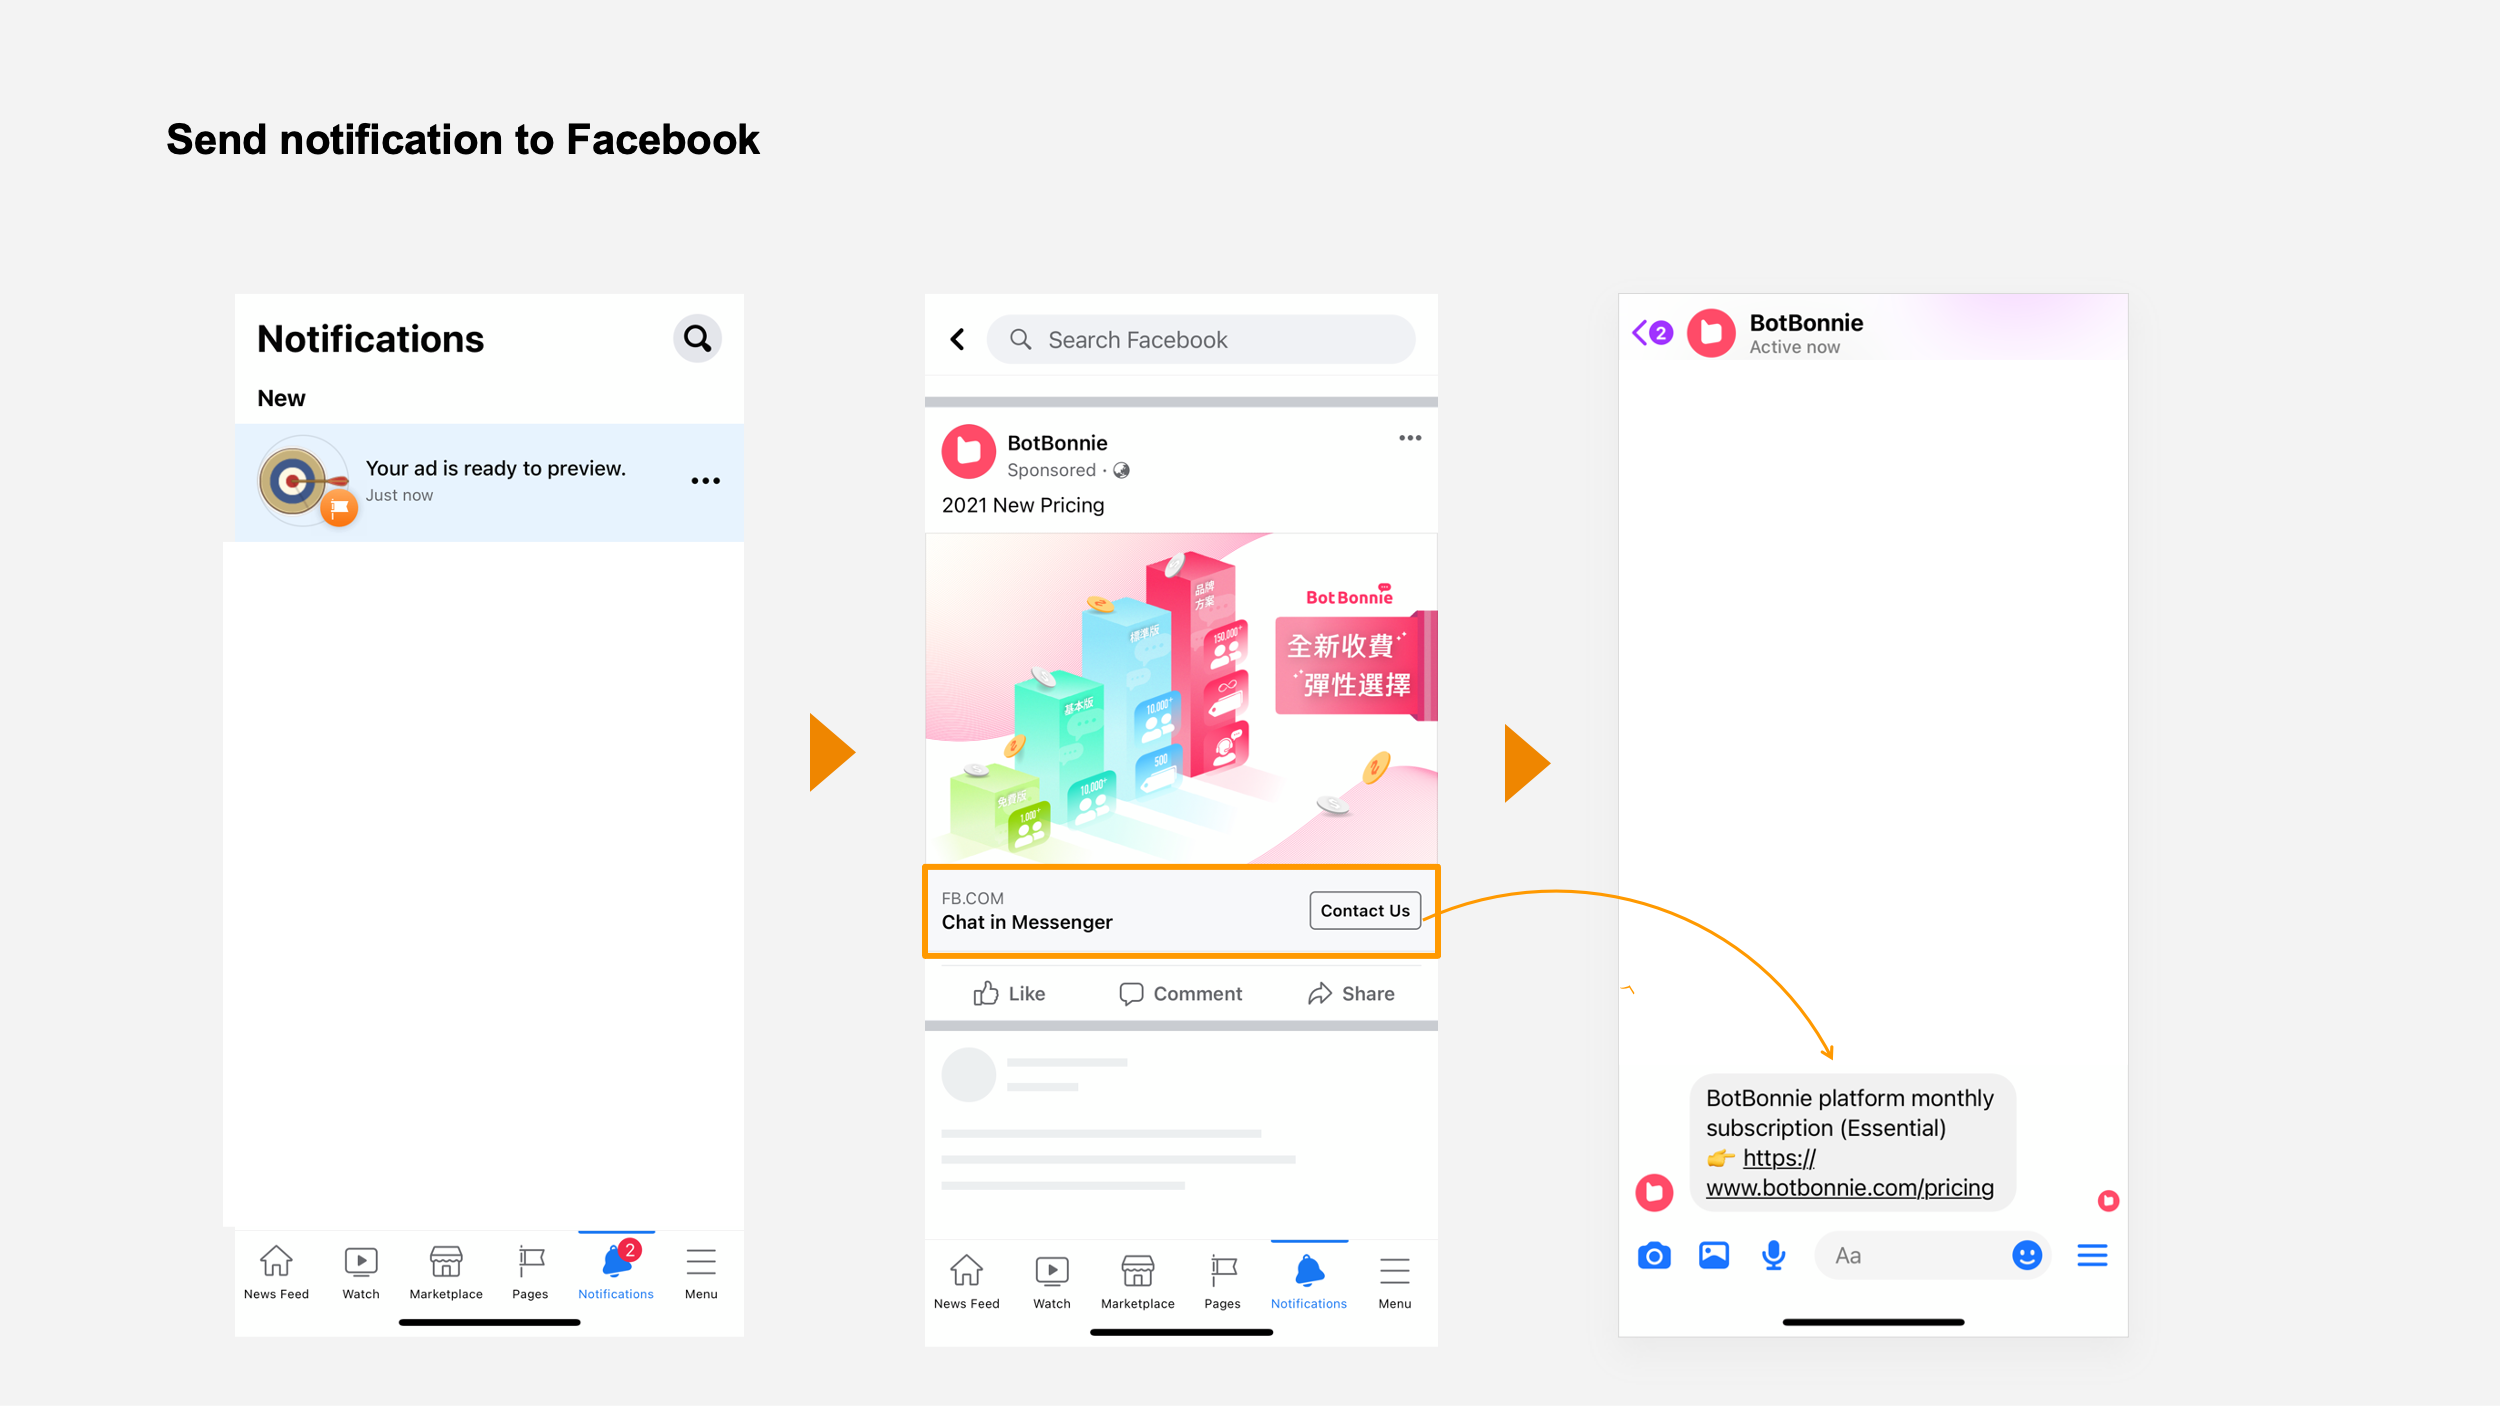
After saving and completing, you will see a preview of your message. If you want to see how customers will experience the ad after it is sent, go to “Ad Preview” on the right side and click the send icon in the upper right corner. Select “Send notification to Facebook,” and you will be able to view the appearance of the ad on your phone!
When the test results are verified as correct, click “Publish” in the lower right corner to deploy the ad! And just like that, you’re done!
【BotBonnie’s Note】Reference:
1. About Ads That Click to Message
2. Click-to-Messenger Ads – Messenger Platform
Congratulations! You’ve created a Click to Meddage ad!
Official website / Facebook Fan page / Tutorials