Facebook chatbots help community personnel and customer service personnel save massive amounts of time and costs for repeated responses to users. Through simple chatbot settings, automatically replying to posts under Facebook posts can be achieved. Creative marketing design can also be used with the post reply function to complete social psychological testing, e-commerce shopping, and other scenarios.
Learn four applications of post Auto Reply in just 7 minutes!
Before learning the advanced Conditional Reply, first you need to understand how to set the default post reply for the public version! The preliminary settings of the two functions are the same! Therefore, this article will just go right into teaching the combination skills for Conditional Reply and Public/Private reply!
👉 Basic article: Default Reply Message and Random Reply to posts
Step one, Growth Tools: Post Auto Reply settings

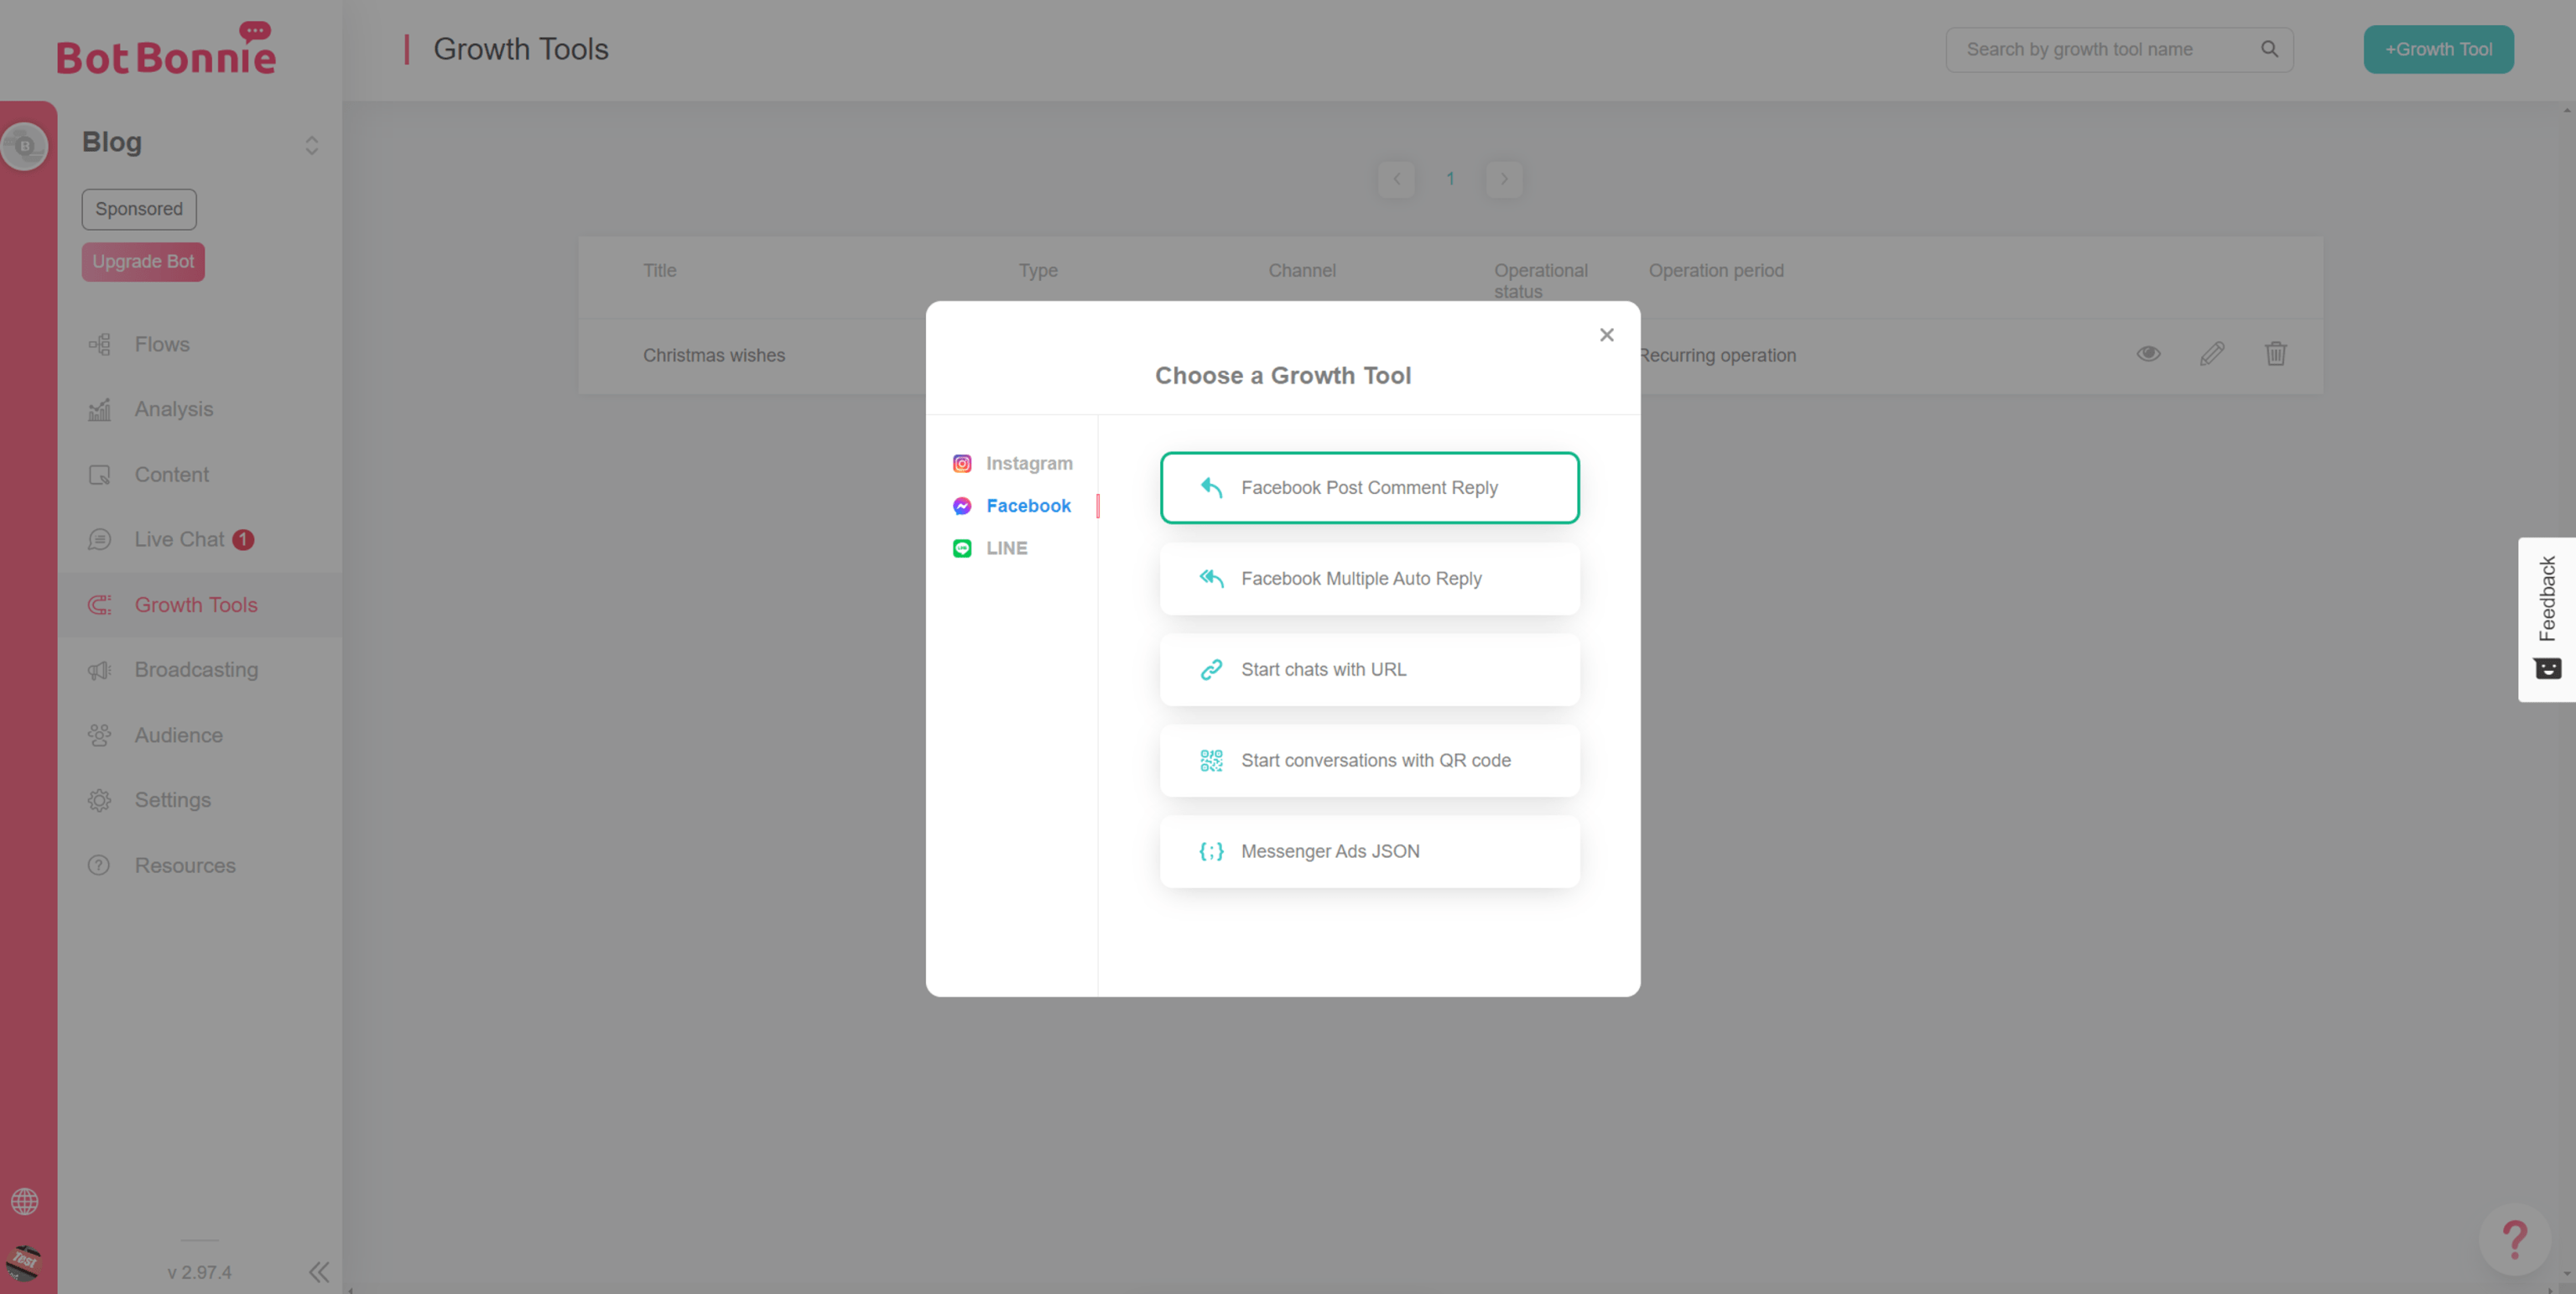
First, go to the BotBonnie platform and select “Growth Tools” in the menu operation on the left, click “Add Growth Tools” in the upper right corner, and six tools will pop up. Next, click the “Post Comment Reply” tool to start setting information for the post reply.
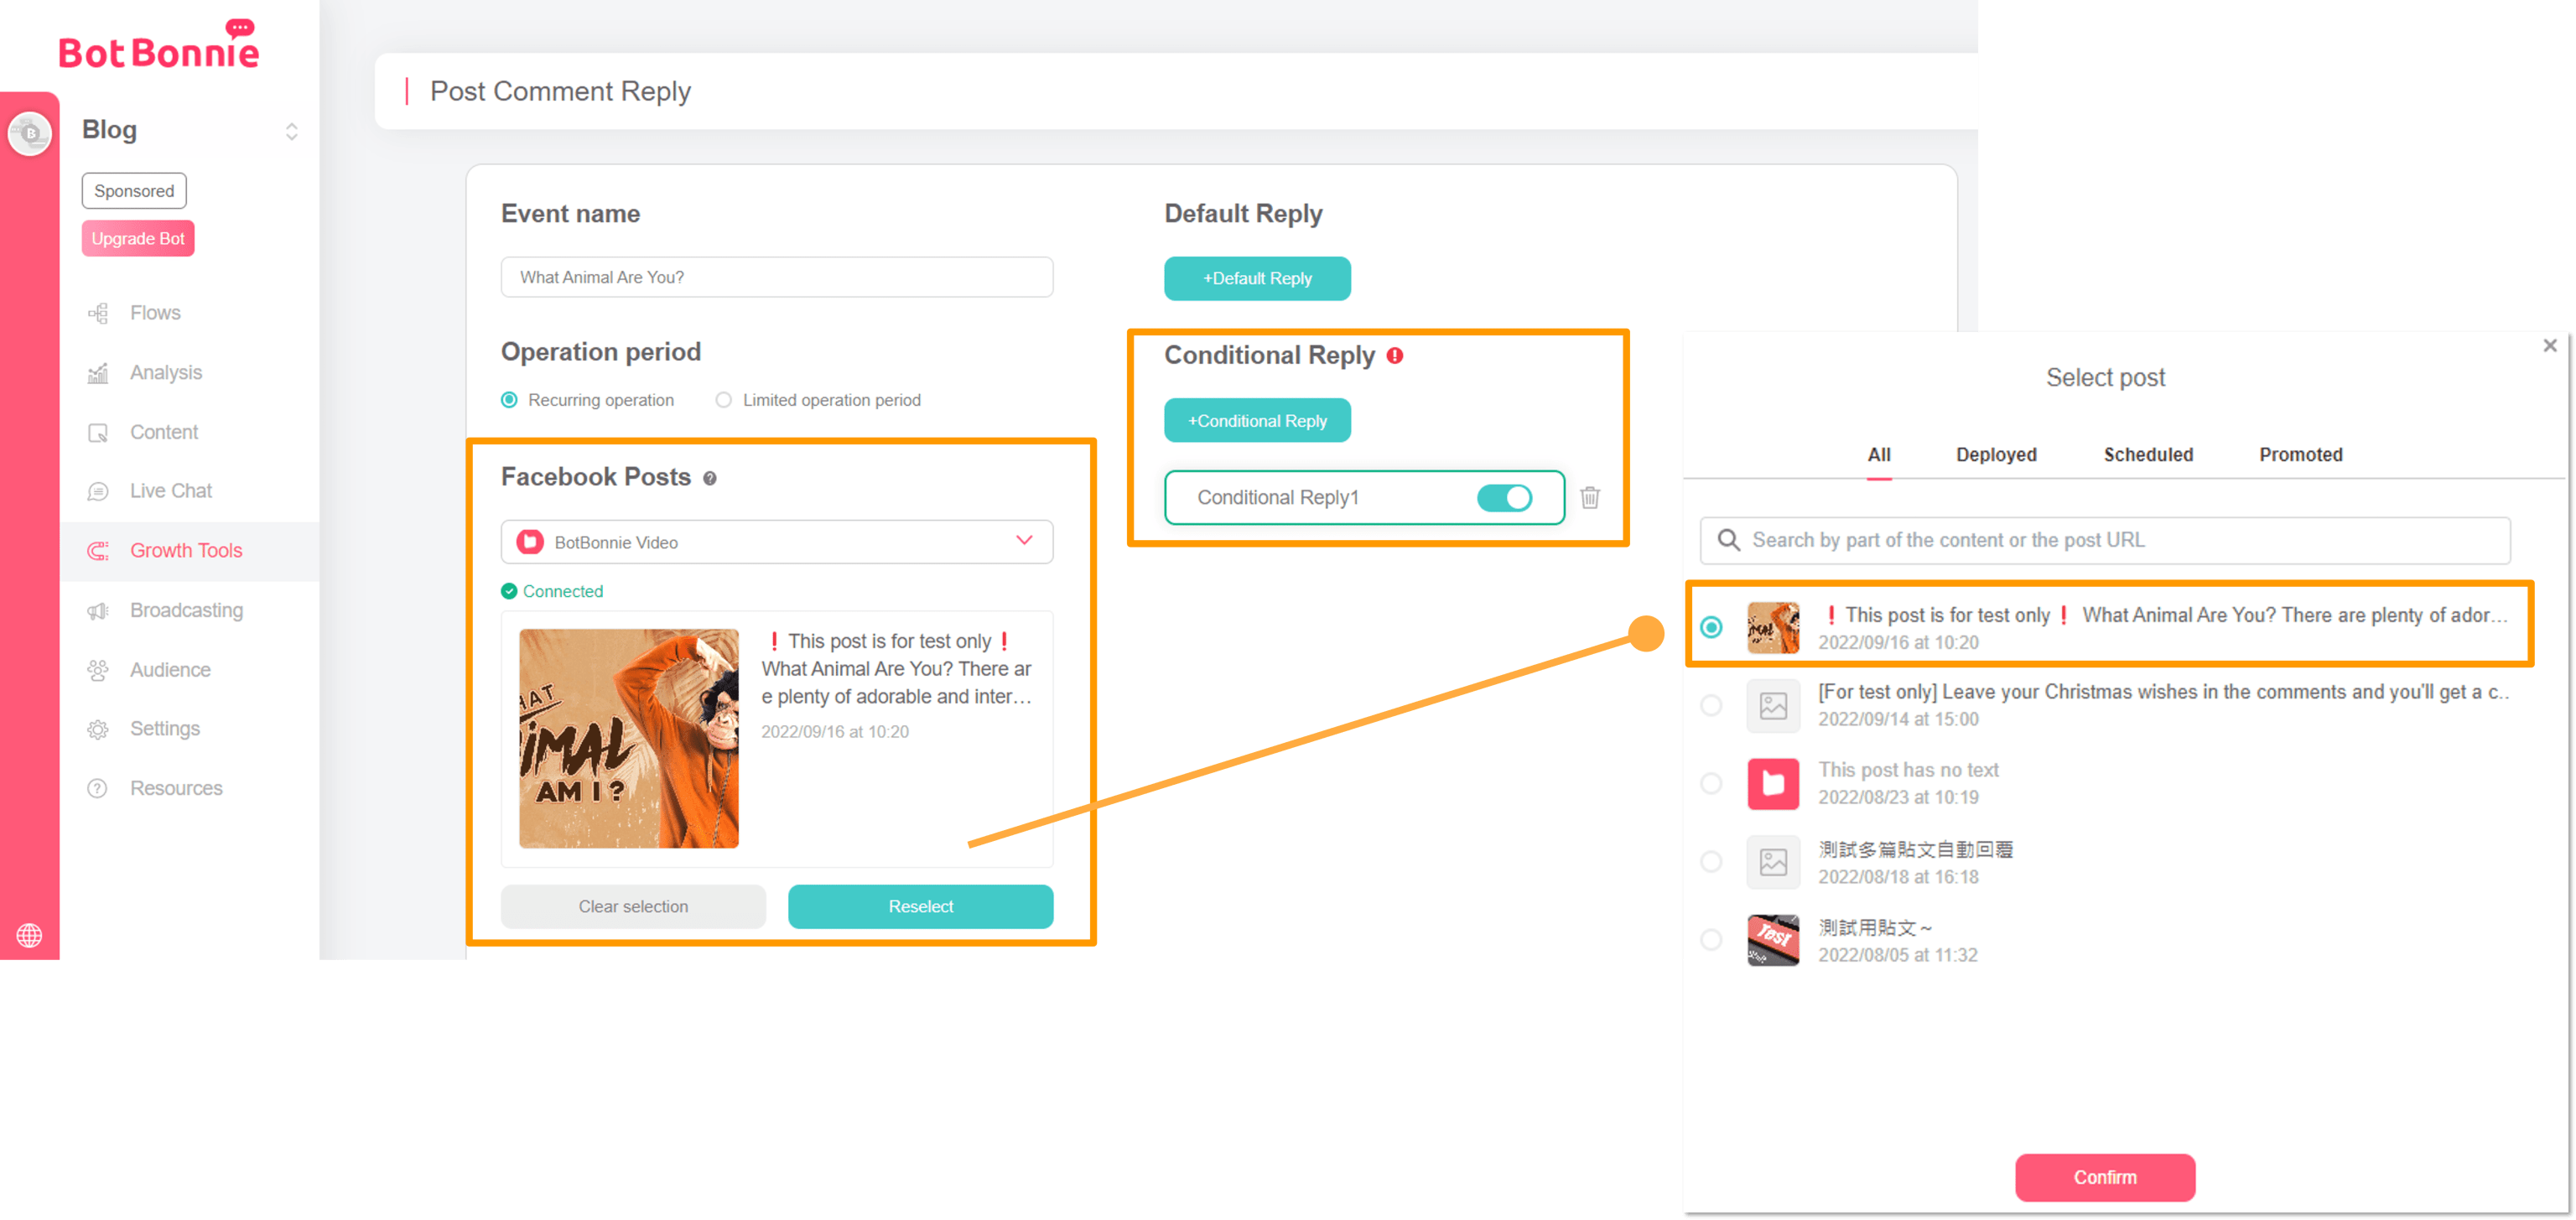
Then go to the fan page linked to BotBonnie and select the post that you want to combine with the Auto Reply tool. At the time of the post, right-click to copy the link URL, return to the BotBonnie bot Growth Tools editing backend, and paste the link to the post.Then go to the right to select the new conditional reply. If you want to know the default reply message settings, see the Growth Tools — default reply message, random response for fan page post.
【BotBonnie’s Note】
1. Default Reply Message: “Default Reply Message” will be used when the message does not meet any conditions to reply
2. Conditional Reply: When the message meets set conditions, the bot will automatically reply with the designated content.
Step two, Conditional reply settings
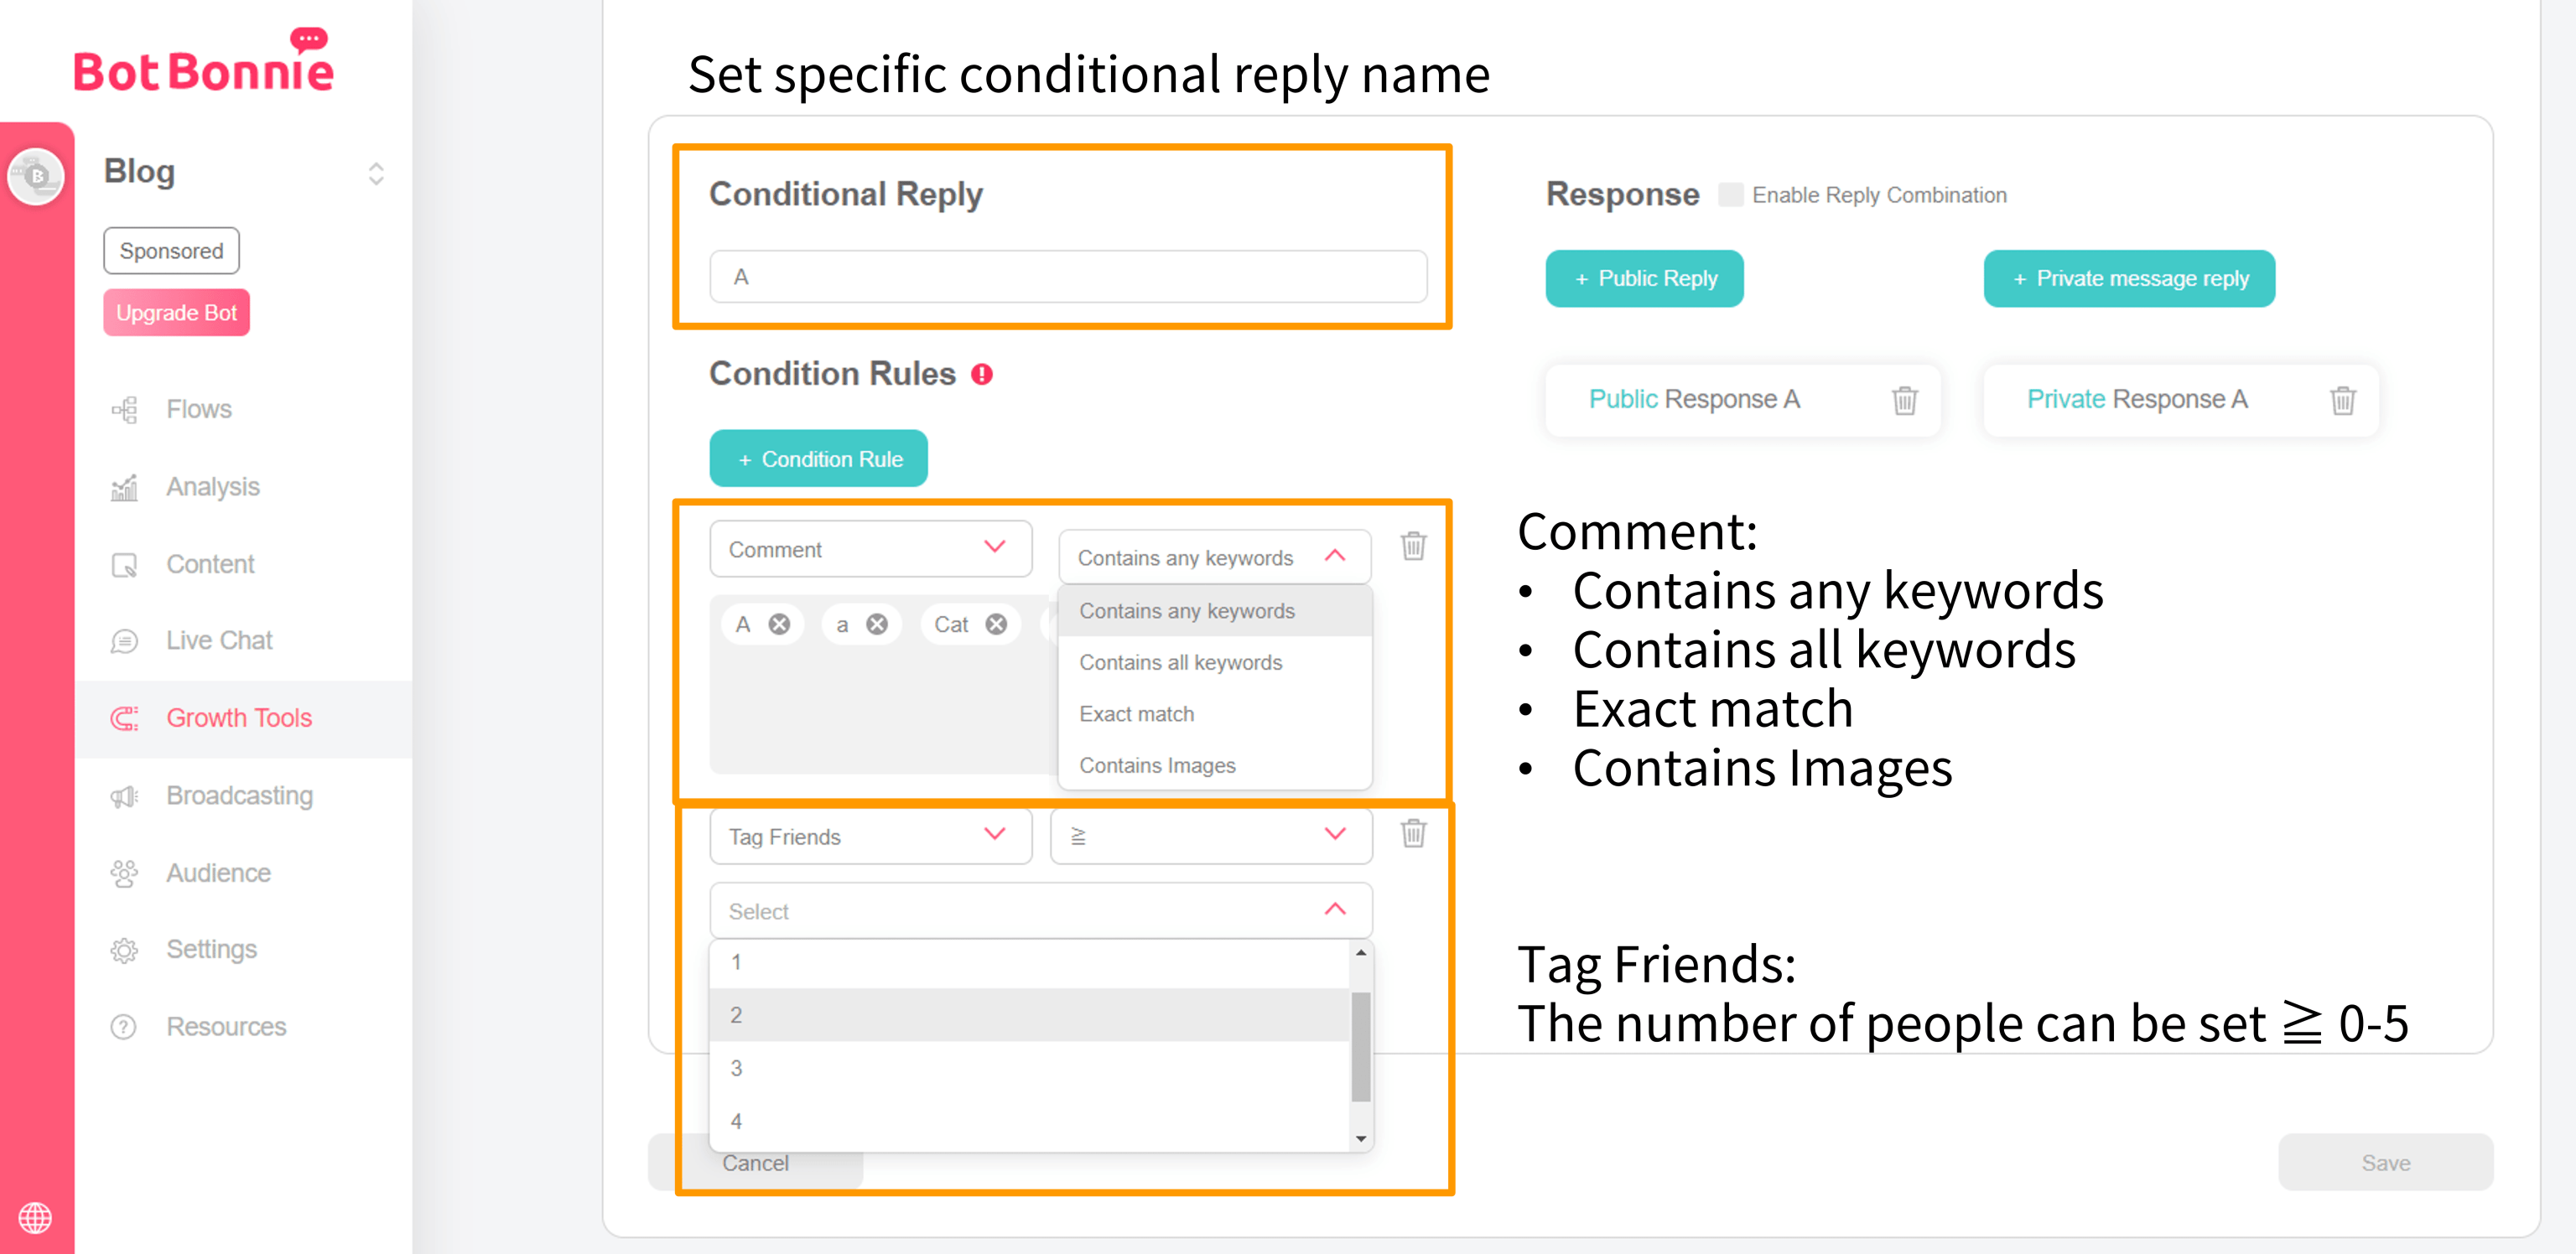
First, set specific conditional reply names for different designated messages to facilitate sorting and planning. Then set the rules according to the needs of the specified users to leave messages in each post event. Two message formats can be set up: “Comment” and “Tag Friends.” At least one trigger condition must be set. You can also click “+Add Condition Rules” to add multiple rules.
Comment: Can be set to “Contains any keyword”, “Contains all keywords”, “Exact match” or “Contains images”
Tag Friends: The number of people can be set ≧ 0-5
【BotBonnie’s Note】“Conditional Reply” needs to meet all the rules before replying
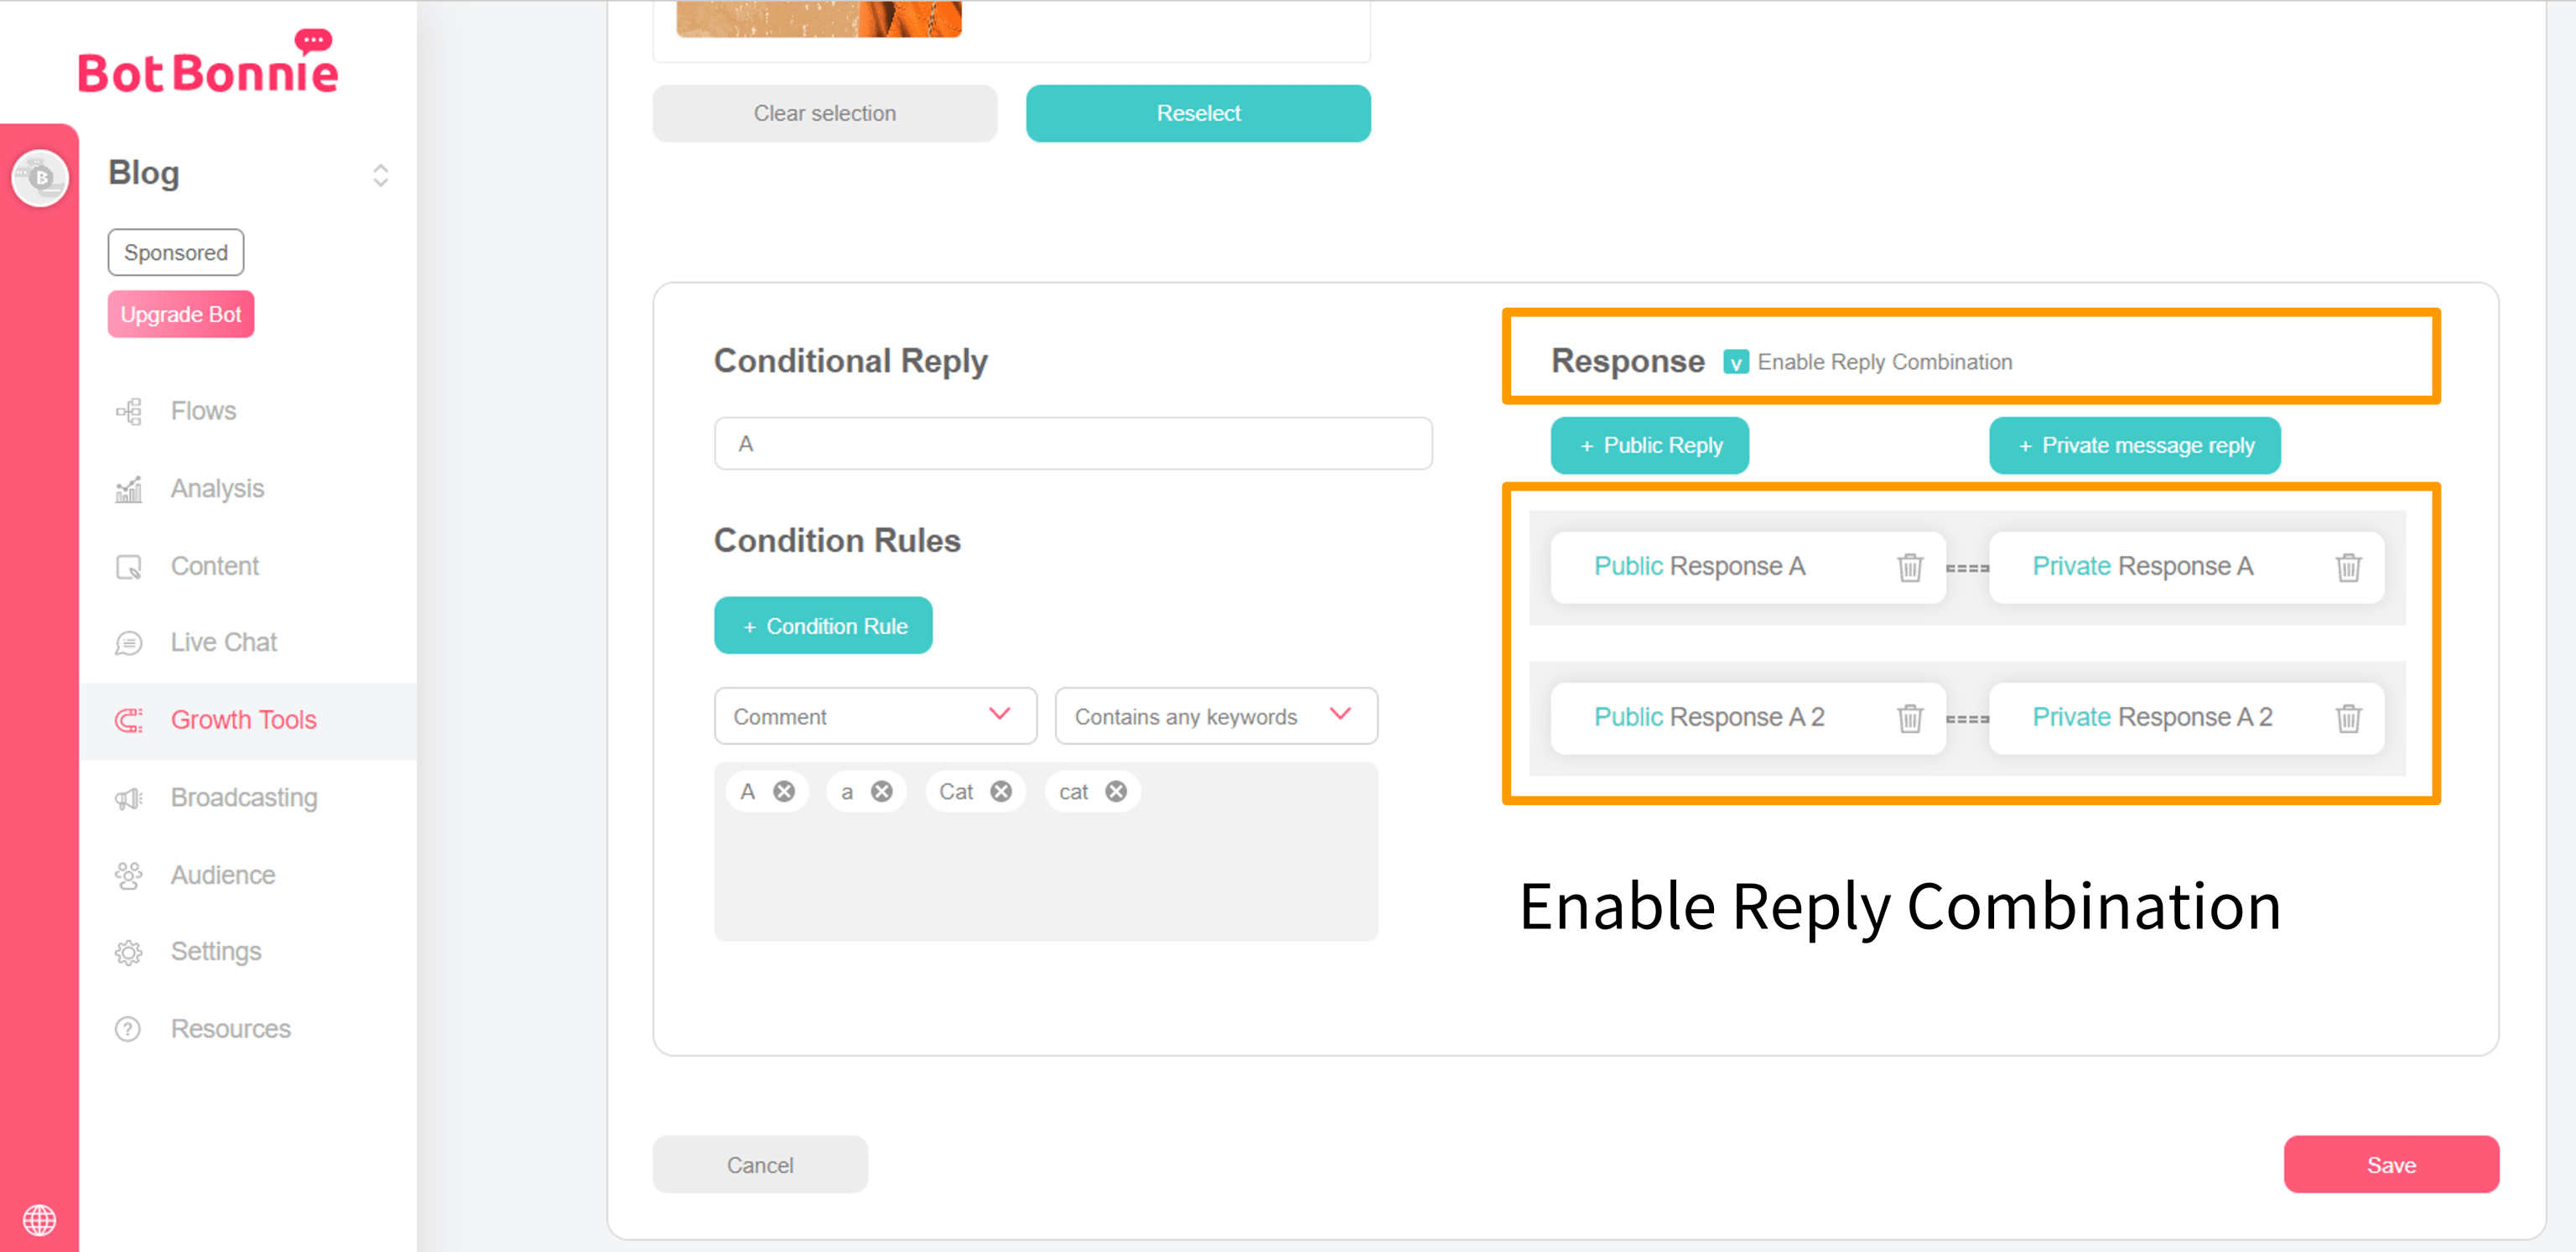
Step three, Binding of public and private message combination reply
After setting the rules, edit the public reply/private message.
Public responses can consist of “text + images”; private responses include “text, image, carousel, audio, video”; one-time notification request, delay, and JSON function can also be used.
When you set more than one response, the program will randomly select one of the responses to send to the user. This achieves a random-reply effect! After editing, remember to click Save in the lower right-hand corner to finish!
👉 Learn the basic post reply settings to make random reply easy!

Binding of public and private message combination reply!
If “Public/Private Message Combination Reply” is enabled, the public and private messages will be bound together, such as “Public: Easy Life” will be matched to “Private Message: Relax and live.” If the “Public/Private Message Combination Reply” is not enabled, in the picture below, “Public: Relax and live” may match with “Private Message: Melancholic existence”
Step four, Deploy and performance review
When the post is edited and the Auto Reply message is saved, the “deployment status” will automatically appear. When returning to the Growth Tools setting page, we can see the Growth Tools information of different event names. Use the blue-green Deploy switch to control the Auto Reply state of the post message. Turn off the Deploy state to stop the Auto Reply of the post.
In addition, there are three icons on the right side of each Growth Tool:
1. Click the eye icon to view the effectiveness of the Auto Reply. 2. Click the pencil icon to enter the editor. 3. Click the trash can icon to delete the Post Comment Reply settings for this post.

The trainer can adjust the time settings in the upper right corner to review the effectiveness of different time periods, and view the total number of comments and the total number of replies at the bottom at any time; you can also view the number of public and private replies separately.

Other applications of Growth Tools:
1. Growth Tool – Start chats with URL 2. Start conversations with QR code
